
There’s nothing quite like the sound of a sizzling burger hitting a hot grill — that smoky aroma, the charred crust, and the juicy center make it the ultimate summer (or anytime) meal. But let’s be honest: it’s easy to end up with a dry, overcooked patty or one that sticks to the grill and falls apart.
The secret to grilling juicy burgers with perfectly crispy edges comes down to three things: meat selection, technique, and temperature. Once you master these, every burger you make will be drool-worthy.
Step 1: Choose the Right Meat
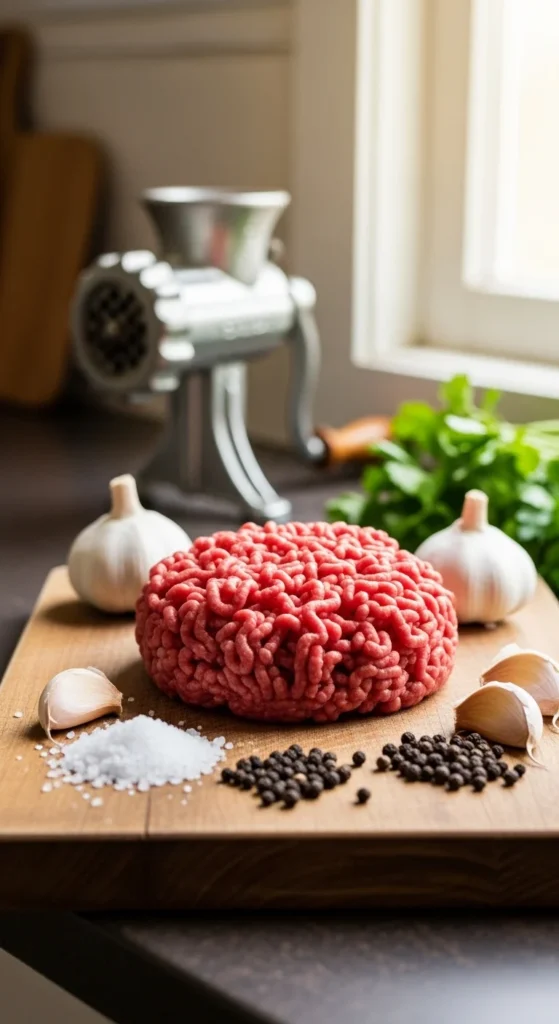
The foundation of a great burger starts with great beef. Skip the lean stuff — the fat is what gives you that mouthwatering flavor and crispy edges.
The Sweet Spot: 80/20
That means 80% lean beef and 20% fat. This ratio gives you a perfect balance between tenderness and juiciness.
Best Cuts to Look For
- Chuck: The classic choice — flavorful, beefy, and juicy.
- Brisket or short rib: Great for a richer, more robust taste (try mixing with chuck).
- Ground sirloin: Leaner, but ideal when mixed with a fattier cut.
Quick Tip:
Always buy freshly ground beef if you can — or grind your own at home. Pre-packaged meat can be dense, which affects texture.
Step 2: Form Patties the Smart Way
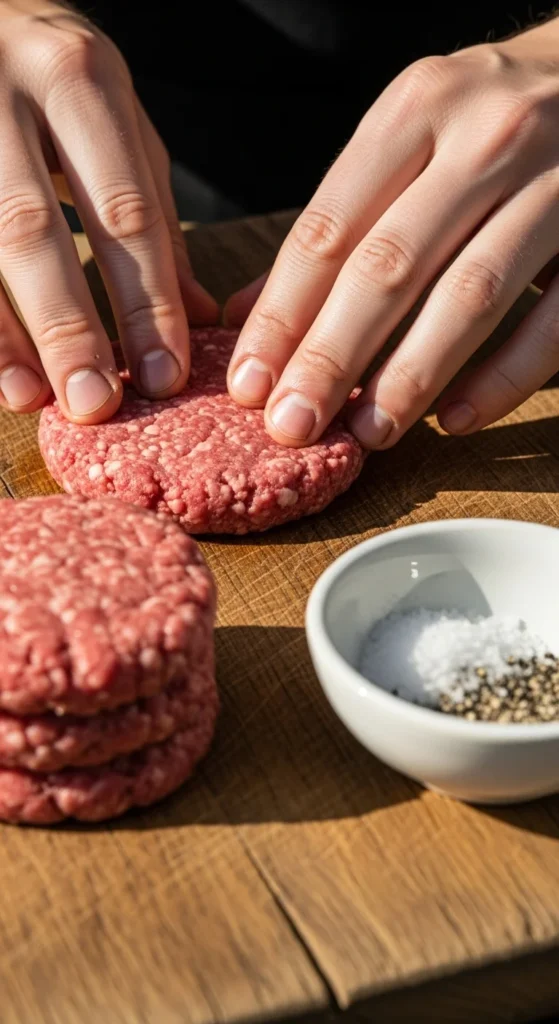
How you shape your patties can make or break your burger.
Here’s what to do:
- Handle the meat gently. Overworking it makes burgers tough.
- Form loose, thick patties about ¾ to 1 inch thick.
- Make an indentation in the center with your thumb — this helps the burger cook evenly and stay flat instead of puffing up.
- Chill before grilling. Pop the patties in the fridge for 15–20 minutes. Cold patties hold their shape better when they hit the heat.
Season Simply
Right before grilling, season both sides with coarse salt and black pepper. If you salt too early, it draws moisture out of the meat and dries it out.
Step 3: Preheat and Prep the Grill
Temperature is everything when it comes to getting that juicy-meets-crispy perfection.
For Charcoal Grills:
- Heat until the coals are white-hot and glowing.
- Push coals to one side to create a two-zone fire — high heat on one side for searing, lower heat on the other for finishing.
For Gas Grills:
- Preheat to 450°F–500°F.
- Keep one burner on medium for indirect cooking.
Before you start grilling, brush the grates with oil or rub them with an oiled paper towel to prevent sticking.
Step 4: Grill for Juicy Perfection
Now for the fun part — cooking your burgers to golden, crispy perfection.
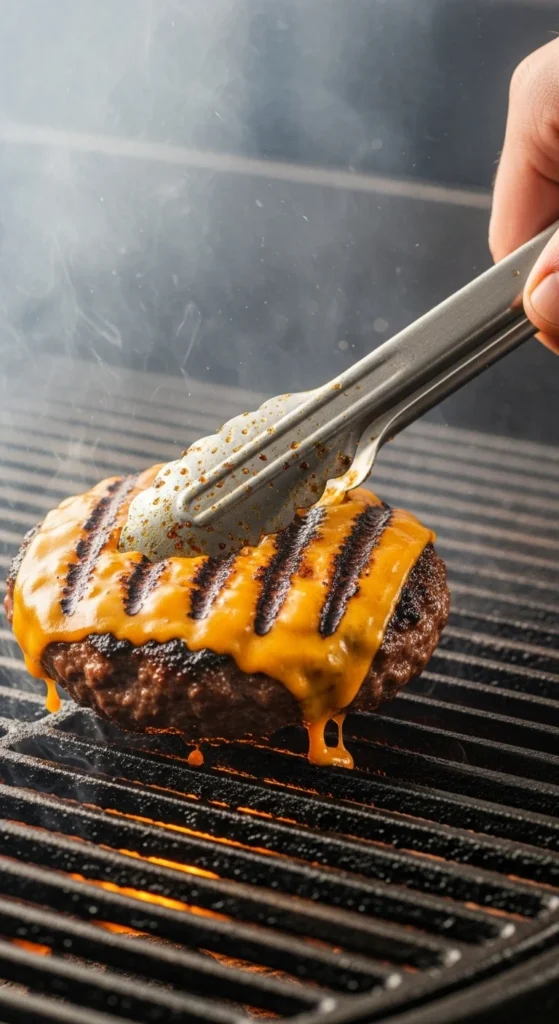
The Sear
- Place patties directly over high heat.
- Don’t press them down! That squeezes out all the juices.
- Grill for 3–4 minutes per side for medium, flipping only once.
The high heat creates that irresistible crust — the “Maillard reaction” that gives burgers their rich, savory flavor.
The Finish
- Move burgers to the cooler side of the grill to finish cooking through.
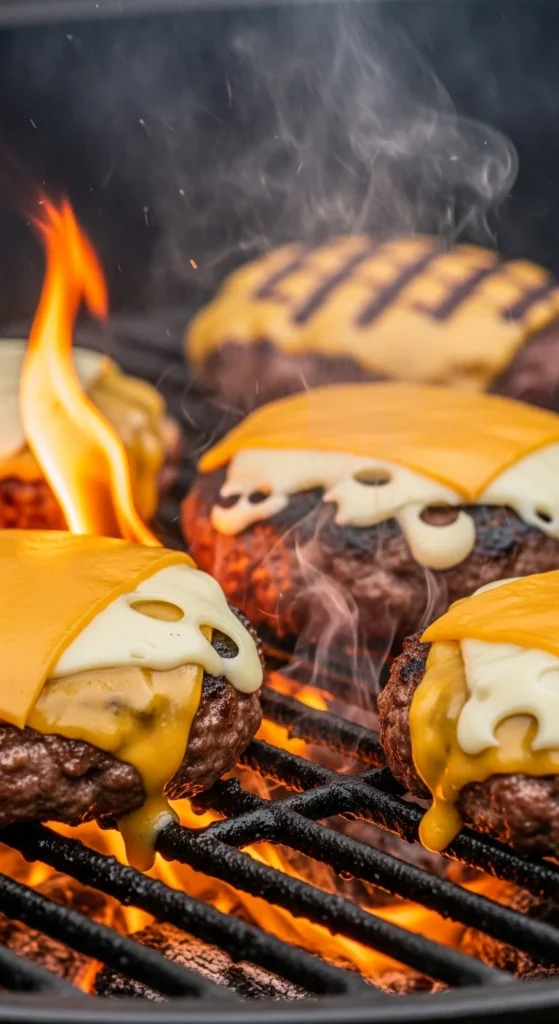
- Add cheese during the last minute and cover the grill to let it melt.
Internal temperature guide:
- Medium-rare: 130°F–135°F
- Medium: 140°F–145°F
- Well-done: 160°F (but expect less juiciness)
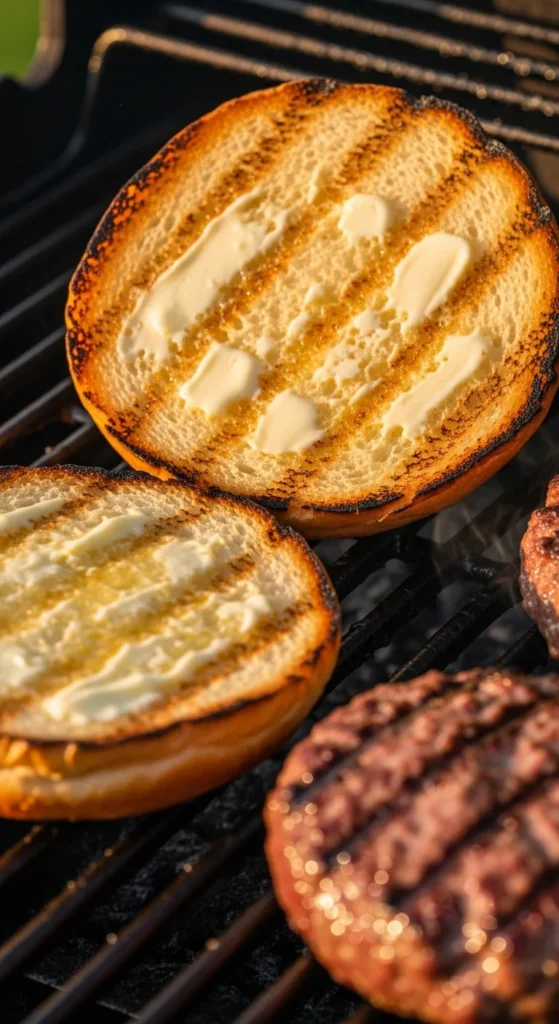
Step 5: Toast the Buns (and Don’t Skip It)
A soft, toasted bun makes all the difference.
- Place the buns cut side down on the grill for 20–30 seconds — just long enough to get golden edges and a bit of crunch.
- Brush with butter or olive oil first for extra flavor.
This step not only adds texture but also helps prevent the bun from getting soggy when you add your juicy burger.
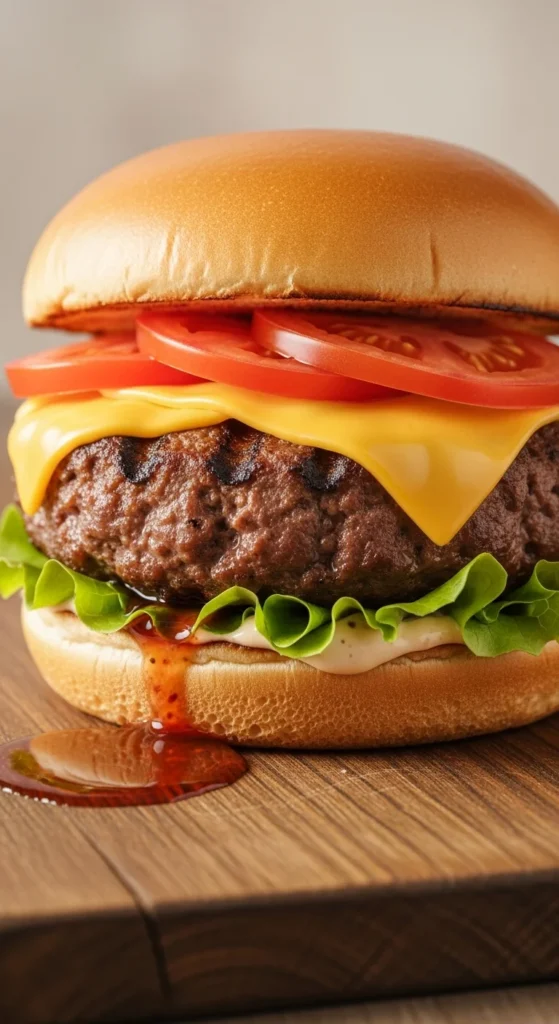
Step 6: Build the Perfect Burger
Now comes the fun part — stacking your masterpiece. Keep it simple or go big; the choice is yours.
Classic Build Ideas:
- The All-American: Lettuce, tomato, cheddar, onion, and pickles.
- The BBQ Burger: Smoked gouda, crispy bacon, onion rings, and barbecue sauce.
- The Spicy Southwest: Pepper jack, avocado, chipotle mayo, and jalapeños.
Tip: Layer lettuce or cheese directly on the bun before adding the patty — it creates a moisture barrier and keeps everything from getting soggy.
Step 7: Rest Before Serving
Just like steak, burgers need a minute to rest. Let them sit for 2–3 minutes before serving so the juices redistribute evenly inside the patty.
Pro Tips for Next-Level Burgers
- Mix-ins? Less is more. Skip raw onions or eggs in the beef — they change texture.
- Try a cast-iron skillet on the grill. It helps create extra-crispy edges.
- Add butter or mayo after grilling. A thin layer on top locks in flavor and shine.
- Keep it hot. The best burgers go straight from grill to bun — no waiting around.
Final Thoughts
Grilling juicy burgers with crispy edges is an art — but it’s one you can master with a little know-how and the right balance of heat, timing, and patience. Once you’ve nailed this technique, every cookout (or weeknight dinner) becomes an instant hit.
So fire up the grill, grab your spatula, and get ready to flip the best burgers you’ve ever made.

Leave a Reply