
There’s something magical about turning simple cream into rich, silky butter—right in your own kitchen. It’s one of those old-fashioned skills that feels special every time, yet it’s shockingly easy. No need for a churn or fancy tools; with just 10 minutes and a little muscle (or a stand mixer), you can make fresh, homemade butter that tastes better than anything from the store.
Let’s walk through how to do it step by step, plus some delicious ideas for flavoring and storing your golden creation.
Why Make Butter at Home?
Homemade butter isn’t just about nostalgia—it’s about flavor and freshness. When you make it yourself, you control every element: the cream’s quality, the salt level, even the texture. The result? Butter that’s creamier, purer, and more flavorful than store-bought.
And there’s a bonus: you also get fresh buttermilk as a byproduct, perfect for pancakes or biscuits!
What You’ll Need
You only need one ingredient to make butter—plus a pinch of salt if you like it salted.
Ingredients:
- 2 cups heavy whipping cream (minimum 36% fat content)
- ¼ teaspoon salt (optional)
Tools:
- Electric mixer, food processor, or jar with a tight lid
- Fine mesh strainer or cheesecloth
- Bowl for catching the buttermilk
- Cold water and spatula for rinsing
Tip: Use the freshest, highest-quality cream you can find. The flavor of your butter depends entirely on it!
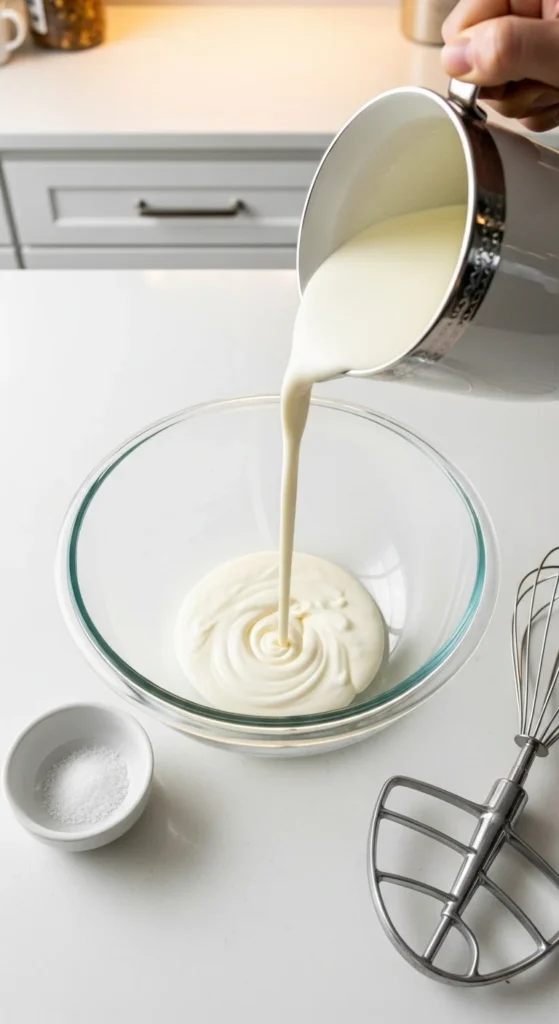
Step 1: Whip the Cream
Pour your heavy cream into the mixing bowl and start whipping on medium-high speed. At first, it’ll look like you’re making whipped cream. Keep going—it will pass the soft peak stage and become grainy as the butterfat separates from the liquid.
This transformation usually happens in about 5–7 minutes.
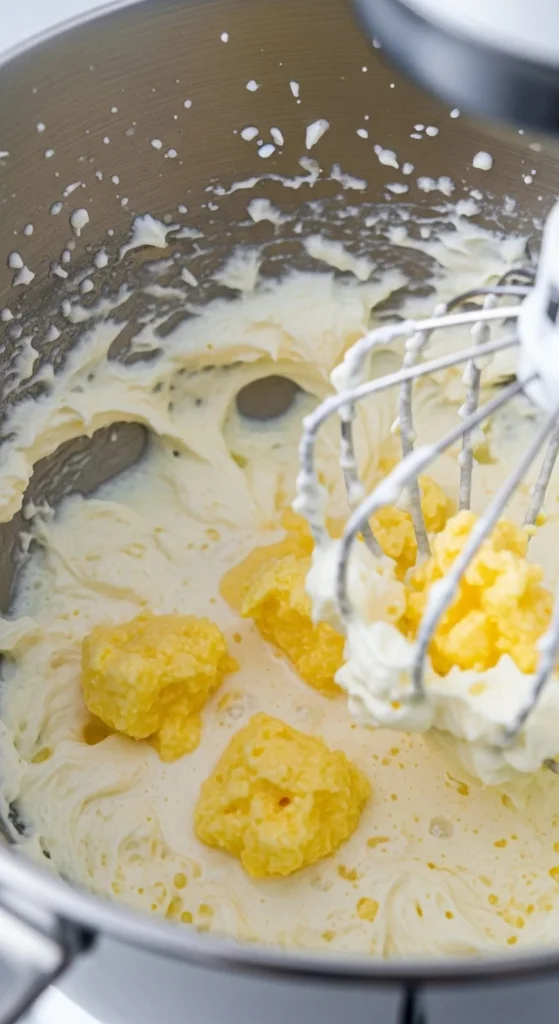
Watch for these stages:
- Whipped cream: soft and fluffy.
- Over-whipped cream: thicker and grainy.
- Butter stage: clumps of yellow butter appear, and liquid (buttermilk) separates.
Once you hit stage three, you’ve officially made butter!
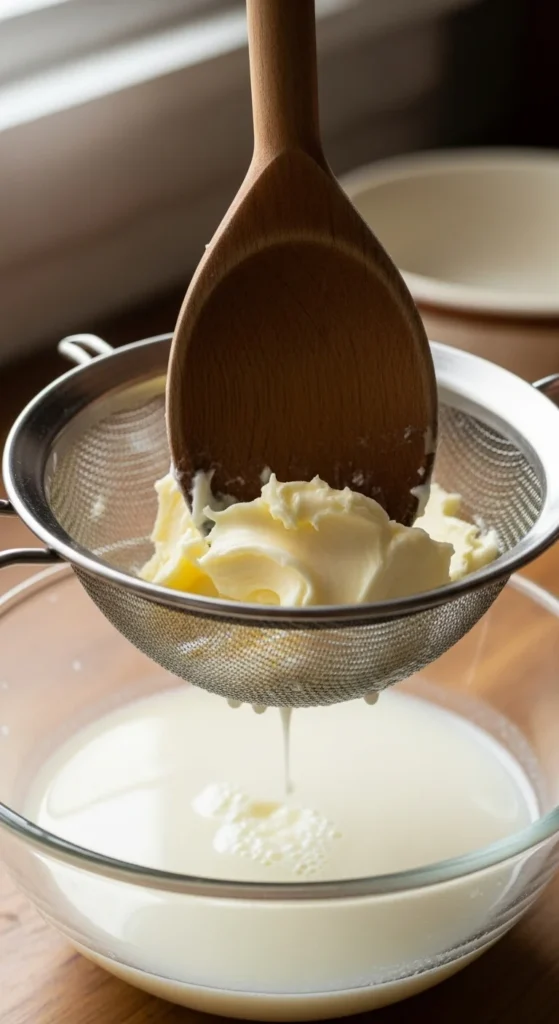
Step 2: Strain the Buttermilk
Pour the mixture through a strainer or cheesecloth over a bowl to separate the butter from the buttermilk. Don’t throw away that liquid—it’s real buttermilk and can be used in baking, pancakes, or salad dressings.
Use a spatula to press the butter gently and release as much buttermilk as possible. The more you remove, the longer your butter will last.
Step 3: Rinse and Knead the Butter
To ensure your butter stays fresh, it’s important to rinse out any remaining buttermilk.
Place the butter in a bowl of ice-cold water, then knead it gently with a spatula or your hands. The water will turn cloudy—pour it out and repeat with clean water until it stays clear.
This step might sound extra, but it prevents spoilage and gives your butter that clean, creamy taste.
Optional: Add salt now if you like salted butter. Mix well to distribute evenly.
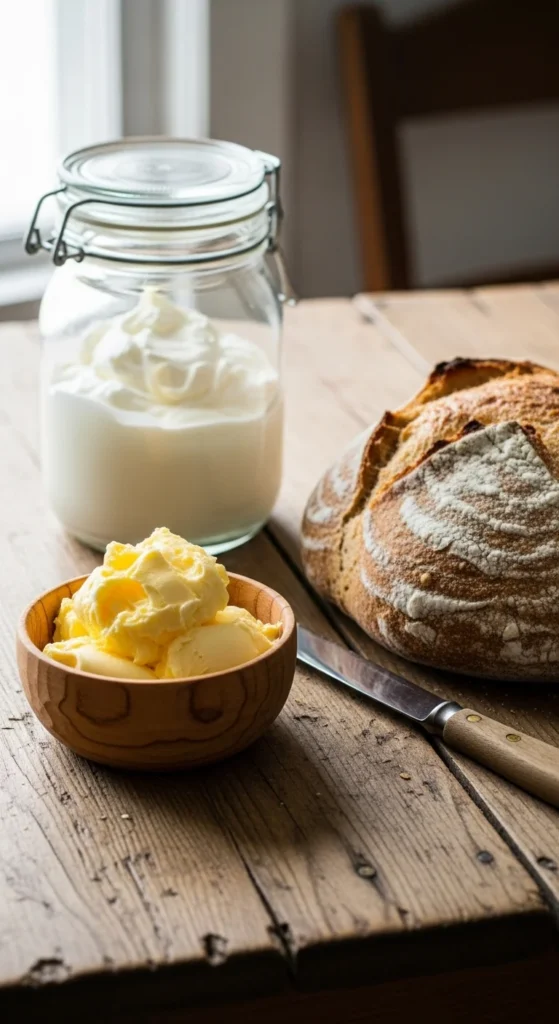
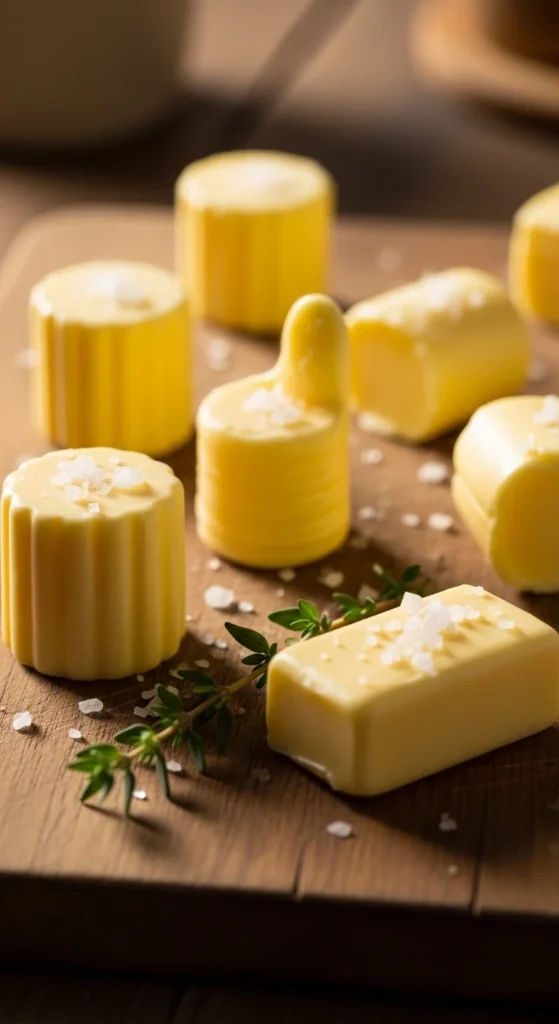
Step 4: Shape and Store
Once rinsed, shape your butter however you like—into a rustic lump, smooth log, or elegant butter mold. Wrap it in parchment paper or store it in an airtight container.
Storage Tips:
- Fridge: Keeps fresh for up to 1 week.
- Freezer: Store for up to 3 months—wrap tightly and label with the date.
Bonus Tip: Portion butter into small ramekins or silicone molds for pretty, individual servings at the table.
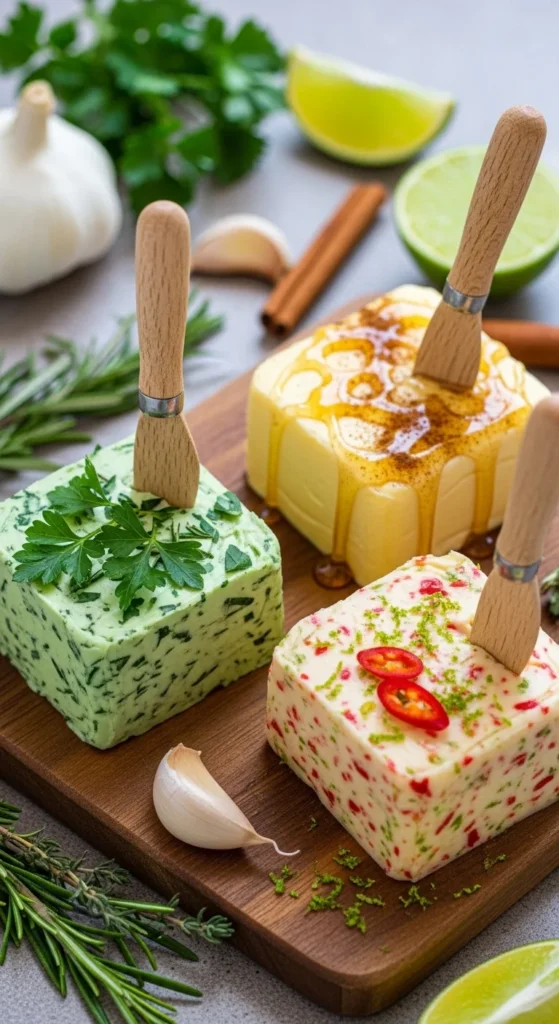
Step 5: Flavor It Up
Once you’ve mastered the basic version, get creative! Homemade butter is the perfect canvas for sweet or savory flavors.
Sweet Variations
- Honey Butter: Mix in 2 tablespoons honey for a breakfast spread.
- Cinnamon Sugar Butter: Add 1 teaspoon cinnamon and 2 teaspoons brown sugar.
- Maple Butter: Blend in 2 tablespoons pure maple syrup for pancakes or cornbread.
Savory Variations
- Garlic Herb Butter: Add minced garlic, parsley, and a touch of lemon zest.
- Chili Lime Butter: Stir in chili flakes and a squeeze of lime for grilled corn or steak.
- Rosemary Sea Salt Butter: Perfect for roasted potatoes or warm bread.
Each blend transforms your butter into something new and exciting—like a gourmet upgrade in minutes.
The Takeaway
Making butter at home isn’t just easy—it’s deeply satisfying. Watching cream turn into golden butter in a matter of minutes feels almost magical, and the taste? Absolutely unmatched.
Plus, it’s the kind of simple kitchen project that makes you slow down, appreciate the process, and enjoy the result even more.
So grab that cream, turn on your mixer, and experience the joy of making your own butter from scratch.

Leave a Reply