
Few kitchen aromas can compete with roasted garlic fresh from the oven. It’s sweet, buttery, and mellow—the total opposite of its sharp, raw form. Whether you spread it on toast, mash it into potatoes, or whisk it into salad dressing, roasted garlic adds a deep, caramelized flavor that instantly elevates any dish.
The best part? It’s surprisingly easy to make. With a few tricks and the right roasting method, you’ll get cloves so soft and sweet they practically melt on your tongue.
Why Roasted Garlic Is So Special
Raw garlic is bold, spicy, and pungent—but when roasted, it transforms completely. The heat breaks down its sulfur compounds, turning harshness into a rich, nutty sweetness.
The result? A spreadable, golden paste that:
- Adds depth to soups, sauces, and marinades
- Blends beautifully into mashed potatoes or hummus
- Spreads like butter on toast or warm bread
- Keeps in the fridge for up to two weeks
It’s the secret ingredient chefs use to give their dishes that subtle, slow-cooked flavor.

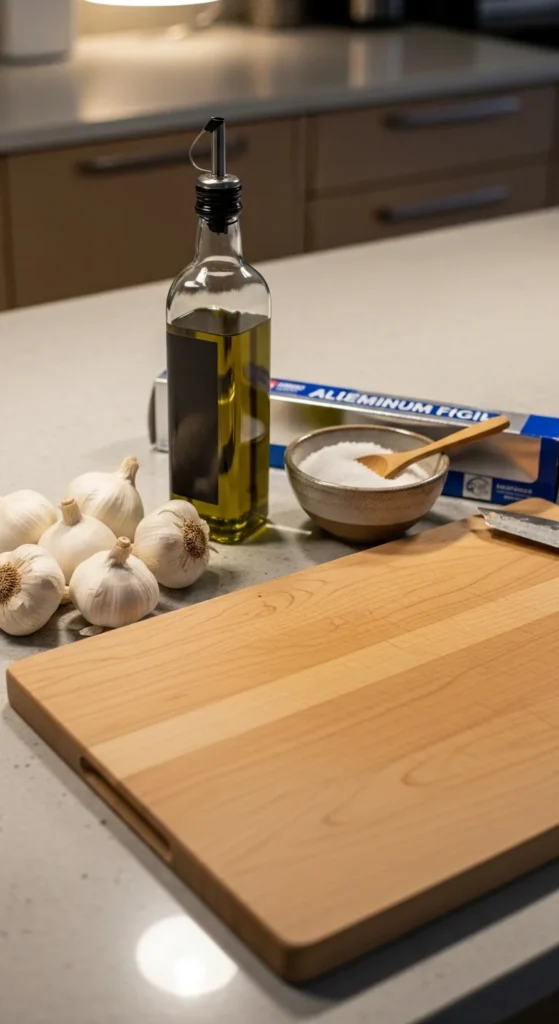
What You’ll Need
You only need a handful of ingredients to make perfect roasted garlic:
- Whole garlic bulbs (as fresh and firm as possible)
- Olive oil (extra virgin for flavor)
- Salt and pepper (optional)
- Aluminum foil or a small baking dish
Quick tip:
If you’re roasting more than one bulb, make extras—you’ll want more once you taste it.
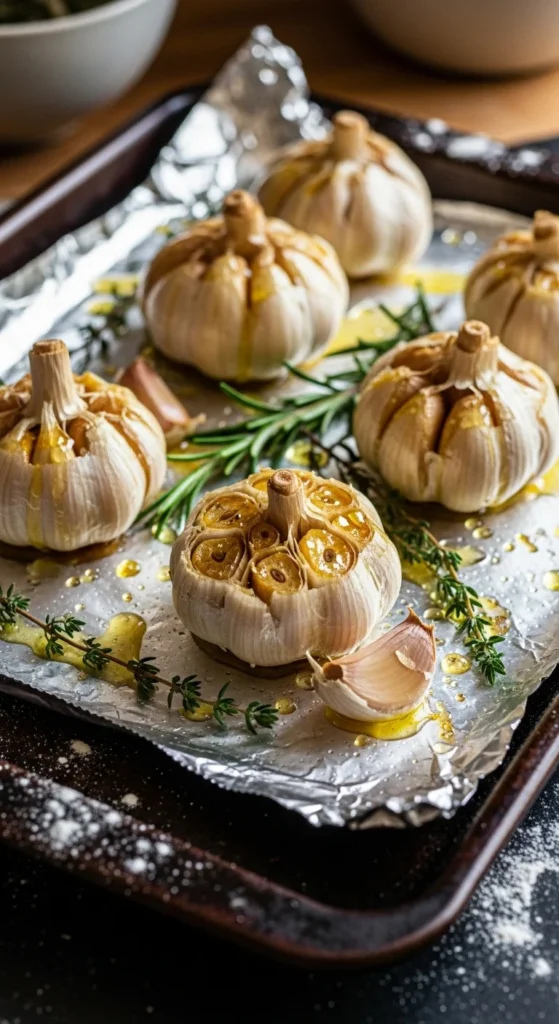
Step 1: Prep the Garlic
- Preheat your oven to 400°F (200°C).
- Slice off about ½ inch from the top of each garlic bulb to expose the tops of the cloves.
- Place the bulb on a sheet of foil or in a small oven-safe dish.
- Drizzle with olive oil—enough to coat the exposed cloves.
- Sprinkle lightly with salt and pepper if desired.
- Wrap tightly in foil or cover with a lid.
This seals in the steam and heat, helping the garlic cook evenly until soft and caramelized.

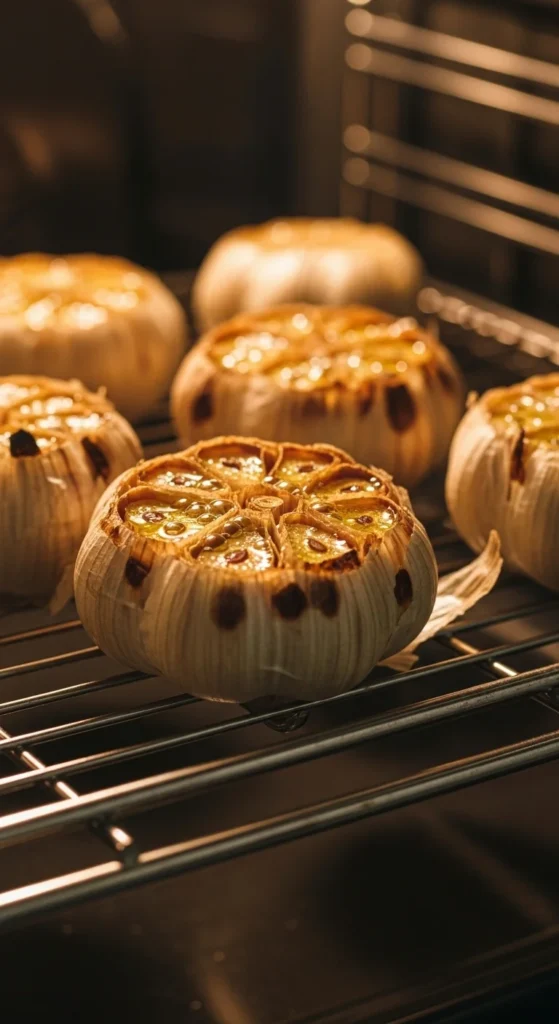
Step 2: Roast to Perfection
Place the wrapped bulbs directly on the oven rack or in a baking dish. Roast for 40–45 minutes, depending on the size of the bulbs.
How to tell it’s done:
- The cloves should be soft and golden brown.
- A gentle press with a spoon should make them squish easily.
- Your kitchen will smell incredible—like warm, nutty garlic butter.
If you prefer a deeper flavor, you can roast for up to 60 minutes, but keep an eye on it near the end to avoid burning.
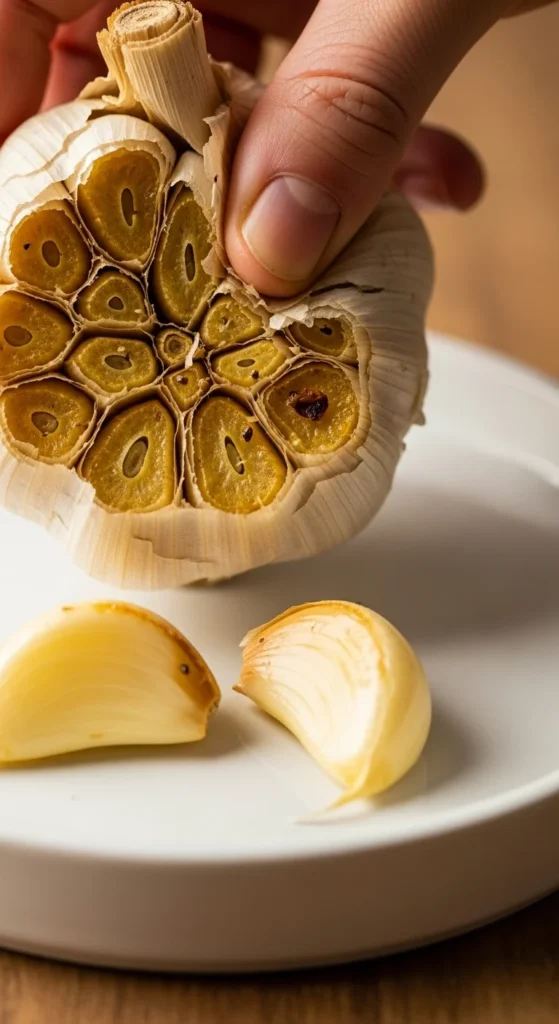
Step 3: Cool and Squeeze
Once roasted, remove the foil and let the garlic cool for about 10 minutes. Then, gently squeeze the base of the bulb—the roasted cloves will slide right out like soft caramel buttons.
Mash them with a fork or blend them into a smooth paste. From here, the possibilities are endless:
- Stir into pasta or risotto
- Mix with butter for instant garlic bread
- Whisk into dressings or sauces
- Spread on toast or sandwiches
Step 4: Store It Right
If you’ve made extra (and you should!), store your roasted garlic for later use:
- In the fridge: Keep it in an airtight container for up to 2 weeks.
- In the freezer: Mash the cloves and freeze in an ice cube tray with a drizzle of olive oil. Pop one out whenever you need a burst of flavor.
Avoid keeping it at room temperature—it’s too moist and can spoil quickly.
Bonus: Flavor Variations
Want to take it up a notch? Try these fun twists:
- Herb Roasted: Add thyme, rosemary, or oregano to the foil before roasting.
- Smoky Garlic: Sprinkle a pinch of smoked paprika before wrapping.
- Butter-Roasted: Replace olive oil with melted butter for an ultra-rich finish.
Each variation gives your roasted garlic its own unique character.
The Sweet Takeaway
Roasted garlic is proof that simple ingredients can create extraordinary flavor. With just a few bulbs, some olive oil, and an oven, you can make something that turns ordinary meals into something unforgettable.
It’s easy, elegant, and irresistibly delicious—once you start making it, you’ll find yourself adding it to everything.

Leave a Reply