

There’s something magical about making your own coconut milk — it’s rich, fresh, and bursting with tropical flavor. Whether you use it for curries, smoothies, baking, or coffee, homemade coconut milk tastes miles better than anything from a can.
And the best part? You only need two ingredients and about 10 minutes to make it from scratch. No preservatives, no fillers, just pure, creamy goodness.
Let’s dive into how you can whip up this tropical essential right in your kitchen.
Step 1: Gather Your Ingredients
You only need two simple ingredients:
- 1 cup fresh grated coconut (or unsweetened shredded coconut if you don’t have fresh)
- 2 cups warm water
That’s it! But if you want to make it extra rich, you can replace half the water with warm coconut water for a more intense flavor.
Optional Add-ins:
- A pinch of salt for balance
- A touch of vanilla extract for sweetness (especially if using in drinks or desserts)

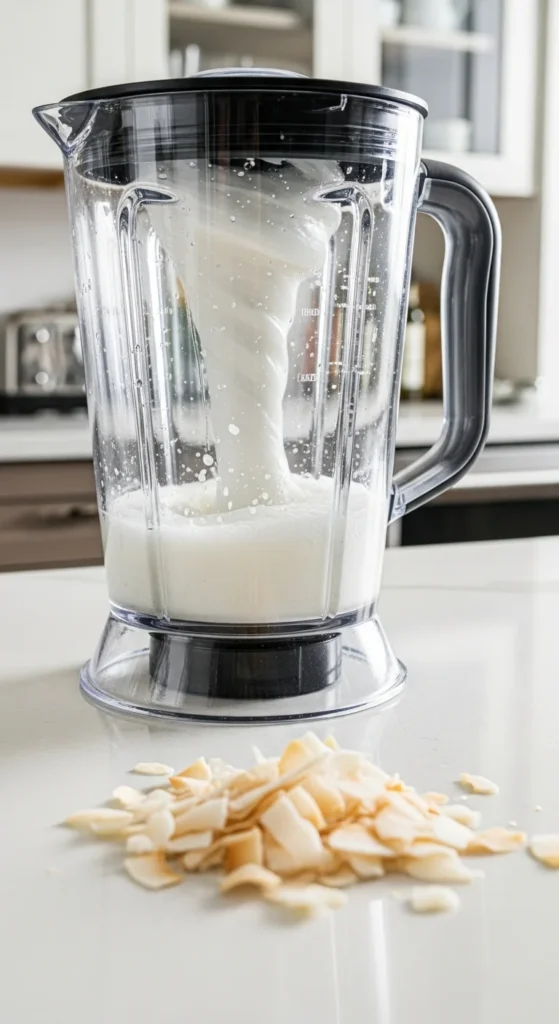
Step 2: Blend It Up
Now comes the fun part — extracting all that creamy coconut goodness.
How to do it:
- Add the grated (or shredded) coconut and warm water to a blender.
- Blend on high speed for 1–2 minutes until the mixture looks milky and frothy.
- Let it sit for about 2 minutes — this helps the fat separate slightly for a richer texture.
Pro Tip: Warm water helps soften the coconut flesh, making it easier to release the natural oils and creaminess. Cold water won’t give the same silky result.
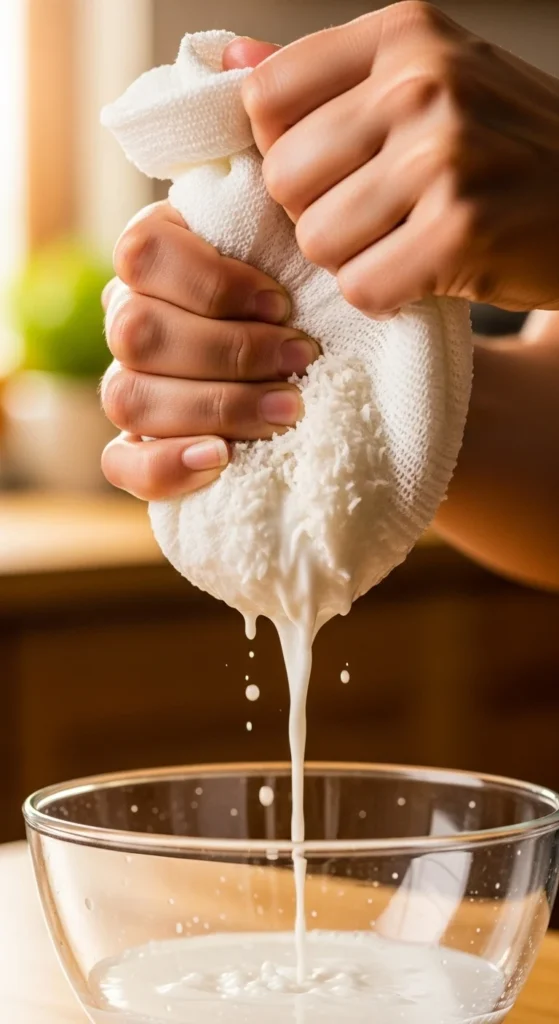
Step 3: Strain the Milk
Once blended, it’s time to separate the liquid from the pulp. This step gives you that smooth, creamy coconut milk texture.
You’ll need:
- A nut milk bag, cheesecloth, or fine mesh strainer
- A large bowl or jug to catch the milk
How to strain:
- Place the strainer or cloth over your bowl.
- Pour the blended coconut mixture through it slowly.
- Squeeze or press the pulp to extract every last drop of milk.
You’ll be left with a beautiful, creamy white coconut milk and some leftover pulp — don’t toss it! You can use it for baking, smoothies, or even homemade coconut flour (we’ll get to that later).
Step 4: Store It Right
Homemade coconut milk is fresh and preservative-free, so it won’t last as long as store-bought.
Here’s how to store it:
- In the fridge: Keeps for up to 3–4 days in an airtight jar or bottle.
- In the freezer: Pour into ice cube trays for convenient single portions that last up to 2 months.
Pro Tip: Natural separation is normal! When chilled, the coconut cream will rise to the top and harden — just shake or stir it before using.
If you prefer thick coconut cream, simply refrigerate overnight and scoop off the solid layer at the top. That’s your coconut cream — perfect for curries, soups, or desserts.
Step 5: Use It Everywhere!
Now that you’ve got your homemade coconut milk, the possibilities are endless.
In Cooking:
- Add to curries, soups, and stews for creamy richness.
- Use it as a base for smoothies, oatmeal, or pancake batter.
- Substitute for dairy milk in baking for a tropical twist.
In Drinks:
- Stir into coffee for a velvety coconut latte.
- Blend with fruit for a refreshing piña colada or tropical smoothie.
- Use in matcha or chai lattes for a fragrant, dairy-free upgrade.

Step 6: Don’t Waste the Pulp
That leftover coconut pulp still has life in it! Spread it on a baking sheet and dry it in a low oven (200°F / 93°C) for about an hour. Once dry, blend it into a fine powder — congratulations, you’ve made homemade coconut flour!
You can use it in:
- Gluten-free baking recipes
- Smoothie bowls
- Pancake or waffle batter for extra fiber and texture
Nothing goes to waste, and you get two products from one simple recipe.
Bonus Tip: Make It Extra Creamy
If you love a thick, rich coconut milk (like the kind used in Thai curries), reduce the water slightly:
- Use 1 cup coconut to 1 ½ cups warm water for a luxurious, creamier texture.
Alternatively, blend in 1 tablespoon of coconut oil for added richness and smoothness.
The Takeaway
Making creamy coconut milk from scratch is easier — and tastier — than you think. With just two ingredients, you’ll have a silky, fresh milk that’s versatile, dairy-free, and completely natural.
It’s one of those simple kitchen skills that makes you feel instantly more connected to your food — and once you try it, you’ll never go back to canned again.

Leave a Reply