Macarons: elegant, colorful, and oh-so-French. They’re the kind of treat that looks intimidating at first glance, but once you understand the basics, you’ll be surprised at how achievable they really are—even without professional training. These delicate almond meringue cookies sandwich a smooth filling that melts in your mouth, and the secret to getting them just right lies in a mix of patience, precision, and a few insider tricks.
Whether you’re baking for the first time or chasing that perfect “feet” rise, this beginner’s guide will walk you through each step with clarity and confidence.
Gather Your Essential Ingredients
Before you start whisking and sifting, set yourself up for success by gathering and weighing your ingredients precisely. Macarons are not the time for “eyeballing it.”
You’ll need:
- 100g almond flour (finely ground, blanched almonds only)
- 100g powdered sugar
- 75g egg whites (aged 1–2 days for best results)
- 75g granulated sugar
- A pinch of cream of tartar or lemon juice
- Gel food coloring (optional, but fun!)
- Your choice of filling: buttercream, ganache, or jam
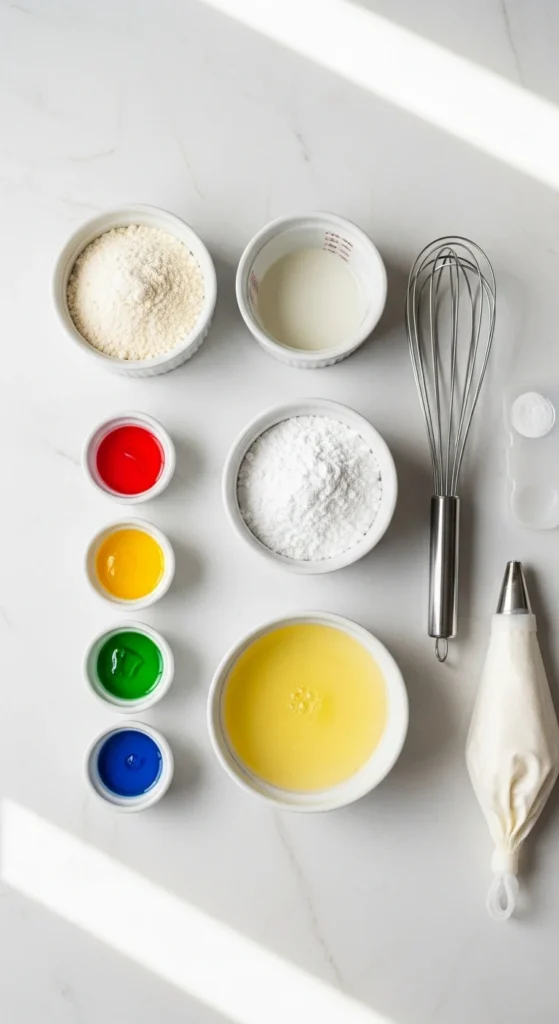
Pro Tip: Always sift your almond flour and powdered sugar together at least twice. This step ensures smooth, crack-free shells.
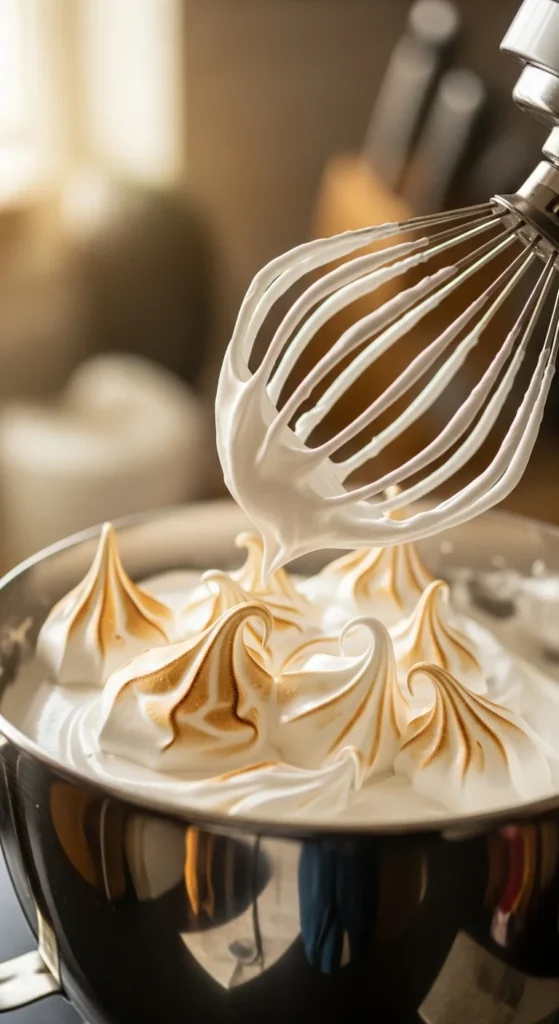
Step 1: Make the Perfect Meringue
Your meringue forms the backbone of the macaron shell, so this part deserves special attention.
- Place your egg whites in a clean, grease-free bowl.
- Whip on medium speed until foamy, then add cream of tartar or a few drops of lemon juice.
- Gradually add granulated sugar, one spoon at a time.
- Beat until glossy and stiff peaks form — when you lift the whisk, the peak should hold straight.
Watch for: Overbeating can dry out the meringue, so stop as soon as it’s shiny and stable.
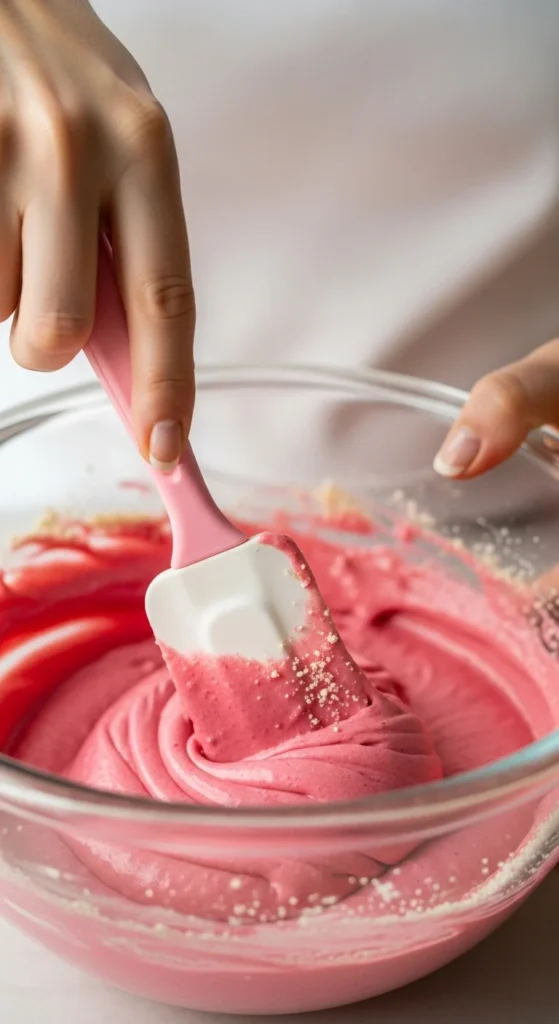
Step 2: Master the Macaronage Technique
This fancy word—macaronage—is just the process of mixing your almond-sugar blend into the meringue. It’s where most beginners go wrong, so take it slow.
- Gently fold the almond flour and powdered sugar mixture into the meringue using a spatula.
- Press and fold, turning the bowl as you go.
- Stop when the batter flows like thick lava and settles back into itself in about 10 seconds after lifting the spatula.
If the batter runs too quickly, it’s overmixed (your shells will spread too much). If it’s too stiff, under-mixed (they’ll crack or not rise properly).
Step 3: Pipe and Rest
Transfer your batter into a piping bag fitted with a round tip. Line your baking sheet with parchment paper or a silicone mat, and pipe evenly sized circles (about 1.5 inches wide).
Tip: Tap the tray firmly against the counter a few times to remove air bubbles. Pop any visible bubbles with a toothpick for smooth tops.
Now comes the crucial step — resting. Let the piped shells sit at room temperature for 30–60 minutes until the tops are no longer sticky to the touch. This helps form that signature ruffled “foot” as they bake.
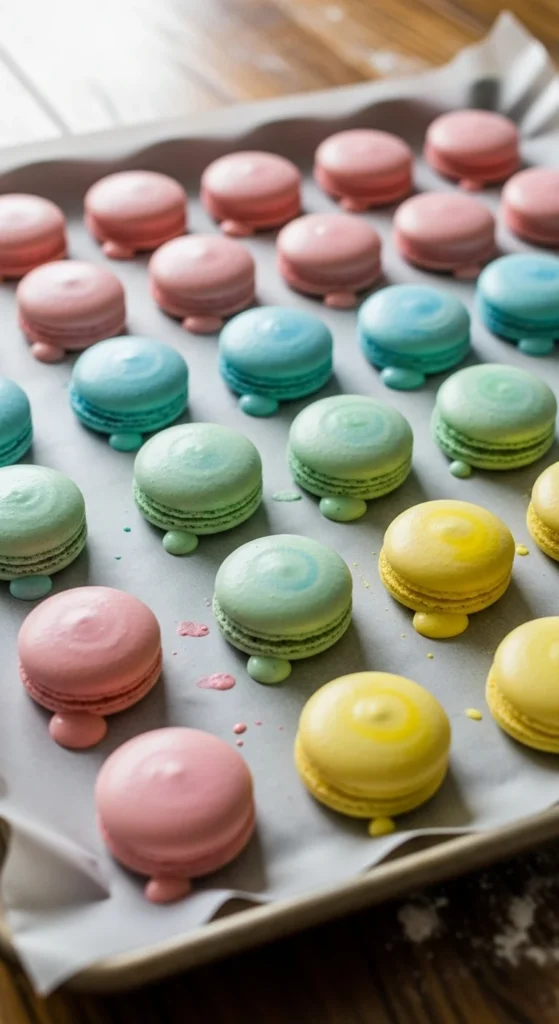
Step 4: Bake to Perfection
Preheat your oven to 300°F (150°C). Bake one tray at a time on the middle rack for 12–15 minutes.
You’ll know they’re done when:
- The tops are firm and dry.
- The shells have risen to reveal delicate “feet.”
Let them cool completely before removing from the tray—warm shells can crack or stick.
Troubleshooting:
- Cracked tops? Oven too hot.
- No feet? Didn’t rest long enough or batter under-mixed.
- Hollow shells? Meringue may have been overwhipped.
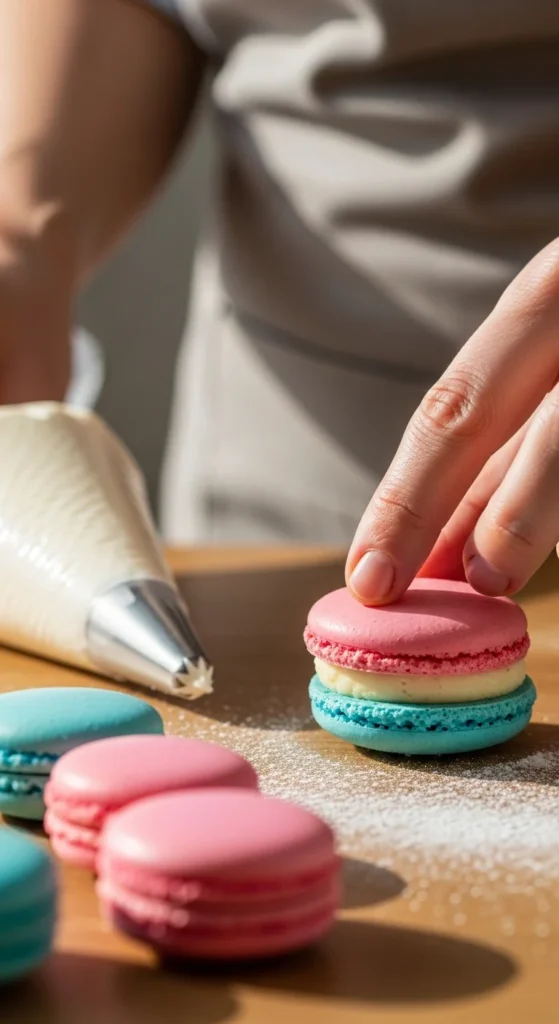
Step 5: Fill and Assemble
Once cooled, match up similar-sized shells. Pipe your chosen filling onto one shell and gently press another on top to form a perfect sandwich.
Classic filling ideas include:
- Vanilla or chocolate buttercream
- Raspberry jam
- Salted caramel ganache
- Lemon curd
Pro Tip: Store assembled macarons in an airtight container in the fridge for 24 hours before eating. This “maturation” time allows the flavors to blend and the texture to soften into that irresistible bite.
Step 6: Serve and Enjoy
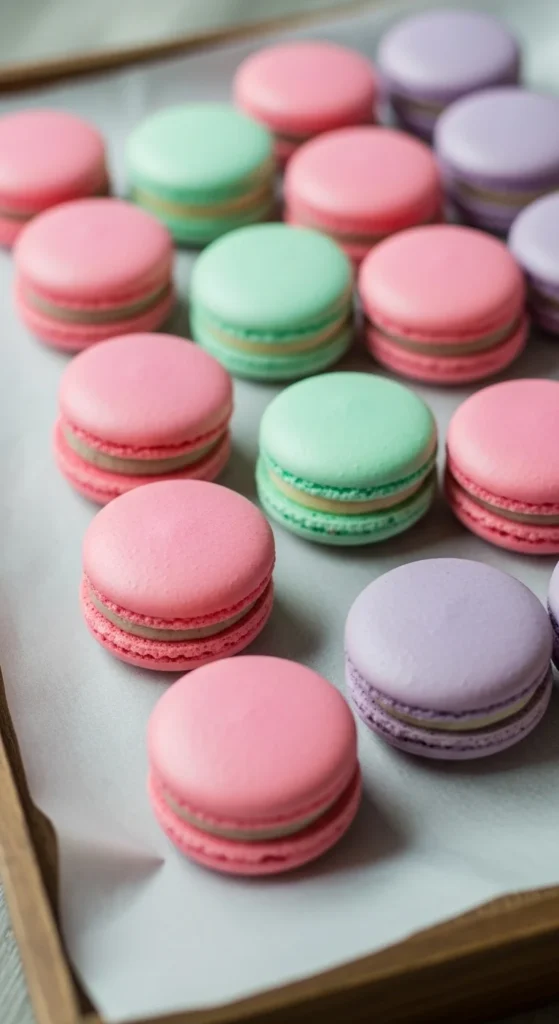
When you finally bite into your homemade macaron, you’ll experience that delightful contrast — a crisp, delicate shell that gives way to a soft, chewy center. Pair them with tea, coffee, or simply enjoy them on their own.
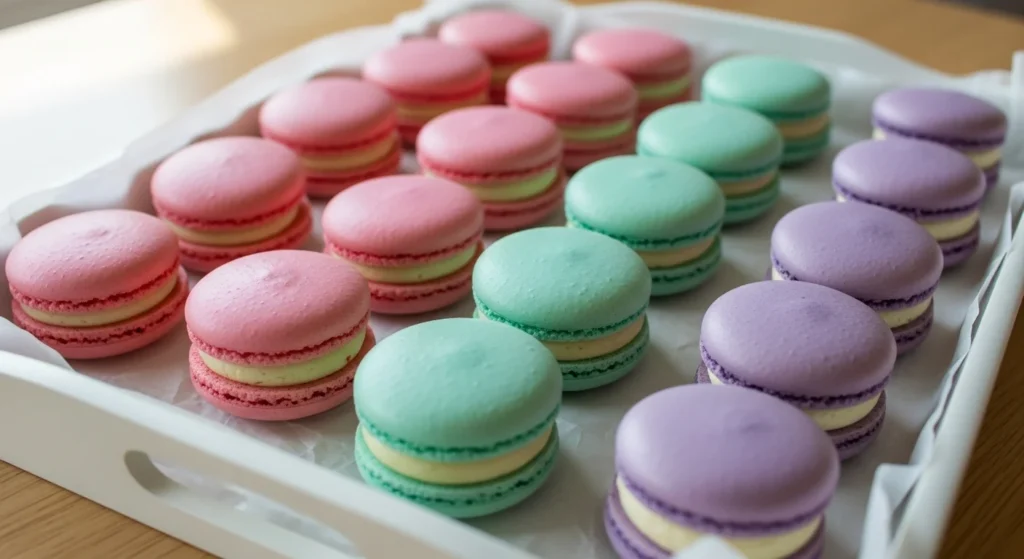
For presentation, arrange them on a tiered dessert tray or stack them in a gift box lined with parchment paper for a professional touch.

The Takeaway
Baking macarons can feel like an art form — and in many ways, it is. But with a little patience, precision, and practice, even a beginner can produce bakery-worthy results. Every batch teaches you something new, and soon you’ll be experimenting with colors, flavors, and fillings like a pro.


