There’s something magical about a homemade pie crust — that flaky, buttery bite that makes any pie taste bakery-level. But here’s the secret most beginners don’t realize: you don’t need fancy tools or complicated steps to get it right.
With just a few pantry ingredients and a simple hand-mix method, you can make a no-fail crust that’s tender, flaky, and perfect for everything from fruit pies to cream pies.
Let’s walk through the easiest method step by step.
Why This Easy Pie Crust Works
This beginner-friendly crust focuses on what actually matters:
- Minimal ingredients
- Cold fats for flakiness
- Gentle mixing (no overworking!)
- Proper chilling time
Result: flaky tender layers without stress.
This method is especially great if you:
- Don’t own a food processor
- Want a reliable “no fail” crust
- Prefer hand-mix baking
- Are new to pie making
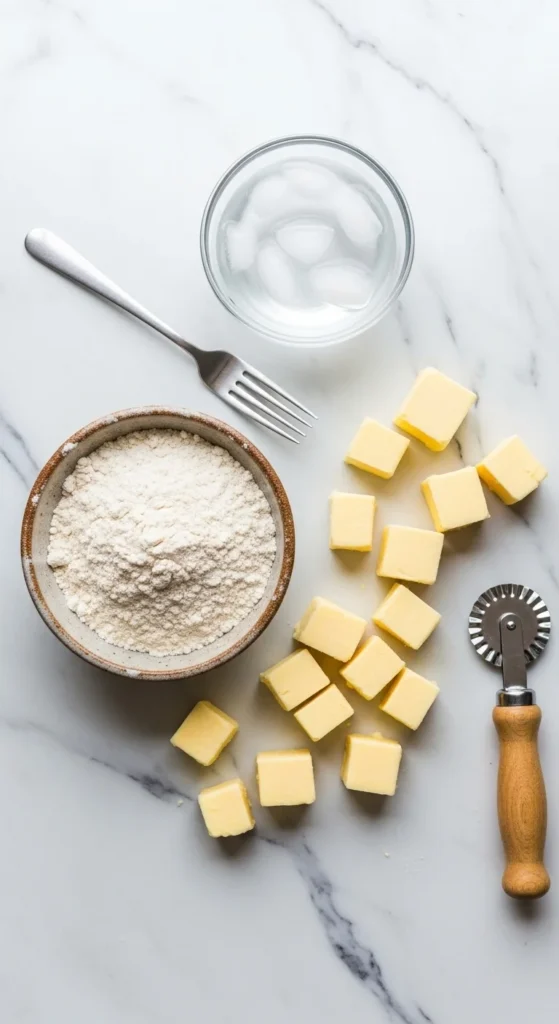
Simple Ingredients You’ll Need
You only need a few basics for a classic single crust.
Standard single crust:
- 1¼–1½ cups all-purpose flour
- ½ cup cold butter (cubed)
- 4–6 tablespoons ice water
- Optional: 1 teaspoon vinegar or 1 egg (for extra tenderness)
- Optional: pinch of salt
💡 Ultra-simple version: just flour, butter, and ice water still works beautifully.
Step 1: Start Cold (Cold Start Mastery)
Cold ingredients are the #1 secret to flaky crust.
Before you begin:
- Cube butter and refrigerate
- Chill flour for 10–15 minutes (optional but helpful)
- Prepare a bowl of ice water
Why this matters:
- Cold butter = steam pockets
- Steam pockets = flaky layers
- Warm butter = tough crust
👉 If your kitchen is warm, work quickly.
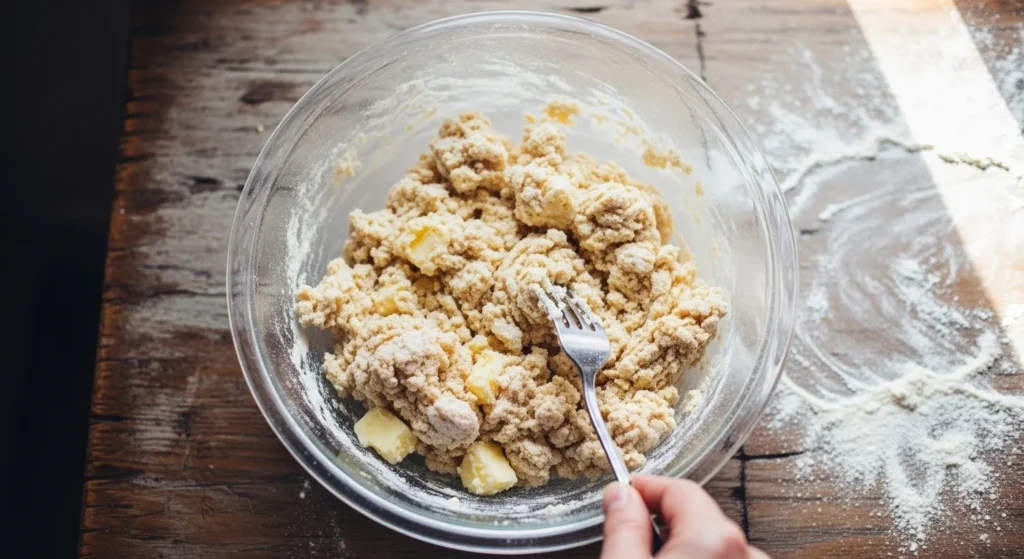
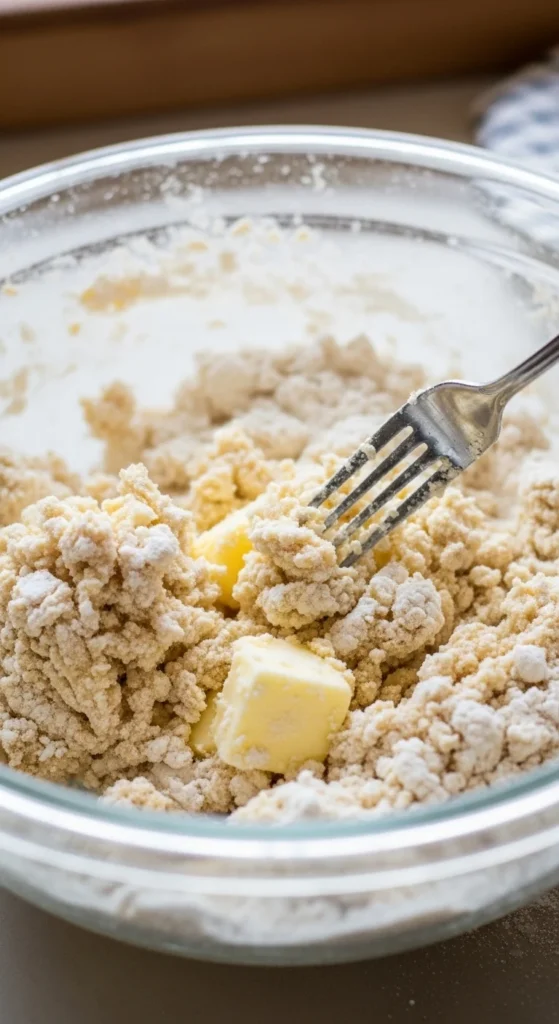
Step 2: Cut the Butter Into the Flour
Place flour and cold butter cubes into a bowl.
Using a pastry cutter or fork, cut the butter into the flour.
What you’re looking for:
- Mixture resembles coarse crumbs
- Butter pieces are pea-sized
- Texture looks uneven (this is good!)
⚠️ Do NOT overmix into a paste.
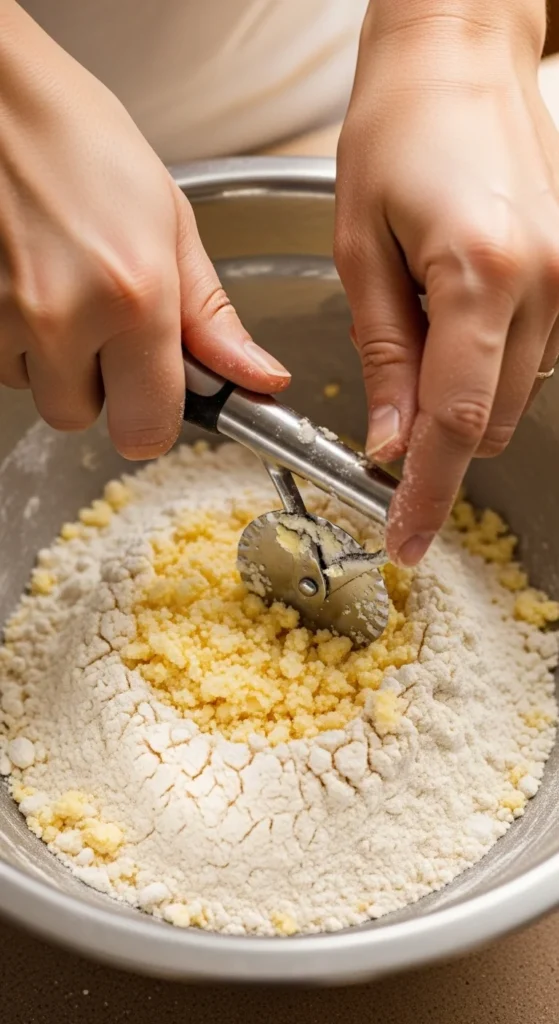
No pastry cutter?
Use:
- Two forks
- Your fingertips (quickly!)
- Even a butter knife in a pinch
Step 3: Add Ice Water Gradually
This is where many crusts go wrong.
Sprinkle ice water 1 tablespoon at a time, gently mixing after each addition.
Watch for the key signs:
- Dough looks shaggy
- It holds together when squeezed
- It is NOT sticky or wet
Usually you’ll need 4–6 tablespoons total.
Hydration Guide for Perfect Dough
✔ Holds when pressed → ready
✔ Still crumbly → add 1 more Tbsp
❌ Sticky → you added too much
💡 Optional pro move: add 1 teaspoon vinegar with the water to inhibit gluten and keep the crust tender.
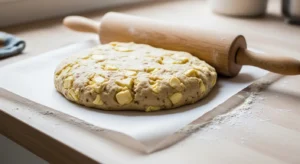
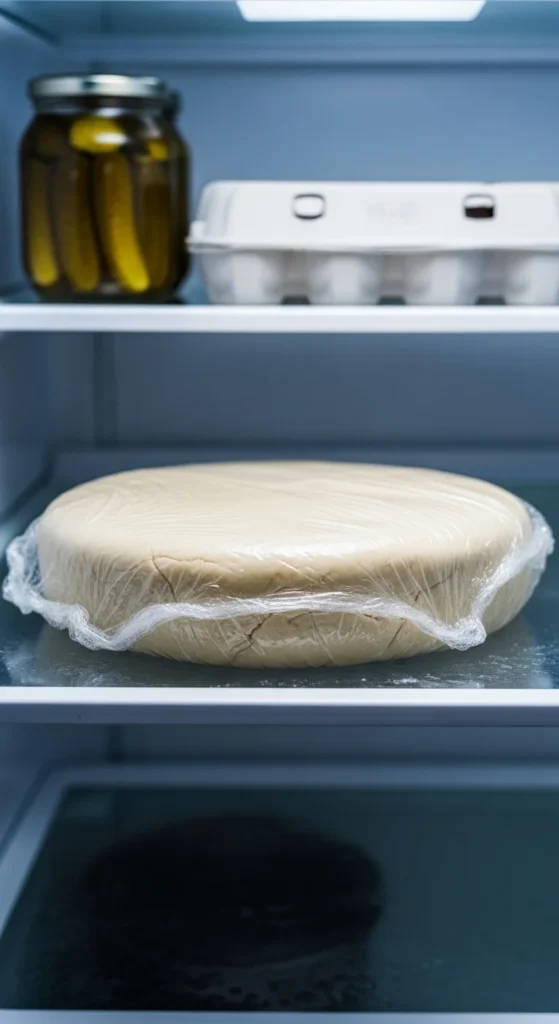
Step 4: Form and Chill the Dough
Once the dough just comes together:
- Gather into a rough ball
- Flatten into a 1-inch thick disk
- Wrap in plastic or parchment
- Chill 30–60 minutes
Do not skip chilling.
Why chilling matters:
- Relaxes gluten (prevents toughness)
- Firms the butter (better flakes)
- Makes rolling easier
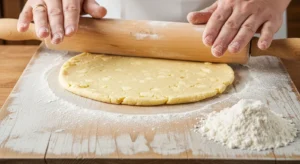
Step 5: Roll Out Like a Pro
Lightly flour your work surface and rolling pin.
Roll from the center outward, turning the dough 90° every few rolls.
Stick-Free Rolling Hacks
- Keep surface lightly floured
- Rotate frequently
- Roll gently — don’t press hard
Target size: about 12 inches for a standard pie plate.
If cracks appear? Totally normal.
👉 Patch tears with a small moistened scrap of dough.
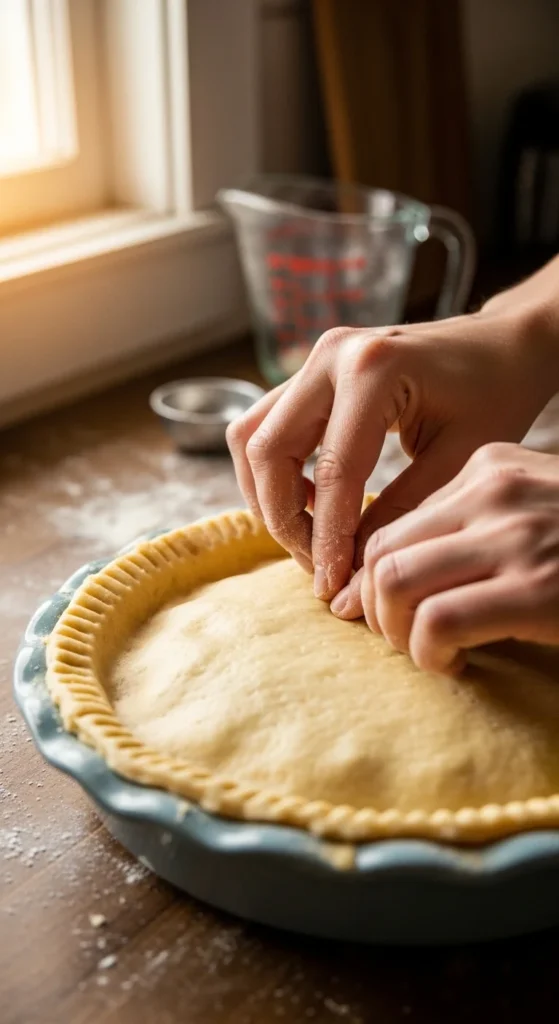
Step 6: Transfer and Crimp the Edges
Gently transfer the dough into your pie plate.
Then trim and decorate the edges.
Easy Edge Styling Ideas
Fork crimp (beginner favorite):
- Press fork tines around the rim
Finger crimp (classic look):
- Pinch between thumb and finger
Keep it simple: rustic edges look beautiful too.
Optional: Blind Bake for Cream Pies
If your recipe needs a pre-baked crust:
- Line crust with parchment
- Fill with beans or rice
- Bake at 375°F until lightly golden
This prevents soggy bottoms — especially for custard or cream pies.
Pro Tips for a No-Fail Crust
Save yourself frustration with these quick wins:
Texture checkpoints
- Pea-sized fat bits = perfect
- Shaggy dough = correct
- Smooth dough = overmixed
Flavor vs. handling
- All butter → best flavor
- Butter + shortening → easiest to handle
- Shortening only → very tender but less flavor
Common fixes
Crumbly dough?
- Add water 1 Tbsp at a time
- Let it rest 5 minutes
Tough crust?
- You overmixed
- Next time: stop at shaggy stage
Sticking while rolling?
- Flour surface lightly
- Chill dough briefly
Make-Ahead & Freezer Tips
Good news — pie dough freezes beautifully.
To freeze:
- Wrap tightly
- Store up to 2 months
- Thaw overnight in fridge
This is perfect for batch baking days.
Final Thoughts: Your Go-To Easy Pie Crust
Making pie crust from scratch doesn’t have to feel intimidating. With cold ingredients, gentle mixing, and a little patience, you’ll get a flaky, tender, bakery-worthy crust every time — no food processor required.
Once you try this method, store-bought crust just won’t compare.
✨ Save this recipe for later and pin it for your next baking day!