There’s a moment every baker loves: rolling out pie dough that’s smooth, flexible, and dotted with tiny butter flecks — the unmistakable sign of a crust that will bake up flaky and tender. If your past pie dough has been tough, crumbly, or stubbornly sticky, don’t worry. The difference between home cooks and pro bakers isn’t luck — it’s technique.
In this guide, you’ll learn the pro-level method (including the famous 3:2:1 ratio) so your homemade pie dough turns out perfect every time.

The Pro Secret: Understanding the 3:2:1 Ratio
Professional bakers love formulas, and this one is gold.
The 3:2:1 ratio (by weight)
- 3 parts flour
- 2 parts fat
- 1 part water
This creates a balanced dough that’s flaky yet tender.
Example for a 9-inch pie
- 4.5 oz flour
- 3 oz fat
- 1.5 oz water
= 9 oz total dough
💡 Pan-to-Dough Calculator: A standard 9-inch pie typically needs about 9 oz dough for a single crust.
Why pros love this ratio:
- Easy to scale
- Consistent results
- Works with butter or butter/shortening blends
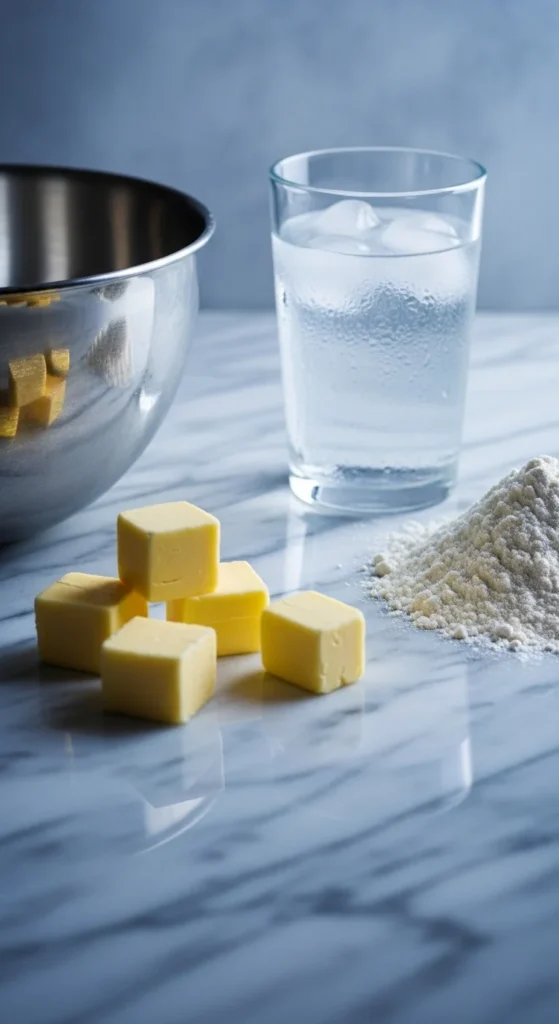
Step 1: Start Cold — The Icebox Method
Temperature control is everything in flaky pastry.
Icebox Start checklist
- Cube butter and chill thoroughly
- Chill flour and mixing bowl (optional but powerful)
- Prepare ice water in advance
- Work quickly with cool hands
Cold fat creates the steam pockets that make flaky layers.
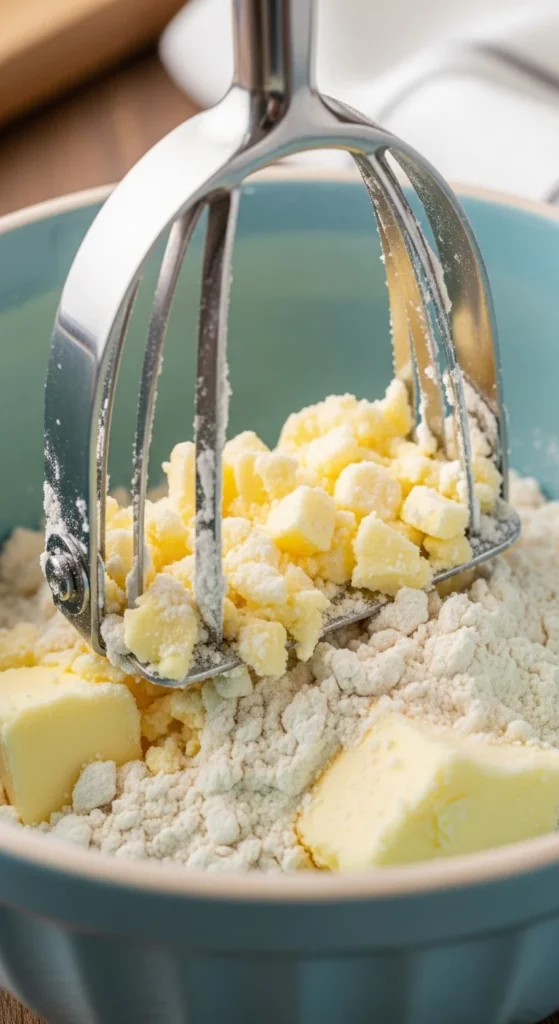
Step 2: Cut Fat to Pea-Sized Pieces
This is the visual cue pros rely on.
Hand-Mix Mastery Tools
🥇 Pastry blender (best control)
- Produces perfect coarse meal
- Prevents overworking
- Beginner-friendly
🥈 Food processor (speed option)
- Pulse only 8–10 times max
- Easy to overmix
- Use cautiously
🥉 Fingertip method (advanced)
- Maximum control
- Slightly messier
Fat Chunk Visual Guide
You want:
- Coarse, sandy flour
- With visible pea-sized butter pieces
- Not smooth paste
Those butter chunks = future flaky layers.
Step 3: Add Ice Water Gradually
This step prevents tough crusts.
No-Gluten Panic Hydration
- Sprinkle water 1 tablespoon at a time
- Toss gently with a fork
- Stop when dough forms clumps
Texture Tests Explained
Your dough is ready when:
- It looks shaggy
- It holds together when squeezed
- It is not sticky
⚠️ Overhydrating is the #1 beginner mistake.
Optional: Acid Edge for Pros
Add 1 teaspoon vinegar to your ice water for:
- Slightly more tenderness
- Reduced gluten development
- Extra insurance against toughness
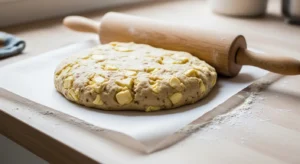
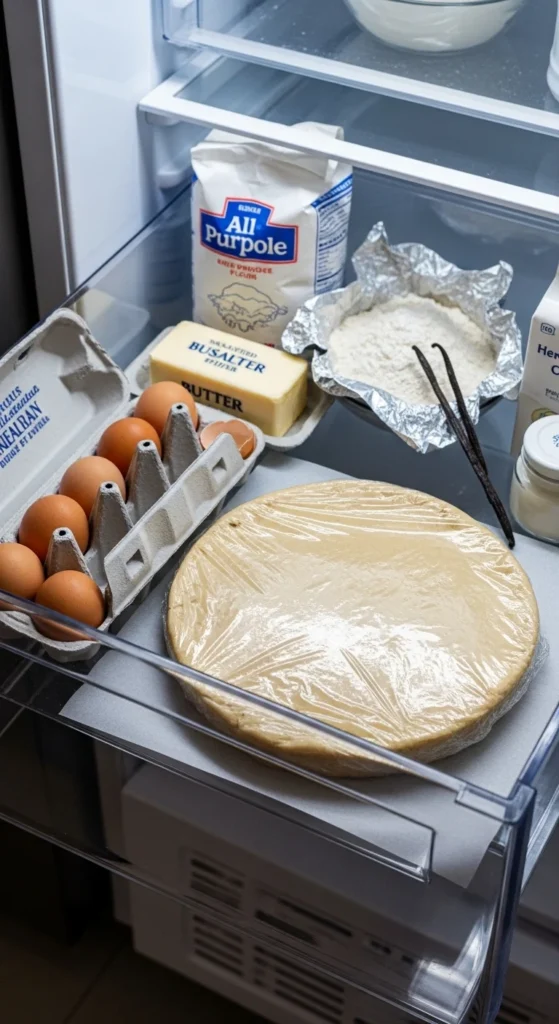
Step 4: Form Discs Immediately
Pros handle dough as little as possible.
Shape to Store Fast
- Use a bench scraper to gather crumbs
- Press into a cohesive mass
- Flatten into 1-inch thick discs
- Wrap tightly in plastic
Why flatten early?
- Chills faster
- Rolls more evenly
- Prevents cracking later
Step 5: Chill Before Rolling
Never skip this step.
Rest & Roll Schedule
- Chill minimum 1 hour
- 2 hours is even better
- Up to 3 days refrigerated
- Up to 3 months frozen
What chilling does:
- Relaxes gluten
- Firms butter
- Prevents shrinkage
- Improves workability
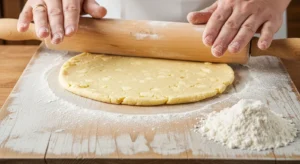
Step 6: Roll Like a Pro
Rolling technique separates amateurs from pros.
Even Circle Hack
- Lightly flour surface
- Roll from center outward
- Give dough a quarter turn frequently
- Keep thickness even (about 1/8 inch)
Prevent sticking
- Flour lightly, not heavily
- Lift and rotate often
- Keep dough moving
If dough softens, chill for 10 minutes before continuing.
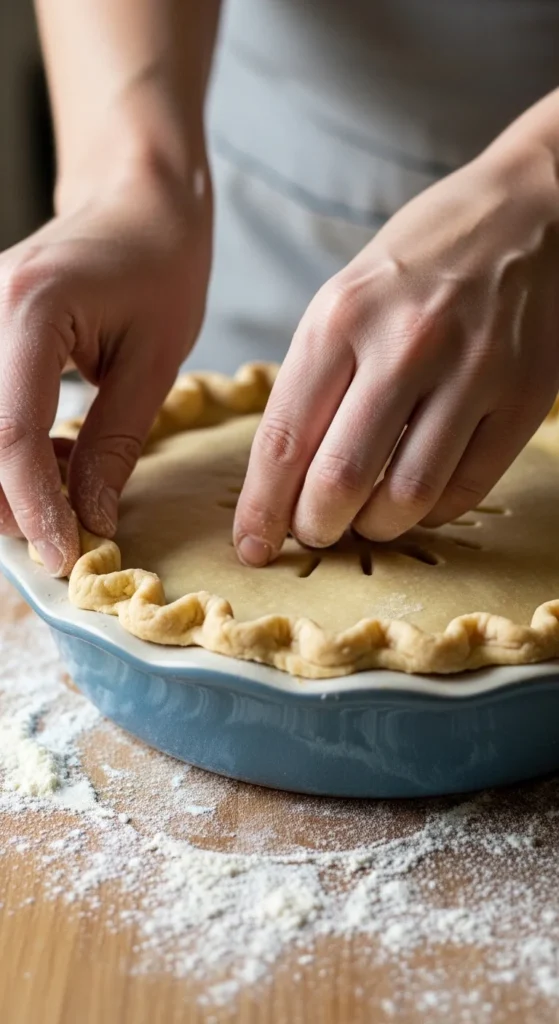
Step 7: Fit, Trim, and Finish
Now it’s time to make it pie-ready.
Edge Seal Perfection
- Transfer dough gently to pan
- Trim to 1-inch overhang
- Fold excess under
- Crimp edges
No-Fuss Finishes
- Fork crimp (quick and clean)
- Finger flute (classic bakery look)
- Press-and-pinch (rustic style)
Step 8: Blind Bake When Needed
For custard or cream pies, blind baking prevents sogginess.
Custard Base Blueprint
- Preheat oven to 375°F
- Line crust with parchment or foil
- Fill with pie weights
- Bake until edges set
This keeps the bottom crisp and stable.
Butter vs Shortening: Fat Face-Off Table
All butter
Pros
- Best flavor
- Beautiful browning
- Natural ingredients
Cons
- Melts quickly
- Slightly trickier to handle
Butter + shortening hybrid
Pros
- Easier handling
- More structure
- Still flavorful
Cons
- Slightly less rich taste
Pro tip: many bakers prefer the hybrid for reliability.
Batch Freezer Plan
Want to bake smarter?
Make-ahead tips
- Double-wrap discs tightly
- Label with date
- Freeze up to 3 months
- Thaw overnight in fridge
Future-you will be very grateful.
Final Takeaway
Making homemade pie dough like a pro baker comes down to a few non-negotiables:
- Use the 3:2:1 ratio by weight
- Keep everything cold
- Cut fat to pea-sized pieces
- Add water slowly
- Chill before rolling
Master these fundamentals and you’ll get flaky, tender, bakery-quality pie dough every time.
📌 Save this guide for later and pin it before your next baking day! 🥧