A beautiful birthday cake doesn’t have to come from a bakery. With a smooth buttercream base, a simple theme, and one standout decoration, you can turn a homemade cake into something that looks straight off Pinterest. The secret? Keep it personal, keep it clean, and let texture do most of the work.
Whether you’re baking for kids, teens, or adults, this step-by-step guide walks you through the full process—from picking a theme to finishing touches that make people say “wow.”
Step 1: Start With a Clear Theme (Make It Personal)
Before you even bake, decide what the cake is about. The best birthday cakes tell a story.
Think:
- Hobbies (gym, music, gaming, baking, travel)
- Favorites (pets, sports teams, colors)
- Mood (minimalist, playful, elegant, vintage)
- Flavor first (chocolate lover, matcha fan, fruity person)
Quick theme ideas:
- Kids → dinosaurs, rainbows, animals, polka dots
- Teens → hand-drawn doodles, bold colors, mini cakes
- Adults → minimalist buttercream, vintage piping, fresh flowers
Tip: Pick one main idea, not five. Simple always looks more polished.
Step 2: Bake and Stack Like a Pro
A stunning design starts with structure. If the cake leans or cracks, decorating gets frustrating fast.
Do this first:
- Bake flat layers (use cake strips or trim domes)
- Chill layers 20–30 minutes before frosting
- Use a thin filling so layers don’t slide
Simple stacking routine:
- Cake layer
- Thin frosting or filling
- Repeat
- Light crumb coat
- Chill 15 minutes

This chilled crumb coat locks in crumbs and gives you a smooth base for decorating.
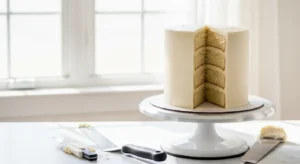
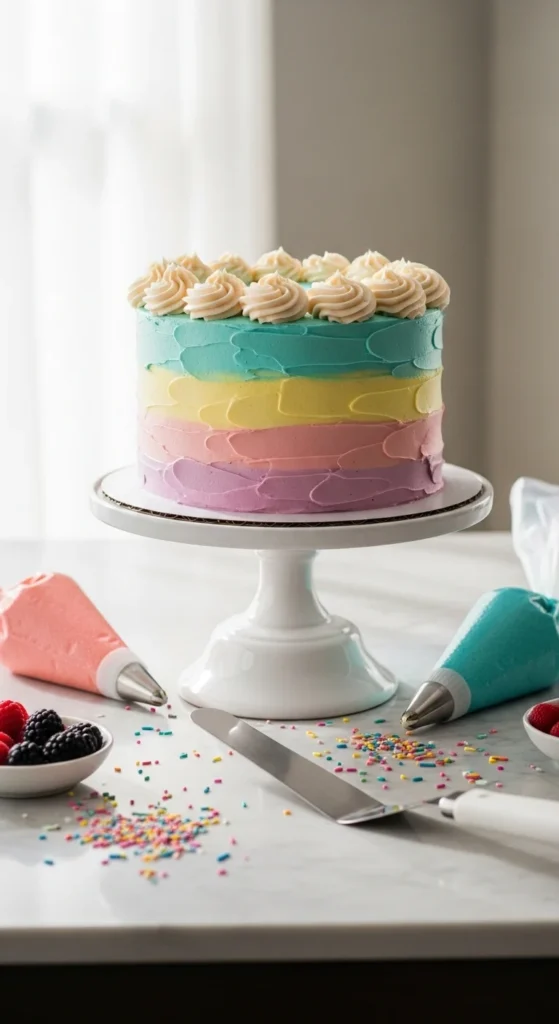
Step 3: Create a Smooth or Textured Buttercream Base
This is where your cake starts to look “professional.”
Option A: Minimalist Smooth Finish
Perfect for modern or elegant cakes.
- Add a thick layer of buttercream
- Hold a bench scraper still
- Spin the turntable
- Pull frosting inward on top for sharp edges
Option B: Textured Buttercream (Beginner Friendly)
If smooth sides feel tricky, texture is your best friend.
Try:
- Palette knife swoops
- Watercolor smears
- Rustic waves
- Light spatula strokes
Texture hides imperfections and looks artistic without extra effort.
Pro tip: Slightly chill the cake before adding details so nothing melts.
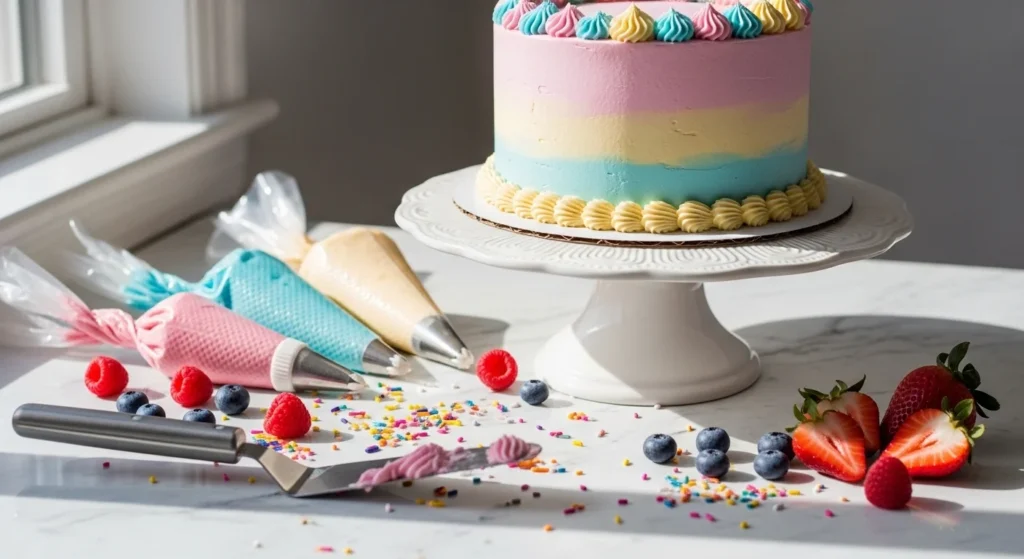
Step 4: Choose One Standout Decoration Style
Here’s where personality shines. Pick one hero technique and keep everything else simple.
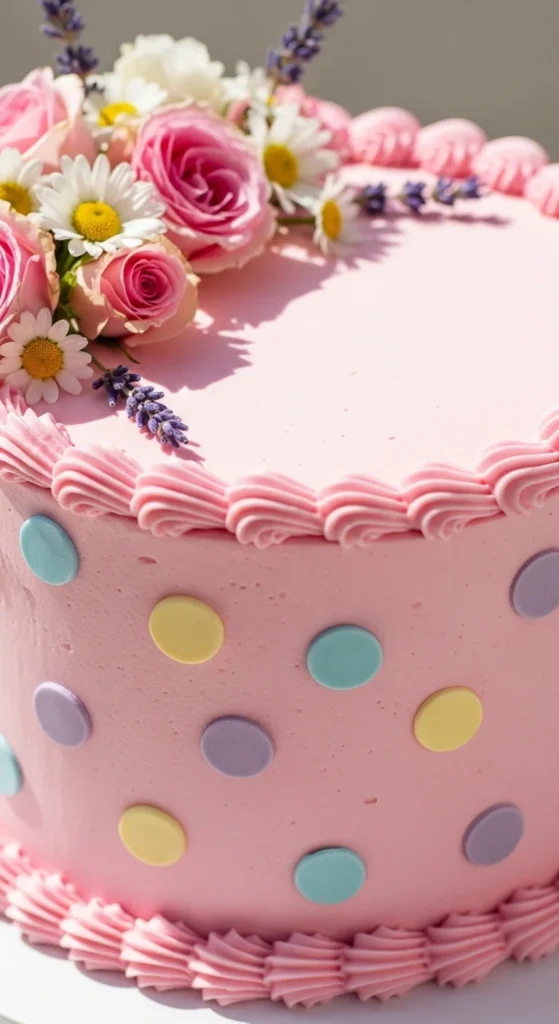
🎈 Polka Dots (Playful & Trendy)
Easy and super cute.
- Pipe dots with a small round tip
- Vary sizes slightly
- Stick to 2–3 colors
Great for kids and modern designs.
✏️ Hand-Drawn Buttercream Art (Personal & Emotional)
Looks custom and special without fancy tools.
- Use a small round piping tip
- Draw simple shapes: hearts, stars, names, pets
- Sketch lightly with a toothpick first
Perfect for storytelling cakes or teens.
🌿 Edible Flowers & Botanicals (Natural & Elegant)
Simple but beautiful.
- Use edible flowers or herbs
- Place asymmetrically
- Leave negative space for a modern look
🎀 Vintage Lambeth-Style Piping (Retro Glam)
Layered borders, ruffles, and shells are back.
- Pipe shells around edges
- Stack small borders for dimension
- Keep colors soft for elegance
Remember: less is more. Too many techniques can look messy.
Step 5: Add Personal Touches
This is what makes the cake unforgettable.
Small details matter:
- Handwritten name or age
- Favorite color palette
- Mini figurines or toppers
- Hobby-inspired elements (tiny weights, books, paintbrushes, soccer ball)
- Fun surprises like a hidden sprinkle center
Mini Cakes Tip
Baking for a small group? Try 4–6 inch mini cakes:
- Faster to decorate
- Fully customizable
- Great for social sharing
They’re trending for a reason—cute and low pressure.
Step 6: Color and Flavor Pairing
Looks matter, but taste seals the deal.
Try pairing:
- Matcha + white chocolate (clean green aesthetic)
- Chocolate + peanut butter (cozy classic)
- Lemon + berries (fresh summer feel)
- Vanilla + pistachio (elegant and modern)
Matching flavors to the design makes the cake feel thoughtful and complete.
Step 7: Final Styling and Presentation
The last few minutes make a huge difference.
Before serving:
- Chill cake 20 minutes for clean slices
- Wipe cake stand edges
- Add candles or a simple topper
- Place on a neutral background for photos
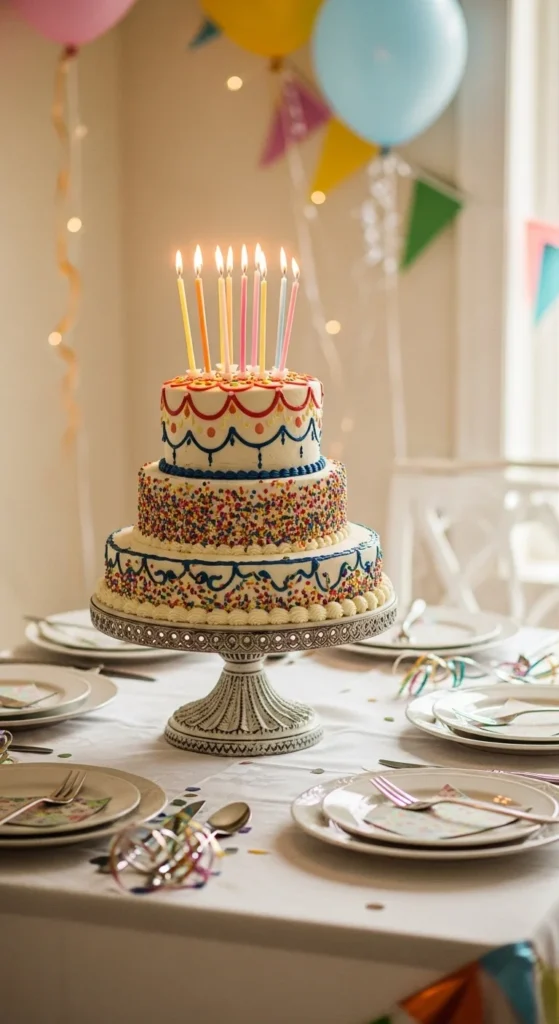
Take a photo before cutting—you worked for this!
Final Thoughts
Designing a stunning birthday cake at home isn’t about complicated tricks. It’s about:
- A smooth or textured buttercream base
- One clear theme
- One standout decoration
- A personal touch
That’s it.
Keep it simple, have fun with the process, and don’t stress perfection—homemade charm always wins.
Save this guide for your next celebration and start planning your dream cake today 🎂