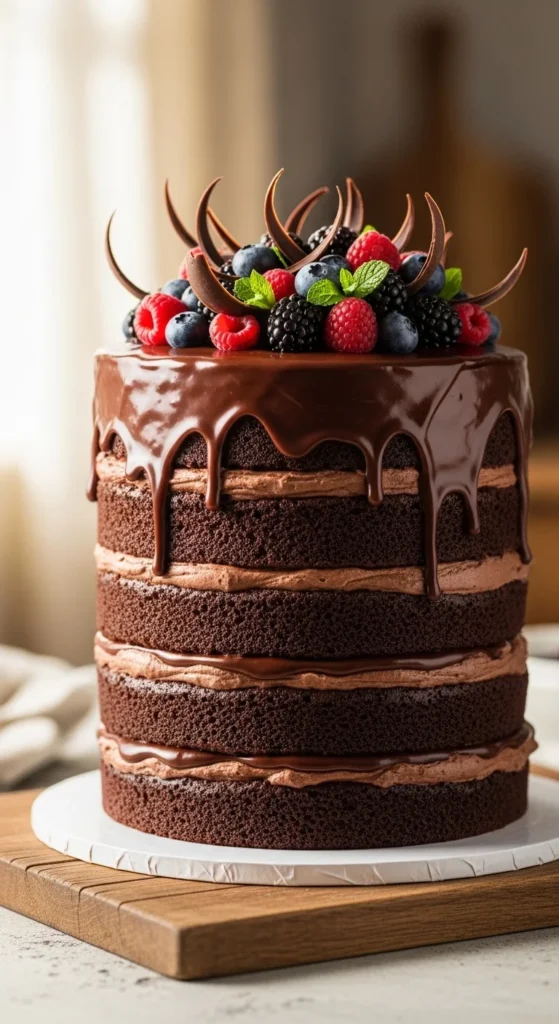
There’s something undeniably luxurious about a chocolate cake. Glossy ganache dripping down the sides, rich dark layers peeking through, delicate chocolate curls on top — it feels dramatic, elegant, and bakery-level impressive.
But here’s the fun part: those stunning chocolate designs aren’t complicated. They’re mostly about simple finishes, smart ratios, and a few easy decorating tricks.
Once you know the basics, you can turn any homemade chocolate cake into a showstopper.
Let’s break it down step by step so you can create your own professional-looking chocolate cake at home.
Start with a Smooth Chocolate Base
Before decorations, get your foundation right.
A clean base makes everything else pop.
Great options:
- Chocolate buttercream
- Chocolate cream cheese frosting
- Dark ganache coating
- Semi-naked chocolate finish
Quick prep tips:
- Chill cake layers before frosting
- Use a bench scraper for smooth sides
- Keep edges sharp on top
If the base is messy, decorations won’t look polished.
Pro tip: Chill the frosted cake 20–30 minutes before adding any chocolate decor.
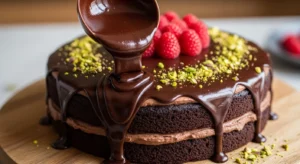
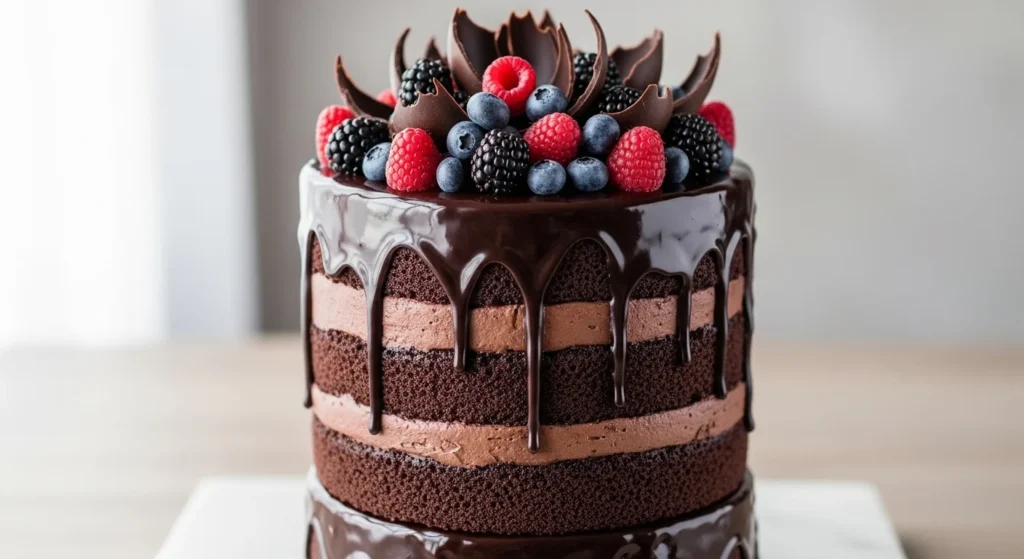
Master the Ganache Drip (The Signature Look)
If there’s one design that instantly screams “fancy chocolate cake,” it’s the drip.
Ganache drips add shine, drama, and elegance with almost zero effort.
Classic ganache ratio:
- 1 cup chocolate
- 1 cup heavy cream
This 1:1 ratio gives a smooth, slow drip.
How to make:
- Heat cream until steaming
- Pour over chopped chocolate
- Rest 2–3 minutes
- Stir until glossy
Let cool slightly before using.
Always test first
Do one drip on the back of the cake:
- Too fast → cool longer
- Too thick → warm gently
Aim for slow, controlled movement.
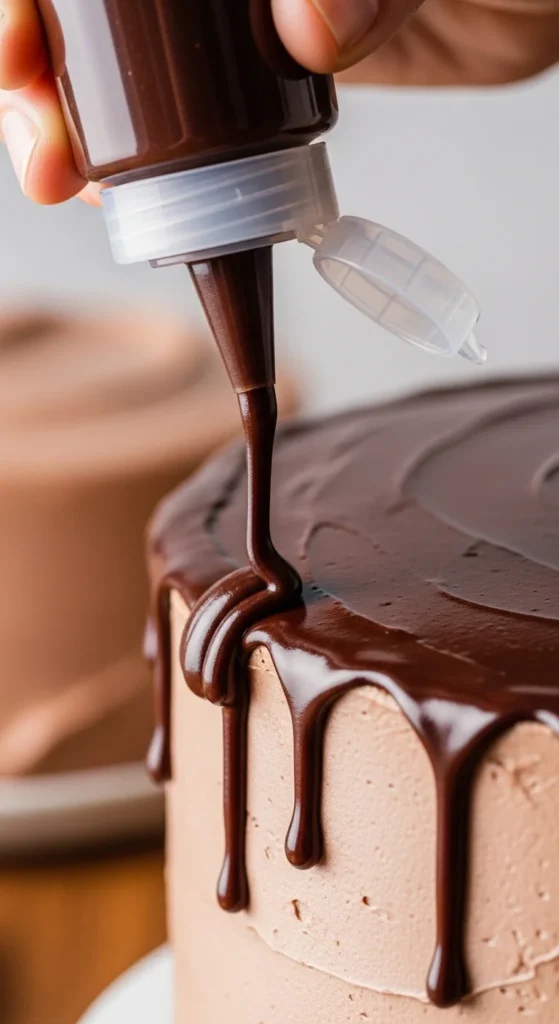
Use a squeeze bottle for precision. It’s much cleaner than a spoon.
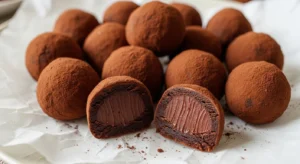
Add Tempered Chocolate Decorations (Instant Elegance)
Chocolate decorations look impressive but are surprisingly easy.
Tempered chocolate sets firm and snaps cleanly — perfect for curls and shapes.
Quick no-stress method:
- Melt chocolate gently
- Spread thinly on parchment
- Let set slightly
- Scrape into curls or shards
You can also pipe shapes onto parchment:
- Lines
- Zigzags
- Spirals
- Hearts
- Fans
Let harden, then peel off.
These decorations add height and texture instantly.
No tempering perfection needed for home baking — just let them set cool and firm.
Try Ombre or Gradient Frosting (Modern & Sophisticated)
Chocolate doesn’t have to be one shade.
Ombre frosting is trending and surprisingly simple.
How to create a gradient:
- Dark chocolate frosting at bottom
- Milk chocolate in middle
- White chocolate or vanilla at top
Spread each band around the cake, then smooth with a bench scraper.
As you rotate, colors blend naturally.
The result? A subtle, luxe fade that looks professionally designed.
Perfect for:
- Weddings
- Birthdays
- Dinner parties
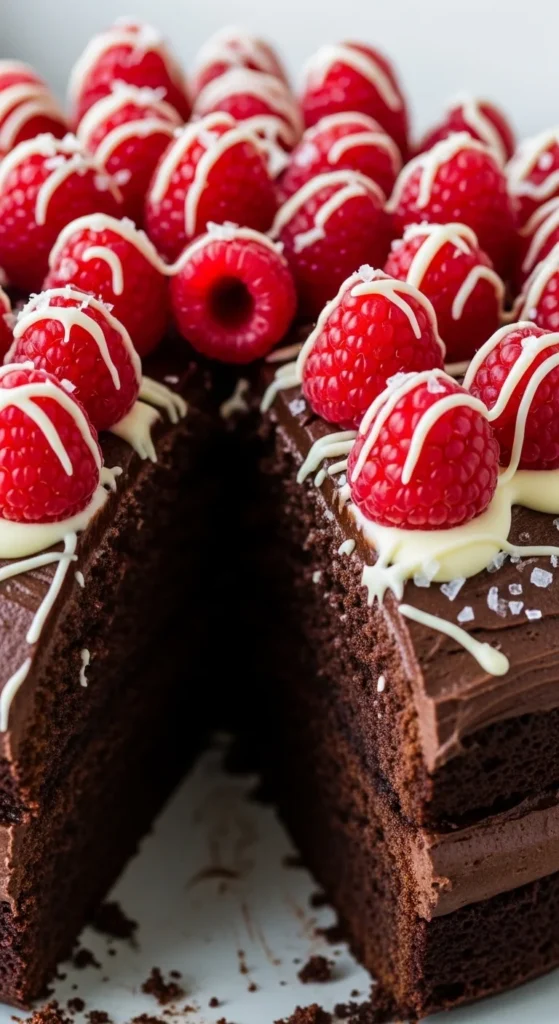
Elevate with Texture & Contrast
Chocolate cakes look best when you mix textures and colors.
Too much brown can feel heavy. Contrast keeps things exciting.
Easy add-ons:
- Fresh raspberries or strawberries (cut side down)
- Sea salt flakes
- Crushed pretzels or nuts
- White chocolate drizzle
- Cocoa dusting
Sweet + salty combos taste amazing and look stylish.
Placement tip:
Cluster toppings instead of spreading them evenly. Grouping looks intentional and elegant.
Go Glossy with a Mirror Glaze (Optional Pro Finish)
Want that ultra-shiny bakery look?
Mirror glaze is your secret weapon.
It creates a glass-like surface that reflects light beautifully.
Basic concept:
- Chocolate
- Cream
- Sugar
- Glucose or syrup
Pour over a chilled cake and let it flow naturally.
It sets in minutes and gives a flawless finish.
This technique is great for:
- Special events
- Elegant centerpieces
- Dramatic chocolate cakes
Add Luxury Details (Small Touch, Big Impact)
Tiny accents can transform a simple cake into something memorable.
Try:
- Edible gold leaf on drips
- Chocolate collar wrap (acetate method)
- Macarons or truffles
- Chocolate sails
- Powdered sugar dusting
Gold leaf on ganache looks especially stunning and modern.

Less is more — a few details look richer than covering everything.
Final Thoughts
Creating a beautiful chocolate cake design comes down to a few simple techniques:
- Smooth base
- Perfect ganache drip
- Easy chocolate decorations
- Color or texture contrast
- Minimal but bold accents
You don’t need complicated tools or professional training — just smart steps and a little creativity.
Save this guide for your next celebration and enjoy building a chocolate cake that looks every bit as amazing as it tastes. 🍫🎂