There’s something wildly satisfying about a perfect drip cake. That glossy ganache slowly sliding down the sides… those clean buttercream edges… the dramatic, bakery-style finish that makes everyone say, “Wait, you made this?!”
Good news: drip cakes aren’t complicated. They’re just about temperature, timing, and control. Once you learn a few small tricks, you’ll get those dreamy, Instagram-worthy drips every time.
Let’s walk through the step-by-step method so your next drip cake looks polished and professional.
Step 1: Start With a Smooth, Chilled Buttercream Cake
Before you even think about ganache, your cake base has to be firm.
If the cake is warm or soft:
- Drips run too fast
- Ganache pools at the bottom
- Edges look messy
The rule:
Chill your frosted cake at least 30 minutes.
Cold buttercream slows the ganache so it flows gently instead of racing down the sides.
Quick checklist:
- Smooth buttercream finish
- Sharp edges
- No crumbs
- Chill until firm to the touch
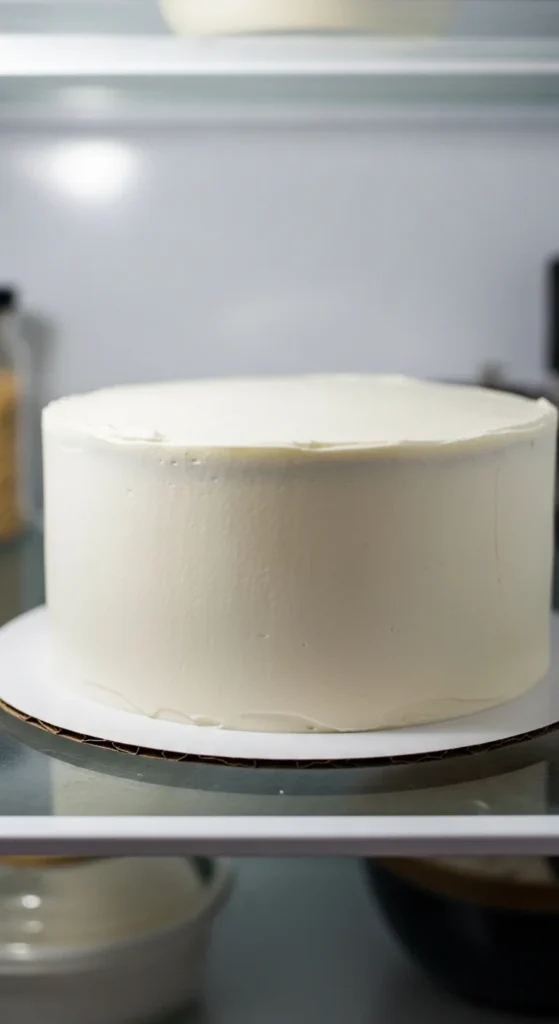
This “fridge firm foundation” step makes all the difference.
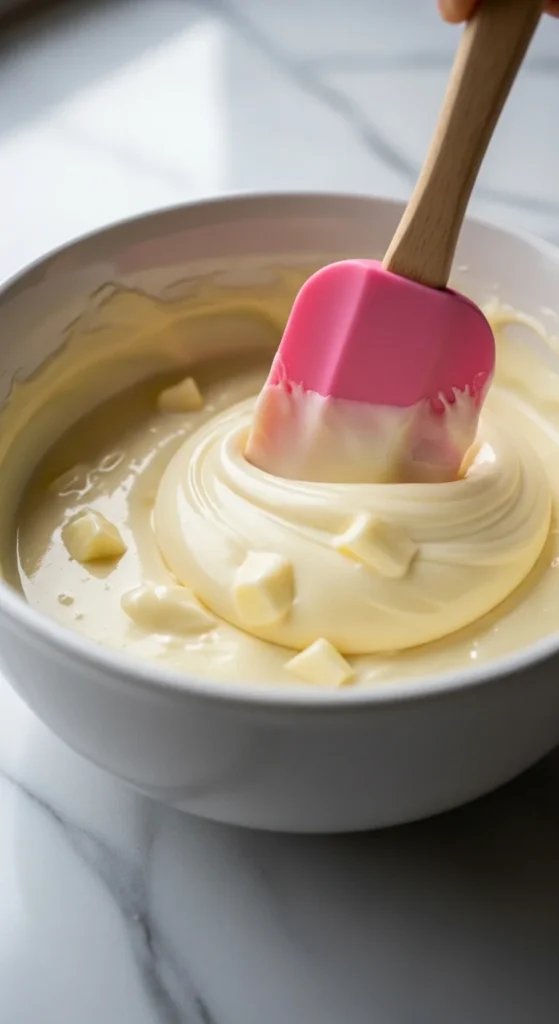
Step 2: Make the Perfect Ganache Ratio
Ganache consistency is everything. Too thin = waterfall. Too thick = blobs.
For drip cakes, the sweet spot is a 1:2 ratio (cream to chocolate).
White chocolate ganache (best for colors):
- 6 oz white chocolate
- 3 oz heavy cream
Dark/milk chocolate:
- 1:1 ratio works well
- Or mix dark + milk for custom tones
How to make:
- Heat cream until steaming (not boiling)
- Pour over chocolate
- Rest 2–3 minutes
- Stir smooth
White chocolate is super popular because you can color it or paint it later.
Step 3: Test the Drip First (Don’t Skip!)
This tiny step saves your whole cake.
Before pouring anything, do a test drip on the back of the cake.
You want:
- Slow movement
- Drip travels halfway down
- Not too fast, not stuck
Fixes:
- Too runny → cool 2–3 minutes
- Too thick → microwave 5 seconds
Think “warm bath water” or body temperature, not hot.
Pros call this the “single bead test.”
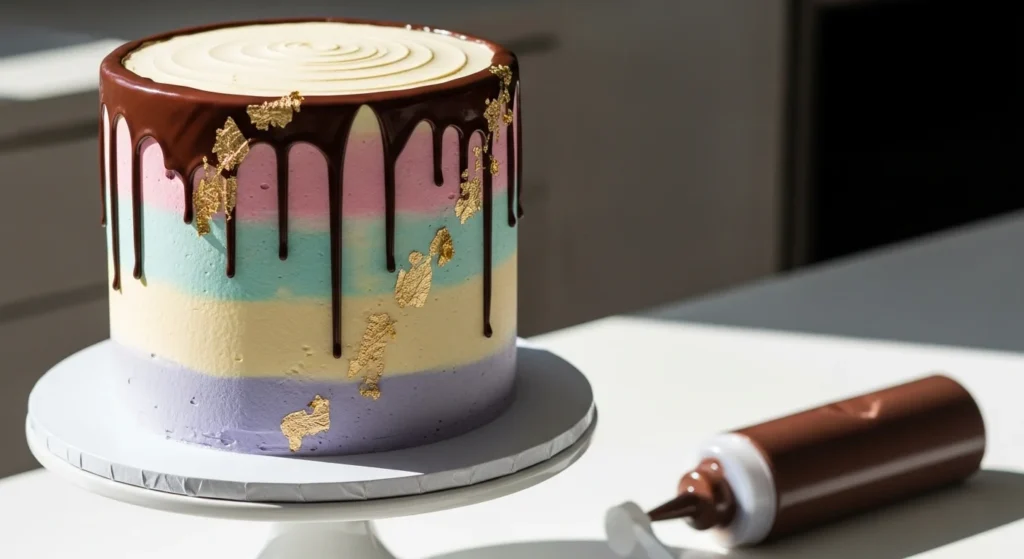
Step 4: Use a Squeeze Bottle for Control
Forget spoons. They’re messy and unpredictable.
A squeeze bottle gives you precision and clean drips.
How to drip like a pro:
- Fill bottle with ganache
- Squeeze gently at edge
- Pause to let drip fall
- Move around cake
- Vary lengths naturally
Different drip heights look more organic and trendy.
Perfect symmetry can actually look fake—random is better.
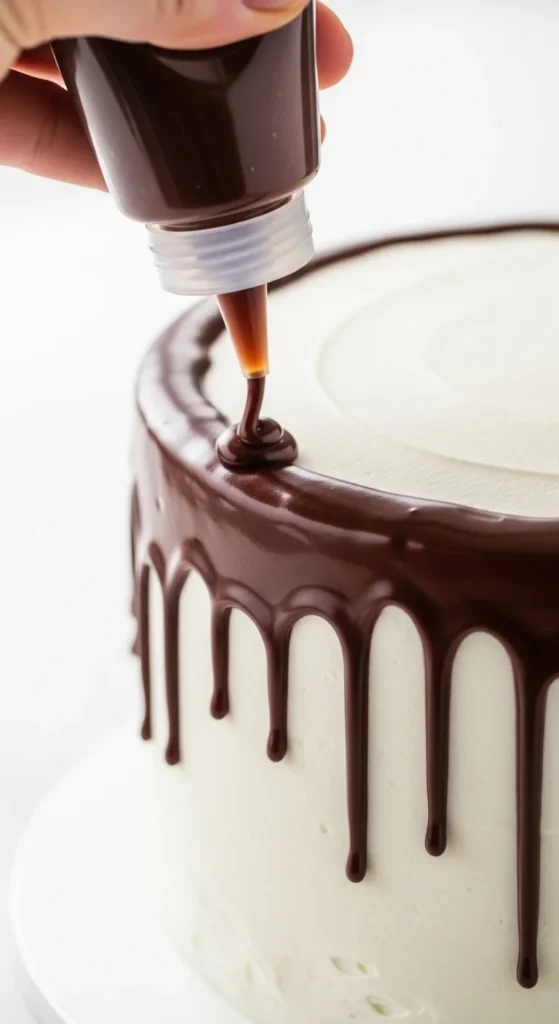
Take your time. This is the fun part.
Step 5: Fill the Top Without Flooding
Once the edges are done, add ganache to the top.
The trick:
- Pour a small amount in the center
- Spread gently with an offset spatula
- Don’t push over edges
Just barely touch the drips so everything connects cleanly.
Too much ganache on top causes overflow and ruins the drip shape.
Step 6: Let It Set Before Decorating
Patience here pays off.
Chill the cake 15–30 minutes so the ganache firms up.
If you add decorations too soon, they’ll slide.
Once set, you can safely add:
- Buttercream swirls
- Sprinkles
- Cookies or macarons
- Fresh berries
- Gold leaf or edible paint
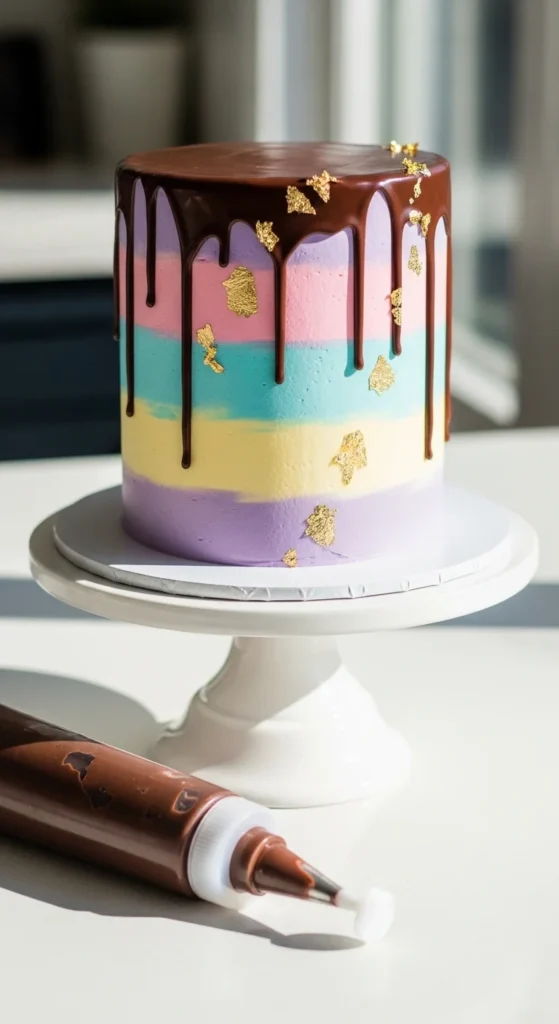
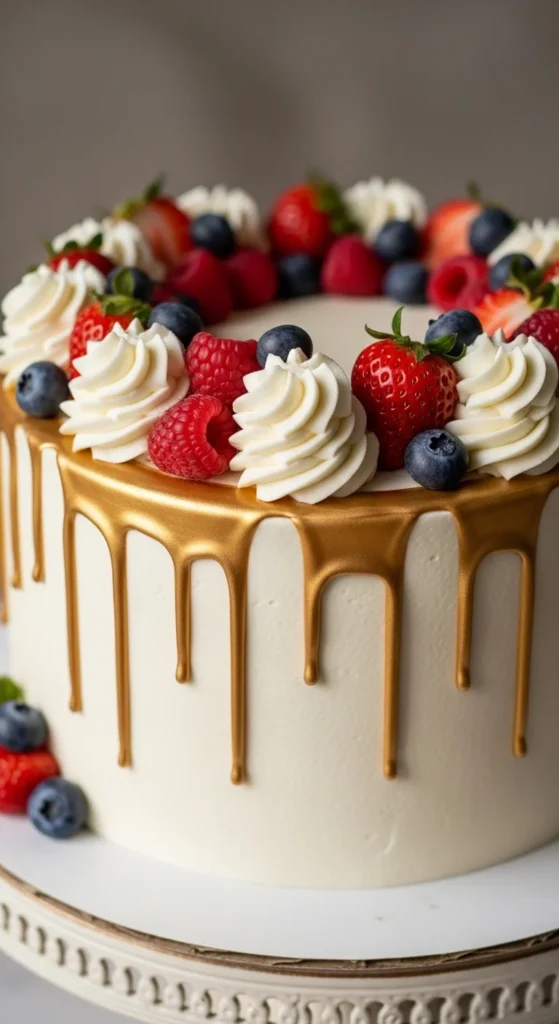
Step 7: Try Trendy Finishes (Make It Wow)
Want that modern bakery look? Try these upgrades.
Metallic gold drips
- Use white chocolate ganache
- Brush with edible gold paint
- Apply 2 coats for shine
Color matching
- Tint white ganache with gel food coloring
- Match to buttercream palette
Chocolate tones
- Mix milk + dark chocolate for warm browns
Drip + swirl combo
Pipe buttercream rosettes on top after ganache sets.
These details instantly upgrade the cake from simple to stunning.
Quick Troubleshooting Guide
Drips too long?
→ Cake not cold enough
Drips too short?
→ Ganache too thick
Ganache dull?
→ Too cool or too thick
Top overflow?
→ Too much ganache on surface
Uneven sides?
→ Spoon used instead of squeeze bottle
Small tweaks make a big difference.
Final Thoughts
A trendy drip cake comes down to three simple rules:
- Chill the cake
- Get the ratio right
- Test the drip first
After that, it’s just decorating fun.
Once you try this method, you’ll realize drip cakes are way easier than they look—and way more impressive.
Save this guide for your next celebration and enjoy making bakery-style drip cakes right in your own kitchen. 🎂