There’s something instantly elegant about a marble cake. Soft swirls of white and gray, hints of gold, and those dreamy stone-like veins make it look like it came straight from a boutique bakery window. The best part? You don’t need fancy tools or pro skills to pull it off at home.
With a little buttercream (or fondant), a palette knife, and a few simple techniques, you can create a gorgeous marble effect cake design that looks polished, modern, and completely Pinterest-worthy.
Ready to make your cake look like edible art? Let’s walk through it step-by-step.
What Is a Marble Effect Cake?
A marble cake design mimics the look of natural stone.
Think:
- Soft color swirls
- Blended streaks
- Organic lines
- Slight texture
Instead of sharp edges or perfect patterns, you’re going for imperfect and flowing. That’s what makes it look realistic.
The technique works beautifully with:
- Buttercream frosting
- Fondant
- Ganache
- Even mirror glaze
Buttercream is the easiest place to start, especially for beginners.
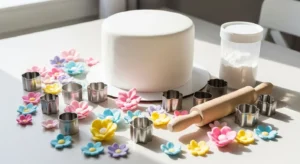
Gather Your Tools & Ingredients First
Having everything ready makes decorating smoother (and way less messy).
For the cake
- Baked and cooled cake layers
- Buttercream frosting (white base + tinted colors)
- Food gel colors (gray, black, beige, or pastel tones)
Tools
- Offset spatula
- Bench scraper or cake smoother
- Small palette knife or spoon
- Turntable (helpful but optional)
Tip: Make more frosting than you think you’ll need. Marble blending takes a little extra.
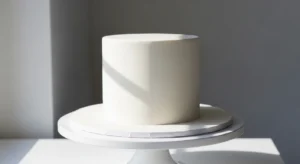
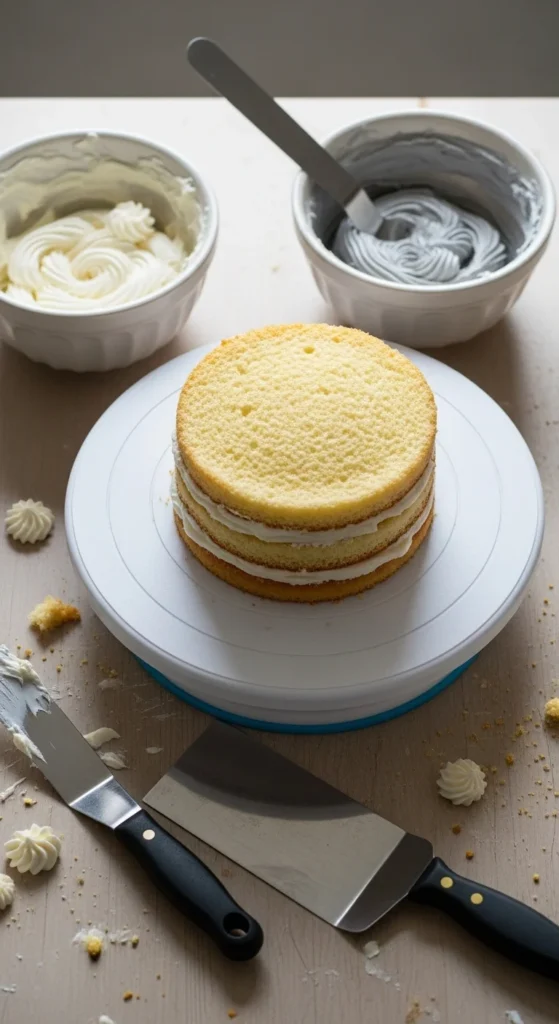
Step 1: Crumb Coat and Chill
Before creating the marble look, you need a clean base.
Here’s how:
- Stack and fill your cake layers.
- Spread a thin crumb coat of frosting.
- Chill for 20–30 minutes until firm.
This traps crumbs and gives you a smooth surface to decorate on.
Think of this step as priming a canvas before painting.
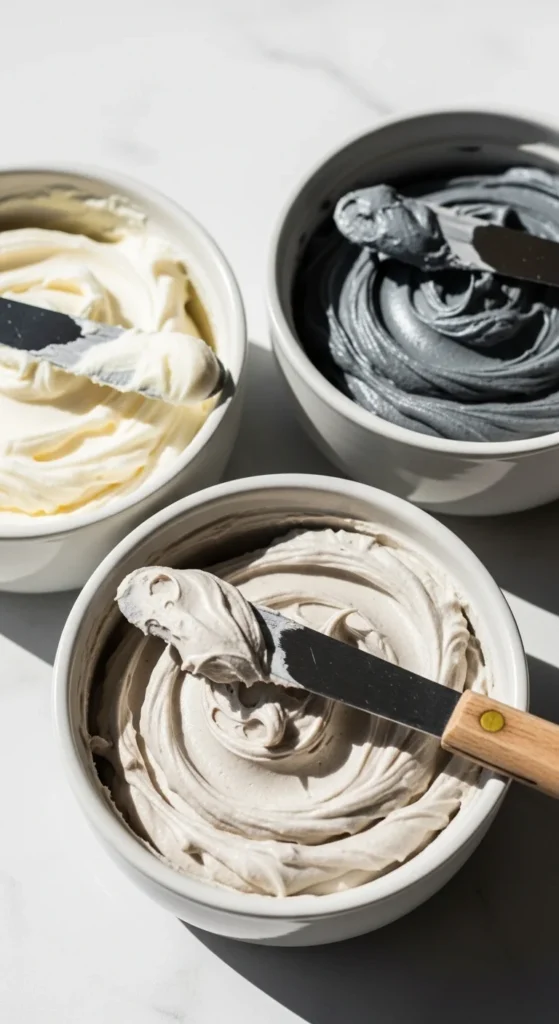
Step 2: Mix Your Marble Colors
Now the fun part — choosing your shades.
Classic marble tones:
- White + light gray + dark gray
- White + blush + gold
- White + navy + silver
- Beige + cream + mocha
How to mix:
- Divide buttercream into bowls
- Add tiny amounts of gel color
- Stir gently for soft tones
Don’t overmix. Slight variations look more natural.
Step 3: Apply Random Patches of Frosting
Instead of spreading one color at a time, dab colors directly onto the cake.
Technique:
- Use a spoon or spatula
- Add random patches of each shade
- Cover entire cake loosely
It will look messy at first — that’s perfect.
Don’t aim for symmetry. Marble is organic and unpredictable.
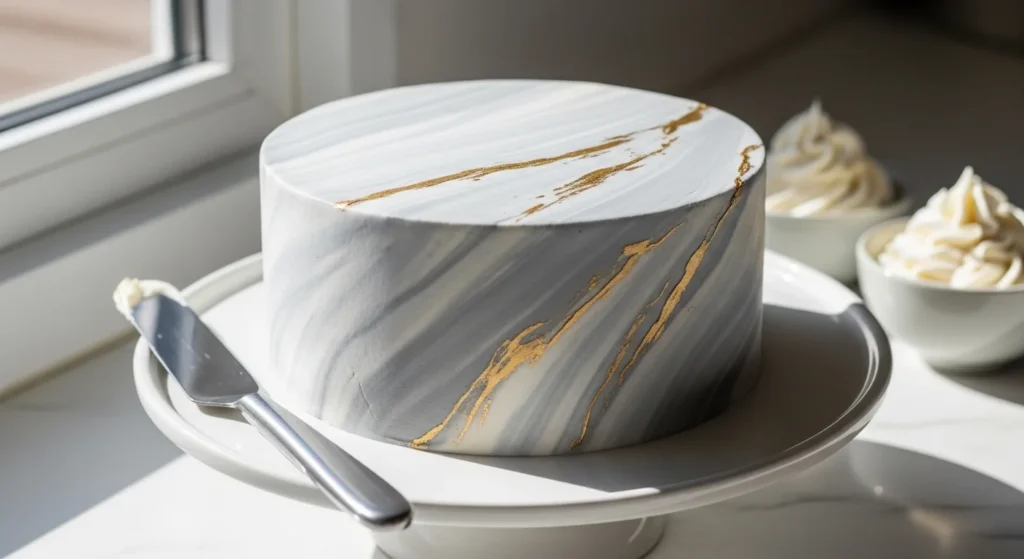
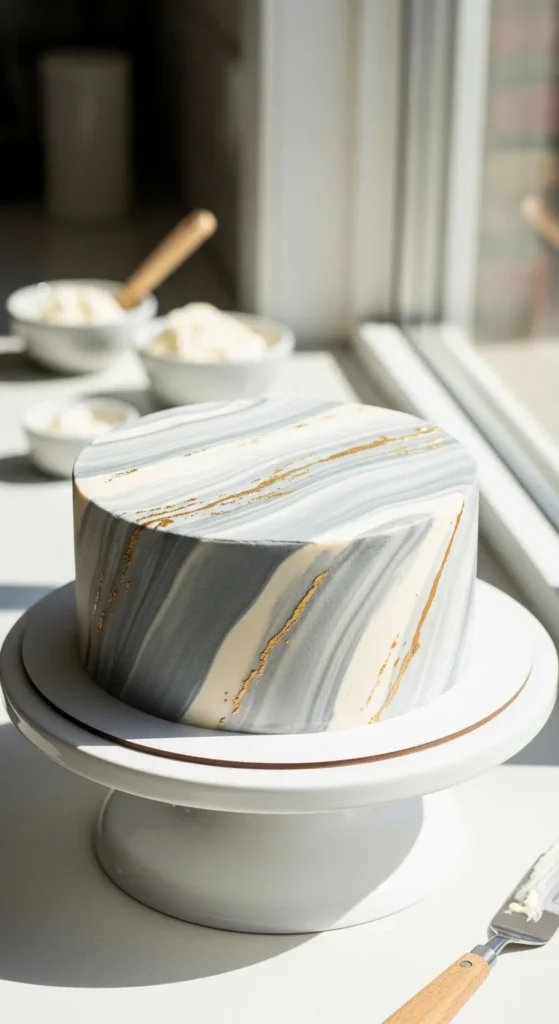
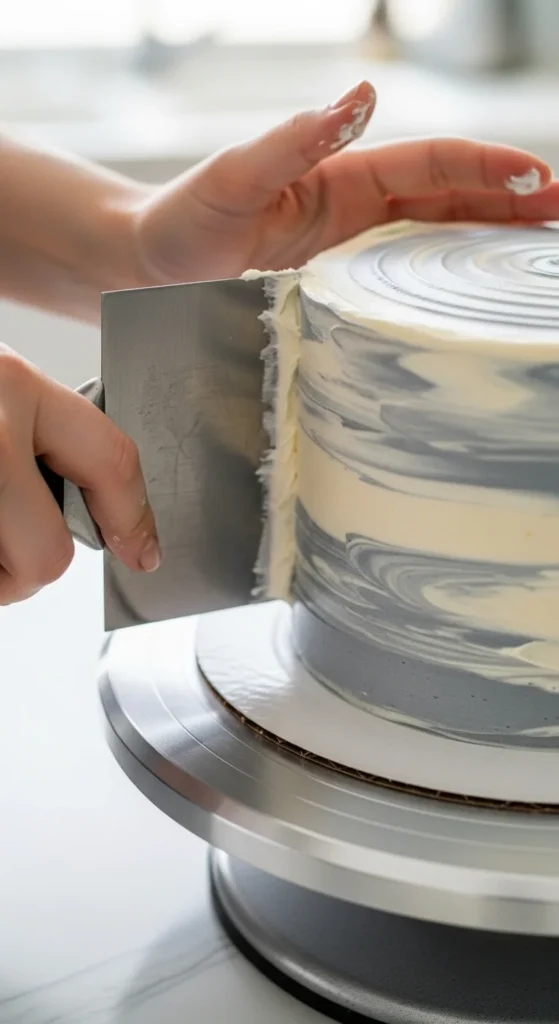
Step 4: Smooth and Blend the Swirls
This step creates the magic marble effect.
How:
- Hold your bench scraper against the cake.
- Slowly rotate the turntable.
- Smooth in one steady motion.
You’ll see the colors stretch and blend into beautiful streaks.
If needed:
- Add more frosting to gaps
- Smooth again lightly
Stop once you see soft veining. Over-smoothing makes colors muddy.
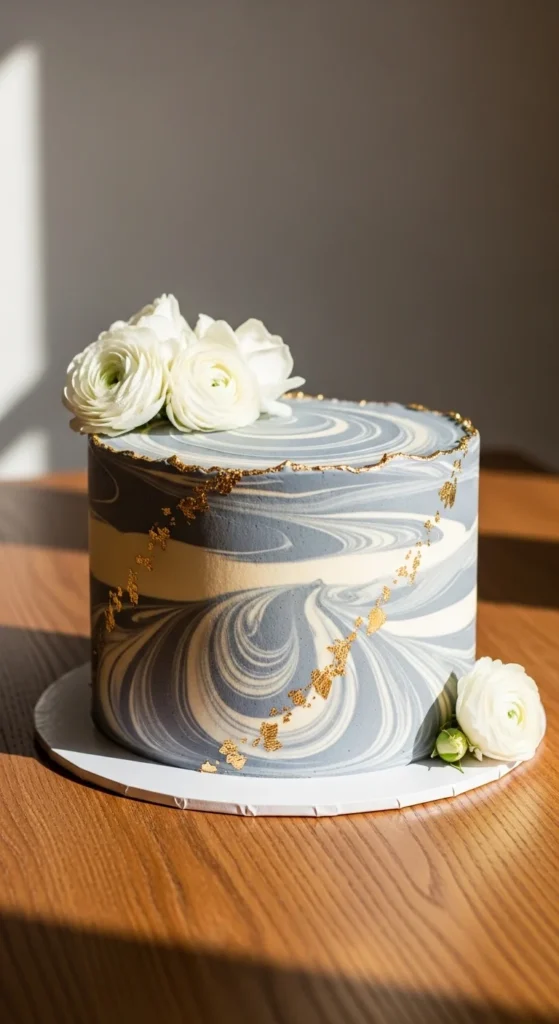
Step 5: Add Extra Marble Details
Want a more dramatic stone look? Add accents.
Try:
- Thin lines of darker frosting
- Gold leaf flakes
- Edible gold paint streaks
- Light spatula textures
- Palette knife swipes
For veins:
- Dip a toothpick in darker frosting
- Drag lightly across surface
Small details give that luxury marble vibe.
Less is more here — a few streaks go a long way.
Step 6: Decorate the Top
Now style the top to finish the look.
Simple ideas:
- Fresh flowers
- Macarons
- Chocolate shards
- Minimal piping
- Gold sprinkles
- A smooth flat finish
Keeping it clean helps the marble shine.
Helpful Tips for Perfect Results
Keep these in mind while decorating:
- Work with chilled buttercream
- Use light pressure when smoothing
- Clean scraper between passes
- Don’t overblend
- Keep colors soft, not too dark
And remember — every marble cake will look slightly different. That’s the charm.
No two are ever the same.
Final Thoughts
Creating a marble effect cake design is surprisingly simple and incredibly satisfying. With just a few colors and a smoother, you can turn an ordinary cake into something that looks artistic and modern.
Perfect for birthdays, weddings, showers, or any special occasion.
Give it a try on your next bake and watch everyone ask, “Did you really make that?”
Save this guide for later and start swirling! 🍰