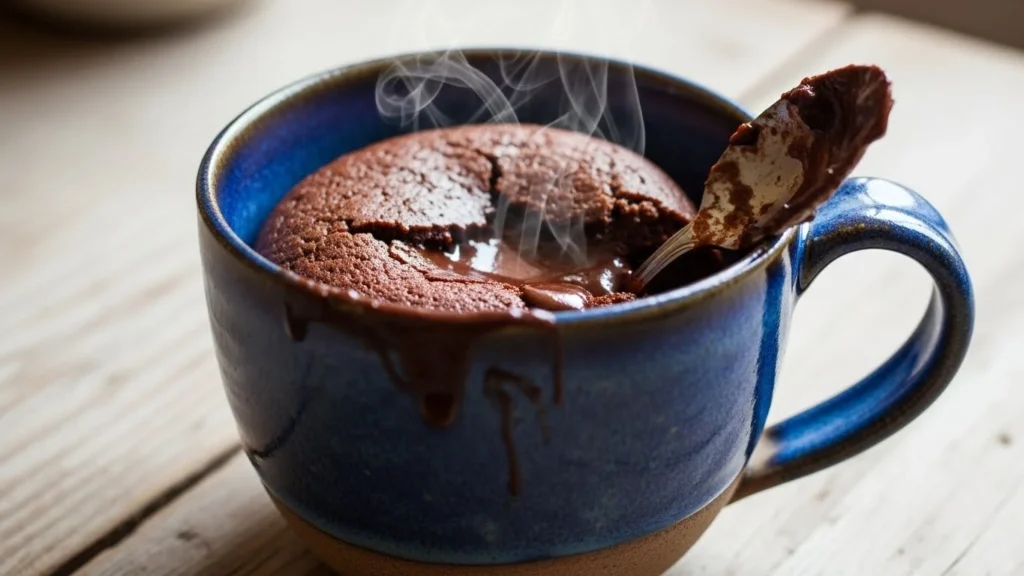
Craving cake right now but don’t want to bake a whole one, wash dishes, or wait an hour? Enter the mug cake—the cozy, single-serve dessert that goes from pantry to spoon in minutes. 🍰 It’s warm, fluffy, and endlessly customizable, making it perfect for late-night cravings, study breaks, or a quick sweet fix after dinner.

If you’ve ever made a mug cake that turned out rubbery or dry, don’t worry. This guide walks you through the right way to make a mug cake in under 5 minutes—soft, tender, and totally satisfying.
Why Mug Cakes Actually Work
Mug cakes rely on a simple idea: small volume + microwave heat = fast baking. Because the batter is tiny, it cooks evenly in a short time—if the ratios are right.
What makes a good mug cake:
- Enough moisture (oil or milk)
- Just a little leavening
- Gentle mixing
- Short cook time
When those elements line up, you get cake—not sponge or brownie brick.
The Basic Mug Cake Formula (Memorize This)
Before we jump into flavors, let’s talk structure. Nearly every successful mug cake follows this simple balance:

Core Ingredients
- Flour – structure
- Sugar – sweetness + moisture
- Milk – soft crumb
- Oil or butter – richness
- Baking powder – lift
- Pinch of salt – balance
Once you understand this, you can swap flavors endlessly.
Step-by-Step: How to Make a Mug Cake in Under 5 Minutes
This method works for vanilla, chocolate, or mix-ins.
Step 1: Choose the Right Mug
- Use a microwave-safe mug
- At least 12 oz capacity
- Straight sides work best for even cooking
Too small = overflow disaster.
Step 2: Mix Dry Ingredients First
Add to your mug:
- 4 tablespoons all-purpose flour
- 2 tablespoons sugar
- 2 tablespoons cocoa powder (for chocolate cake)
- ¼ teaspoon baking powder
- Tiny pinch of salt
Stir well to break up lumps.
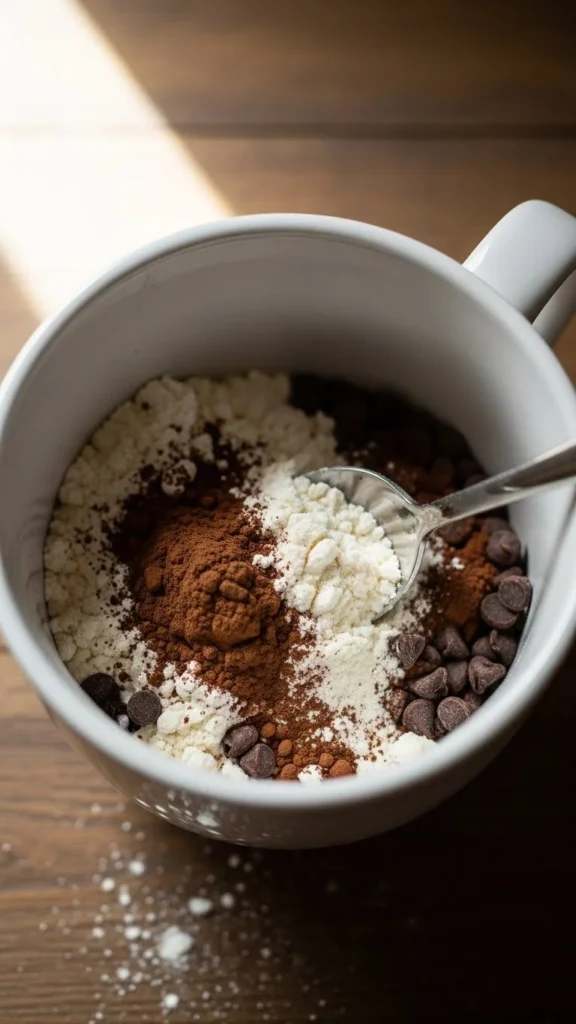
Mixing dry ingredients first prevents pockets of flour or baking powder.
Step 3: Add Wet Ingredients
Stir in:
- 3 tablespoons milk
- 2 tablespoons neutral oil (or melted butter)
- ¼ teaspoon vanilla extract
Mix gently until smooth. Scrape the bottom and sides to make sure everything is combined.
The batter should be:
- Pourable
- Thick but smooth
- No dry patches
Step 4: Microwave (Timing Is Everything)
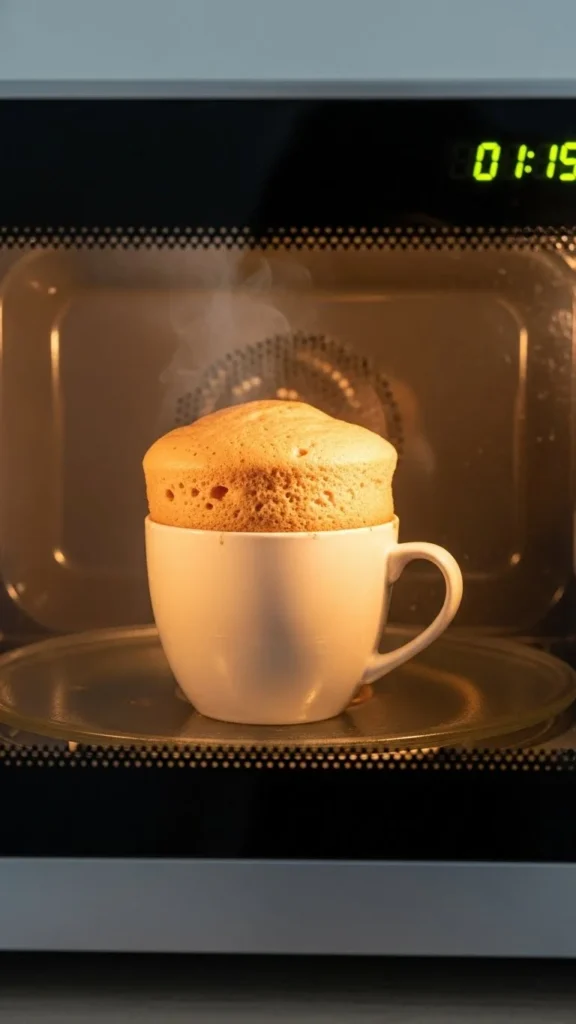
- Microwave on high for 60–90 seconds
- Start with 60 seconds
- Add 10-second bursts if needed
The cake is done when:
- The top looks set
- The center springs back lightly
- No wet batter pools on top
⚠️ Overcooking is the #1 reason mug cakes turn rubbery.
How to Customize Your Mug Cake
This is where mug cakes shine—small tweaks, big payoff.
Flavor Add-Ins
- Chocolate chips
- Peanut butter swirl
- Nutella spoonful
- Chopped nuts
- Sprinkles
- Cinnamon or espresso powder
Add 1–2 tablespoons max to avoid weighing the cake down.
Common Mug Cake Mistakes (and How to Fix Them)
“My mug cake is dry”
- Too much flour
- Overcooked
- Not enough fat
Fix: Add 1 teaspoon milk next time and reduce cook time.
“It’s rubbery”
- Overmixed
- Too much baking powder
- Overheated
Fix: Stir gently and microwave less.
“It overflowed”
- Mug too small
- Too much batter
Fix: Use a bigger mug or fill only halfway.
Toppings That Make It Feel Fancy
A simple topping turns a mug cake into a dessert moment.

Try:
- Whipped cream
- Ice cream
- Powdered sugar
- Chocolate syrup
- Fresh berries
Add toppings after cooking so the cake stays fluffy.
Can You Make Mug Cakes Ahead of Time?
Mug cakes are best fresh, but here’s what works:
- Mix dry ingredients ahead and store in a jar
- Add wet ingredients right before cooking
- Reheat gently (10–15 seconds) if needed
Avoid cooking and storing—they dry out fast.
Final Takeaway
Mug cakes prove that dessert doesn’t need planning, baking pans, or patience. With the right ratios and a quick microwave burst, you can have a warm, comforting cake in under 5 minutes—no mess, no stress.
Once you master the base recipe, the flavor options are endless.
👉 Save this recipe for later, because once you realize how easy mug cakes are, they become a weeknight favorite you’ll come back to again and again. ☕🍰


