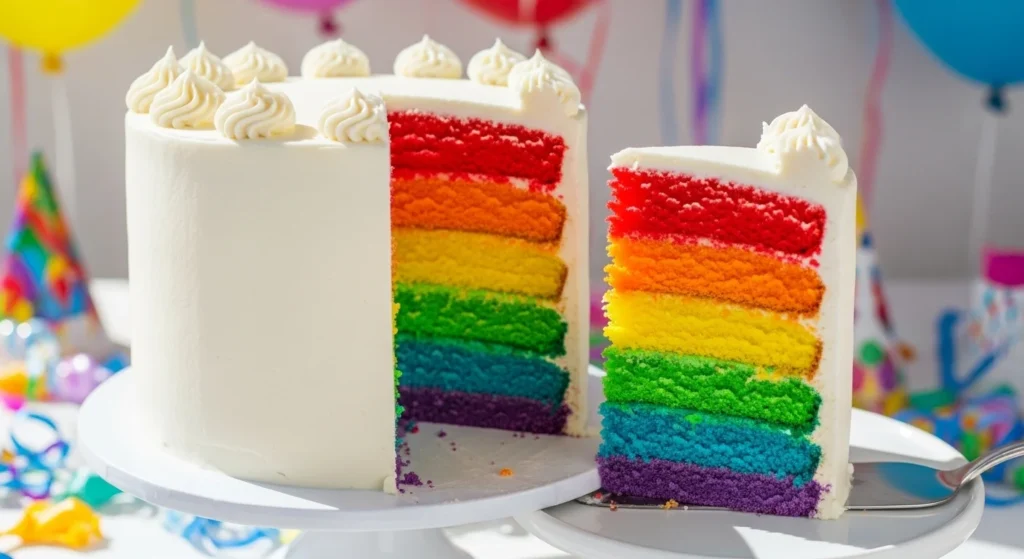
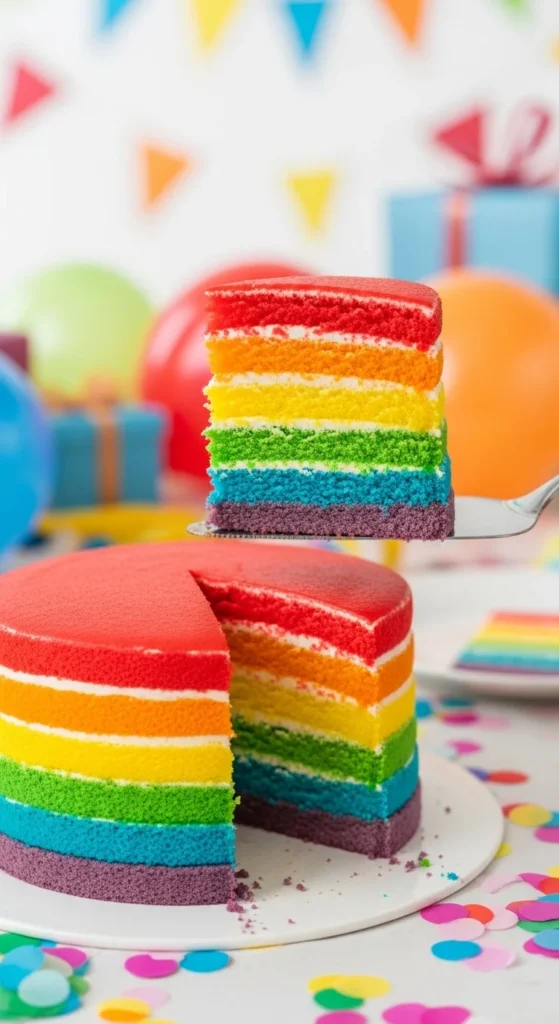
Cut into a plain-looking cake… and boom — bright rainbow stripes inside.
That moment never gets old.
Rainbow cakes are pure joy. They’re colorful, playful, and instantly steal the spotlight at birthdays, kids’ parties, and celebrations. And while they look complicated, the truth is they’re surprisingly simple once you know a few clever tricks.
You don’t need six tall layers or advanced decorating skills. With smart batter dividing, easy piping hacks, and a couple beginner-friendly tools, you can create a rainbow cake that looks bakery-made.
Let’s walk step-by-step through the easiest methods to get those bold, beautiful rainbow reveals.
Step 1: Choose Your Rainbow Style First
Before mixing colors, decide how you want your rainbow to appear.
Popular rainbow cake styles:
- Classic stacked rainbow layers
- Single-layer sliced “3D rainbow”
- Buttercream rainbow piping inside
- Rainbow comb-scraped exterior
- Fondant rainbow toppers
If you want the easiest beginner option, go with:
👉 Even batter layers or piping logs
Both give clean slices with less stress.
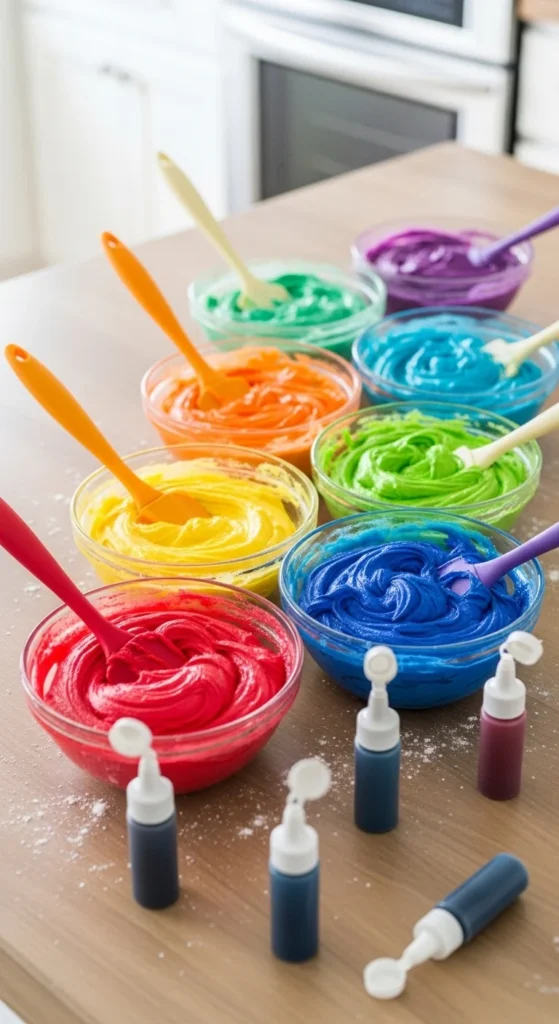
Step 2: Divide Batter Evenly (The Secret to Clean Colors)
Uneven colors ruin the rainbow effect. If one layer is thicker or darker, it throws everything off.
Pro trick: weigh your batter
Instead of eyeballing:
- Divide into 6 bowls
- Weigh about equal portions (around 150g each)
- Tint each bowl separately
Suggested colors:
- Red
- Orange
- Yellow
- Green
- Blue
- Purple
Use gel food coloring for bold shades without thinning the batter.
Mix gently so you don’t overwork the batter.
Step 3: Pick Your Build Method
Here are two easy methods that always impress.
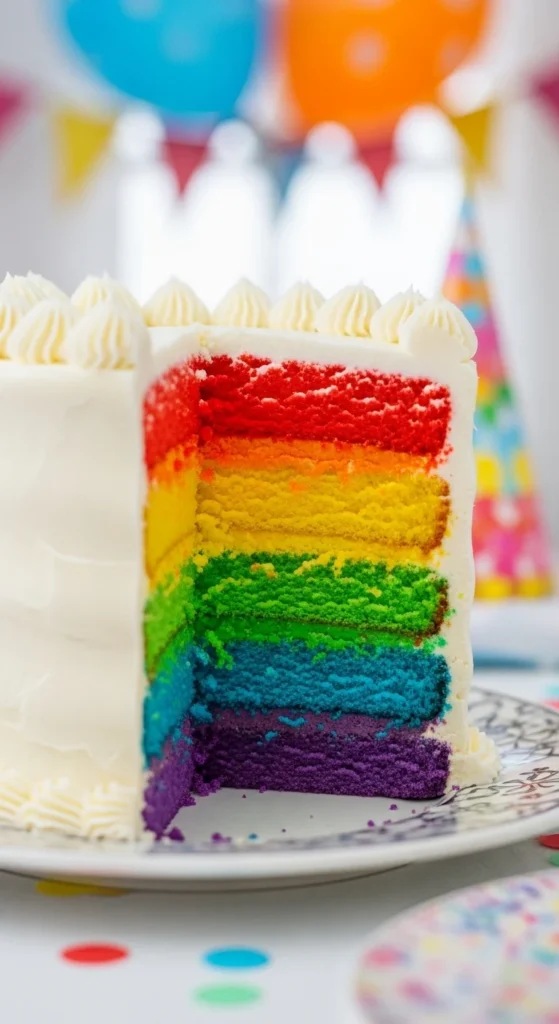
Method 1: Classic Rainbow Layers (Most Popular)
This is the iconic rainbow cake everyone recognizes.
Steps:
- Pour each colored batter into separate pans
- Bake evenly
- Cool completely
- Stack with thin buttercream between layers
Keep layers thin so the stripes look crisp when sliced.
Tip: Chill layers before stacking so they don’t slide.
When cut, you get perfect horizontal rainbow lines.
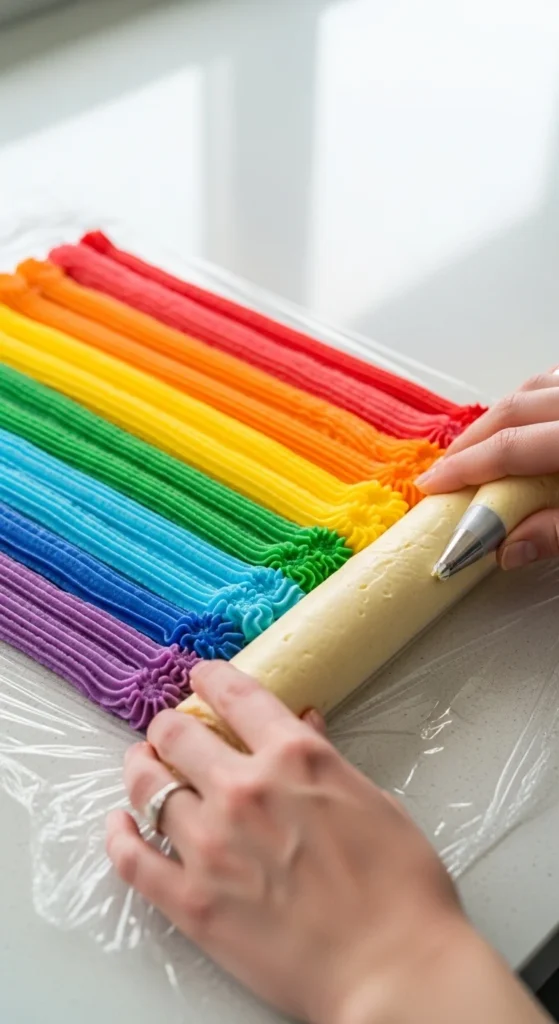
Method 2: Plastic Wrap Rainbow Piping Log (Cleaner & Faster)
This is a game-changer for buttercream rainbows — and way less messy.
Instead of switching piping bags constantly:
How it works:
- Lay plastic wrap flat
- Pipe colored buttercream lines side-by-side
- Roll into a tight log
- Twist ends
- Slide into piping bag
Now all colors pipe out at once in one smooth stripe.
This method:
- Prevents color bleed
- Saves time
- Creates perfect rainbow arcs
It’s one of the easiest pro hacks.
Step 4: Frost Smoothly for Maximum Impact
Rainbow cakes look best with simple, clean exteriors so the inside surprise shines.
Go for:
- White buttercream
- Pastel frosting
- Smooth finish
Use:
- Turntable
- Offset spatula
- Bench scraper
Keep sides sleek and minimal.
Too many decorations distract from the rainbow reveal.
Step 5: Add Fun Rainbow Details Outside (Optional)
If you want color on the outside too, try easy beginner techniques.
Easy ideas:
🌈 Comb-Scraped Rainbow Rings
- Spread colored frosting bands around cake
- Smooth with cake comb
- Creates flat rainbow stripes
🌈 Buttercream Arcs
- Pipe curved rainbow lines on top
- Add small cloud dollops at ends
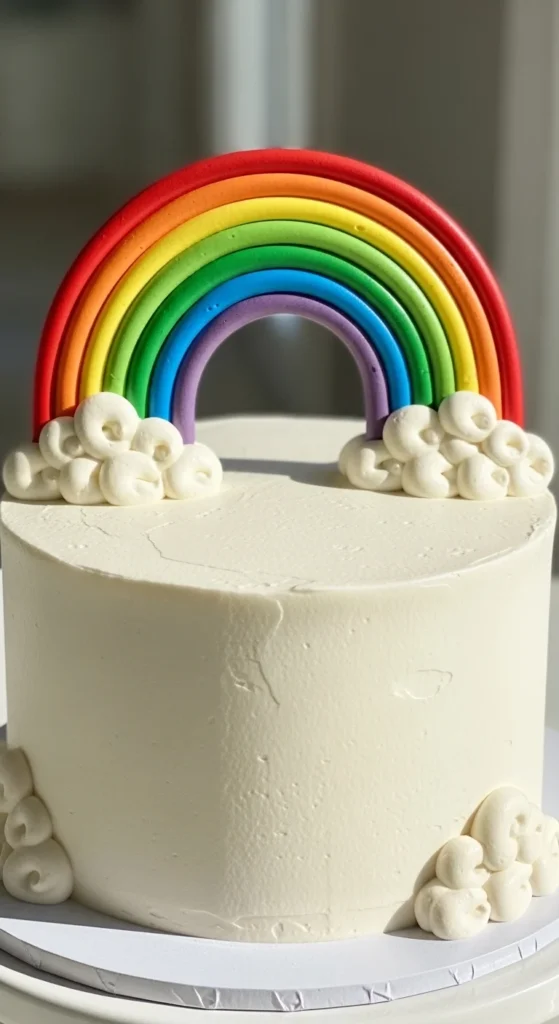
🌈 Fondant Rainbow Topper
- Shape colored fondant ropes
- Form into arch
- Let dry
- Secure with toothpicks
🌈 Sprinkle or stencil dots
Great for subtle mini rainbows without tons of frosting.
Keep it playful but simple.
Step 6: Slice for the Big Reveal
Presentation matters.
For clean slices:
- Chill cake 30 minutes first
- Use a hot knife
- Wipe blade between cuts
This keeps colors sharp and neat.
And don’t forget to capture that first slice — it’s the best moment.
Quick Troubleshooting Tips
Colors bleeding?
→ Use plastic wrap piping log or chill frosting first
Uneven layers?
→ Weigh batter portions
Leaning stack?
→ Chill layers and use thin filling
Frosting messy?
→ Chill crumb coat before final smoothing
Rainbow not centered?
→ Lightly score a middle guide line first
Small adjustments make a huge difference.
Final Thoughts
Rainbow cakes look magical, but they’re really just smart prep and simple techniques.
Remember:
- Divide batter evenly
- Chill layers
- Use piping hacks
- Keep outside clean
- Let the inside shine
That’s all you need to wow your guests.
Save this guide for your next celebration and get ready for those “OMG look at the colors!” reactions when you slice. 🌈🎂