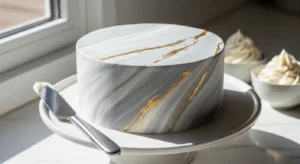
Rosette cakes are one of those magical desserts that look straight out of a bakery window — yet they’re surprisingly simple once you know the technique.
Rows of soft buttercream roses wrap around the cake like petals on a bouquet. Add an ombré color fade and suddenly your homemade cake looks wedding-worthy, birthday-ready, and totally Pinterest famous.
The best part? You only need one piping tip and a few smart tricks.
Let’s walk through it step by step so you can create perfectly swirled buttercream roses at home.
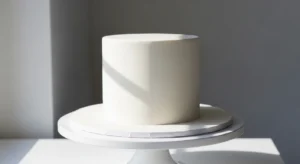
Step 1: Prep the Cake Like a Pro
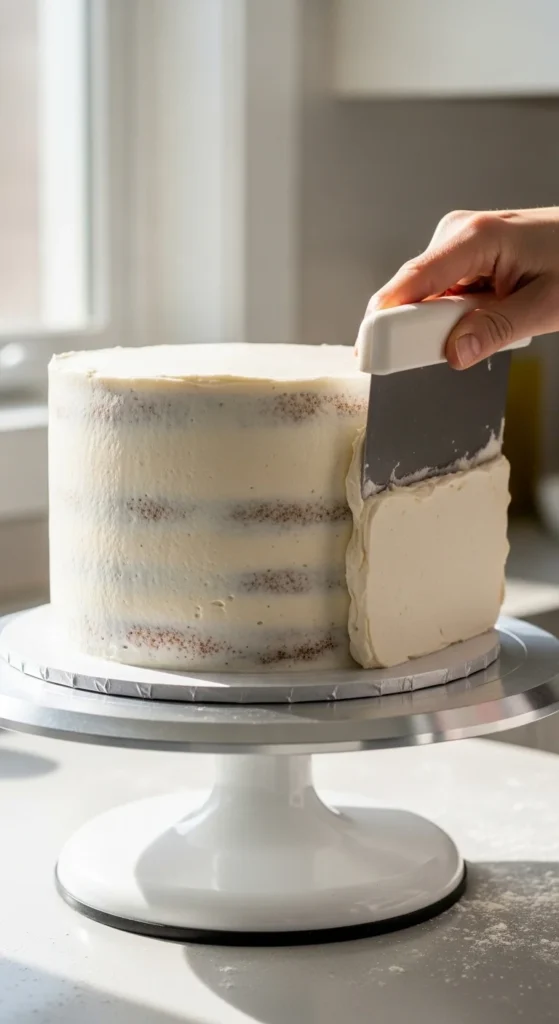
Before piping anything, you need a smooth, stable base.
Rosettes stick best to a firm cake — not soft or warm frosting.
Start with:
- Fully cooled cake layers
- Level tops (no domes)
- Filled and stacked layers
Then apply a crumb coat:
- Thin layer of buttercream all over
- Smooth with a scraper
- Chill 30 minutes
Why this matters:
- Traps crumbs
- Creates a solid surface
- Prevents rosettes from sliding
Pro tip: Use the same color frosting as your rosettes so any tiny gaps disappear.
Step 2: Gather Your Tools
Rosette cakes are very beginner-friendly.
You only need a few basics.
Must-haves:
- Wilton 1M star tip (classic rosette look)
- Piping bag
- Offset spatula
- Turntable
- Buttercream frosting
Optional upgrades:
- Italian or Swiss meringue buttercream (holds shape better)
- Extra star tips (2D, 6B for different textures)
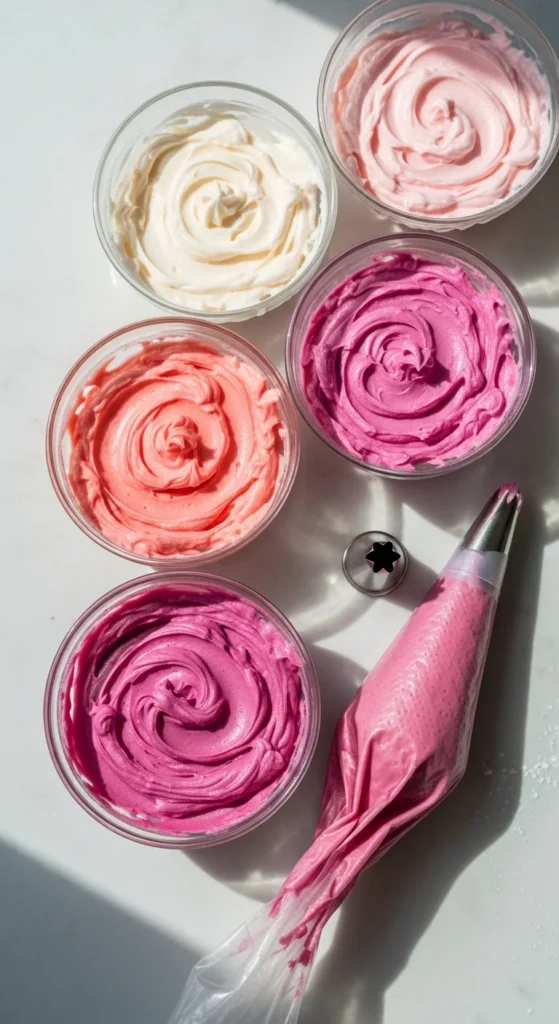
Fill your piping bag halfway. Overfilling makes control harder and tires your hands.
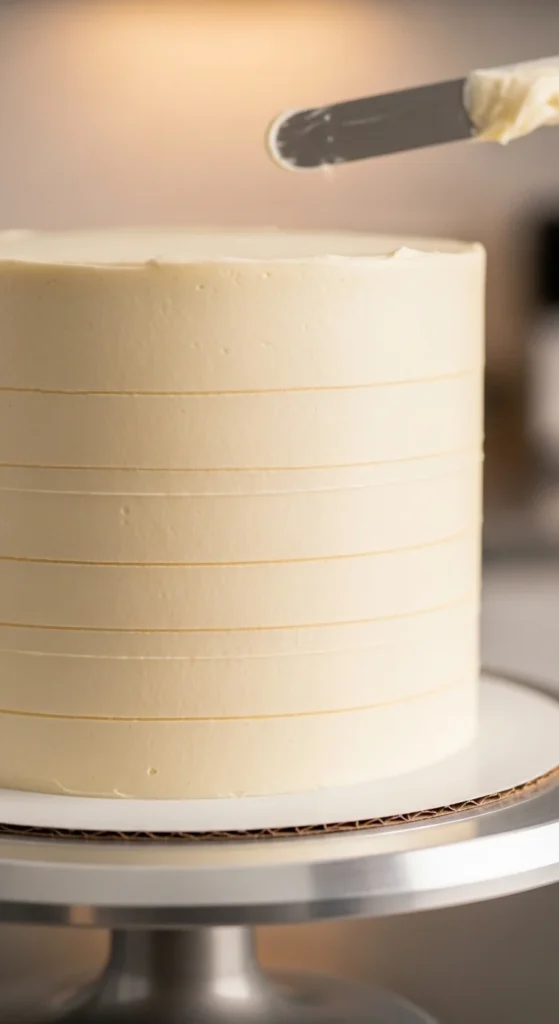
Step 3: Mark Guide Lines for Perfect Rows
This is the secret most beginners skip.
Guide lines keep rows even and professional.
How:
Use your offset spatula or scraper to lightly mark:
- 3 horizontal lines
- Around the cake
This creates 4 even rows of rosettes.
Now you have a roadmap.
No guessing. No crooked swirls.
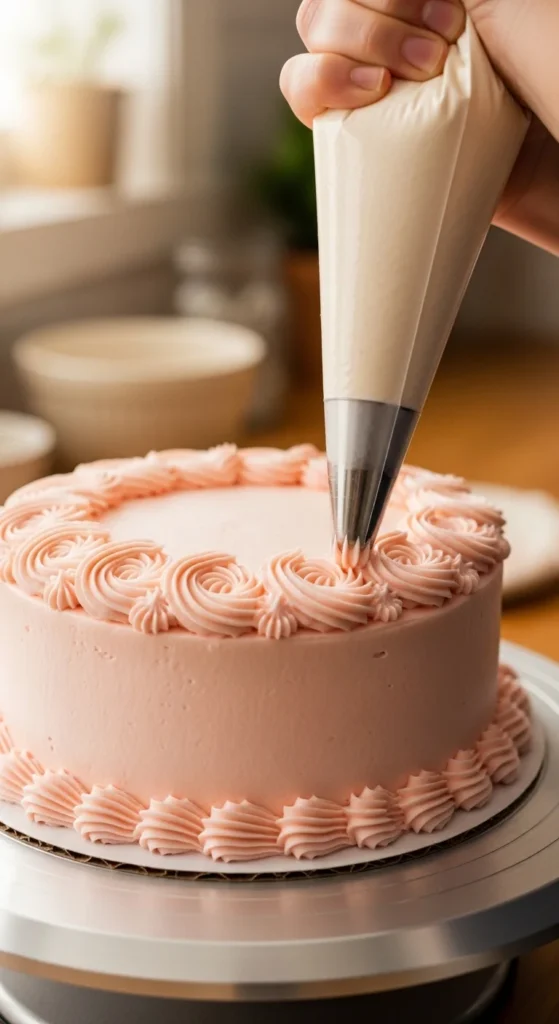
Step 4: Learn the Rosette Motion
Rosettes look fancy but are just simple spirals.
Basic motion:
- Start in the center
- Apply steady pressure
- Pipe outward in a circle
- Stop gently
That’s it.
Key tricks:
- Hold tip at 90°
- Keep wrist steady
- Rotate cake with turntable
- Pipe clockwise for consistency
Practice on parchment first. Scrape frosting back into the bowl and reuse.
Step 5: Hide the “Tail” for Seamless Swirls
This one trick makes your cake look professional.
Every rosette has a tiny “tail” where you stop piping.
To hide it:
👉 Start your next rosette directly over the tail of the previous one.
The new swirl covers the seam automatically.
Result: smooth, connected roses with no messy ends.
Work row by row around the cake.
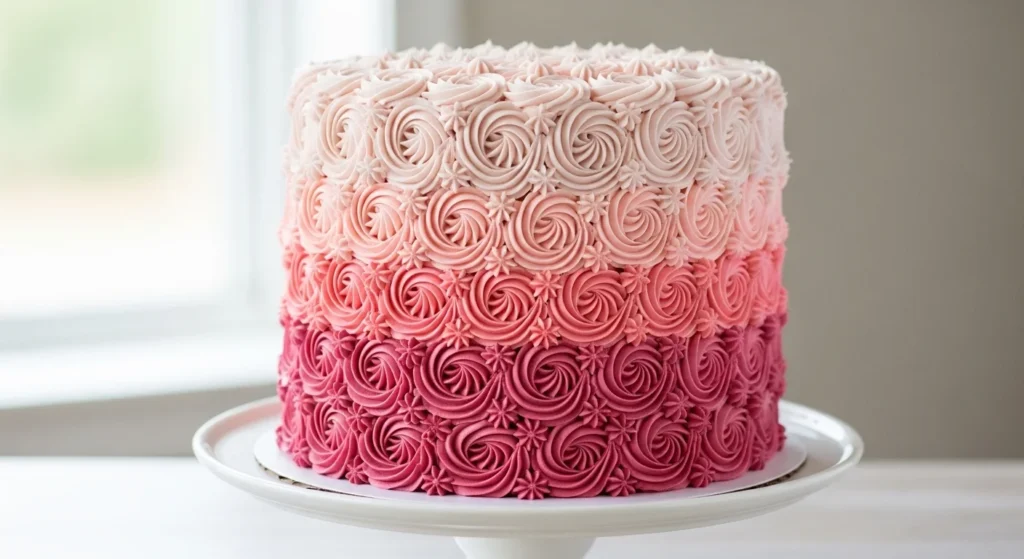
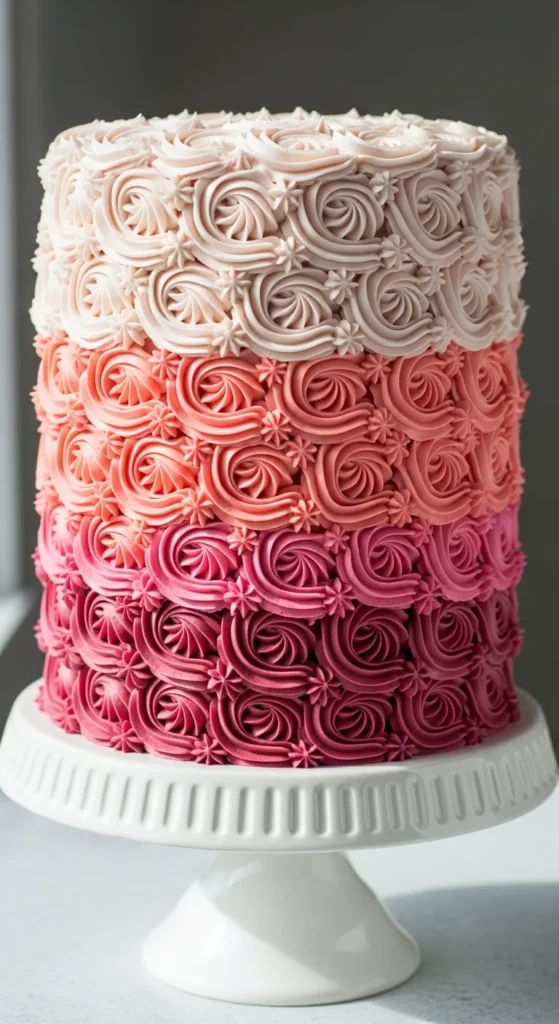
Step 6: Create a Beautiful Ombre Gradient
Rosette cakes really shine with color fades.
Dark-to-light gradients add depth and dimension.
Easy ombre method:
Divide frosting into 3–4 bowls:
- Dark shade
- Medium
- Light
- Very light/white
Pipe darkest color at the base.
Move lighter as you go up.
Blend slightly where rows meet.
This creates a soft, romantic look that’s trending everywhere.
Step 7: Pipe the Whole Cake
Now the fun part.
Order of piping:
- Bottom row first
- Then move upward
- Finish with the top
Keep:
- Same swirl direction
- Same pressure
- Same size
Turn the cake, not your wrist. It keeps shapes consistent and saves your hands.
For the top, pipe rosettes tightly packed or spiral them from outside inward.
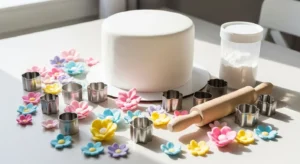
Step 8: Optional Finishing Touches
Rosettes look great alone, but small accents add personality.
Try:
- Sprinkles
- Fresh berries
- Edible gold leaf
- Sugar pearls
- Chocolate shards
Keep decorations minimal so the swirls stay the star.
Quick Troubleshooting
Rosettes sliding?
→ Chill cake longer
Uneven sizes?
→ Use guide lines and steady pressure
Gaps showing cake?
→ Match crumb coat color
Messy tails?
→ Hide each start point under the next swirl
Hand fatigue?
→ Take short breaks between rows
Final Thoughts
Rosette cakes are one of the easiest ways to make a cake look impressive fast.
Just remember:
- Chill your base
- Use guide lines
- Pipe consistently
- Hide the tails
- Add an ombre fade
That’s it.
Once you try it, you’ll want to make rosette cakes for every birthday, baby shower, and celebration.
Save this guide and start swirling — your next cake might be your prettiest one yet. 🌸🎂