
Chocolate ganache is one of those magical kitchen basics that looks fancy, tastes luxurious, and is surprisingly easy to make. It can be silky enough to pour, thick enough to frost, or whipped into a cloud-like filling—and all from just two main ingredients. ✨

Whether you’re glazing a cake, filling macarons, or spooning it over brownies, this guide will show you exactly how to make chocolate ganache that works every time.
What Is Chocolate Ganache (and Why It’s So Useful)
At its core, ganache is simply chocolate + warm cream. When combined correctly, they form a smooth, rich mixture that’s endlessly versatile.
You can use ganache as:
- A shiny cake glaze
- A thick frosting
- A truffle base
- A whipped filling
- A dessert sauce
The secret lies in the ratio and temperature, not complicated techniques.
The Only Ingredients You Need
Ganache doesn’t need much—quality matters more than quantity.

Basic Ingredients
- Chocolate (dark, milk, or white)
- Heavy cream (36–40% fat)
Optional flavor boosters:
- Butter (extra shine)
- Vanilla extract
- Espresso powder
- Liqueurs or extracts
- Sea salt
Best Chocolate to Use
- Use real chocolate bars or couverture
- Avoid chocolate chips (they contain stabilizers that prevent smooth melting)
- Chop chocolate finely for even melting
The Classic Ganache Ratio (This Is Key)
Different uses call for different chocolate-to-cream ratios.
Common Ratios
- 1:1 (equal parts) – pourable glaze or drip cake
- 2:1 (more chocolate) – thick frosting or truffles
- 1:2 (more cream) – sauce for desserts
For example:
- 8 oz chocolate + 8 oz cream = classic ganache
- 8 oz chocolate + 4 oz cream = firm ganache
Step-by-Step: How to Make Perfect Chocolate Ganache
This method works for nearly every ratio and type of chocolate.

Step 1: Heat the Cream
- Warm cream in a saucepan until it just begins to steam
- Do not let it boil (boiling can split the ganache)
Step 2: Pour Over Chocolate
- Place chopped chocolate in a heatproof bowl
- Pour hot cream over it
- Let it sit 2–3 minutes without stirring
Step 3: Stir Gently
- Start stirring from the center
- Use slow, small circles
- Continue until smooth and glossy
If needed, add:
- 1 tablespoon butter for shine
- A pinch of salt to balance sweetness
How to Fix Ganache Problems (Don’t Panic)
Ganache is forgiving—even when things go wrong.
If It Looks Grainy
- Add a splash of warm cream
- Stir gently until smooth
If It’s Too Thin
- Let it cool and thicken naturally
- Or add a bit more melted chocolate
If It’s Too Thick
- Warm slightly over a water bath
- Stir in warm cream, a teaspoon at a time
Turning Ganache Into Frosting or Filling
Let ganache cool and it transforms.
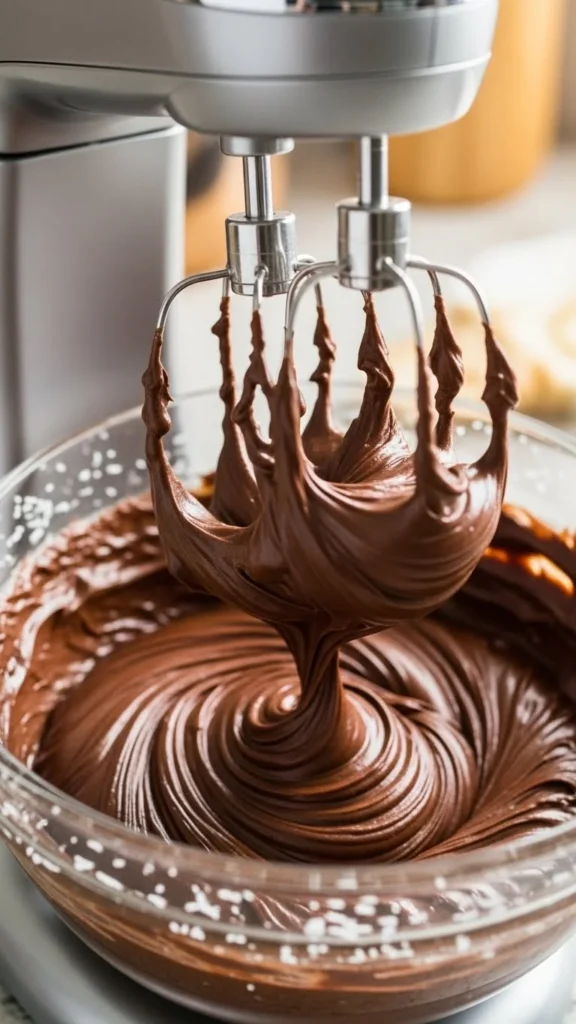
To Make Whipped Ganache
- Let ganache cool until thick but scoopable
- Beat with a mixer on medium speed
- Stop when fluffy and lighter in color
Perfect for:
- Cake fillings
- Cupcake frosting
- Layered desserts
⚠️ Don’t overwhip or it will turn grainy.
Best Ways to Use Chocolate Ganache
Once you master ganache, desserts get a serious upgrade.
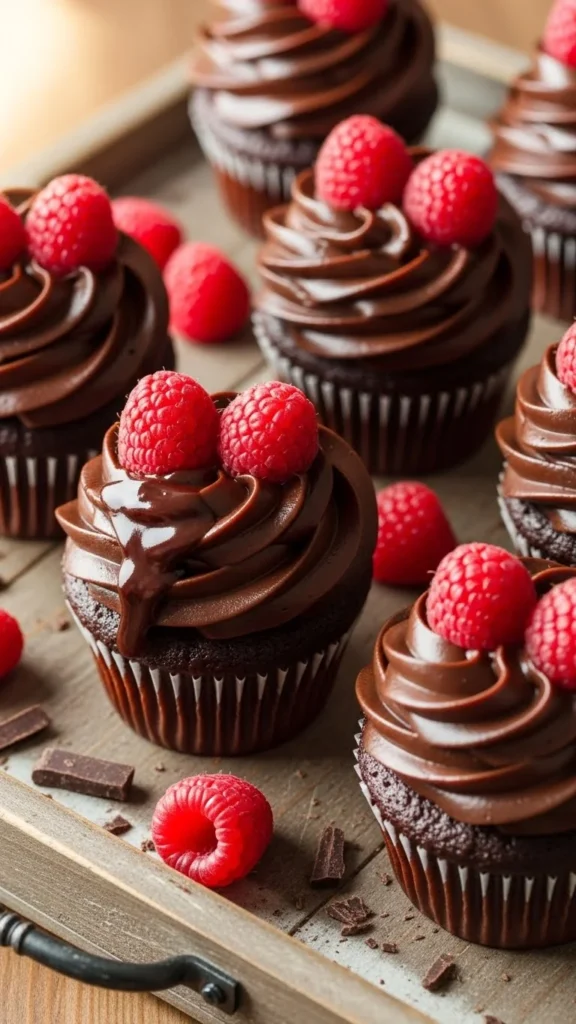
Try it on:
- Chocolate or vanilla cakes
- Cheesecakes
- Brownies
- Tarts
- Ice cream
- Fresh fruit
Ganache pairs beautifully with berries, citrus, coffee flavors, and nuts.
Storage and Make-Ahead Tips
Ganache is great for prepping ahead.
- Room temperature: up to 1 day (cool room)
- Refrigerator: up to 1 week (airtight)
- Freezer: up to 3 months
To reuse:
- Gently reheat until smooth
- Stir, don’t whisk
Final Takeaway
Chocolate ganache proves that simple ingredients can create bakery-level results. Once you understand ratios and timing, you can customize it for nearly any dessert—from elegant cakes to cozy brownies.
It’s rich, flexible, and always impressive.
👉 Save this recipe for later, because once you start making ganache from scratch, store-bought chocolate sauces won’t stand a chance. 🍫


