You know those dessert cups on Pinterest—the ones with perfect layers, clean lines, and colors so pretty they almost look fake? The secret isn’t fancy ingredients or professional tools. It’s intentional layering, a little patience, and knowing what goes where.
The good news? You can absolutely recreate that Pinterest-perfect look at home. Whether you’re making dessert cups for a party, holiday, or just for fun, this guide will walk you through how to layer them so they look polished, balanced, and scroll-stopping.
Start With the Right Cups (Yes, It Matters)
Before you even think about dessert, think about the container. Clear cups are non-negotiable if you want that Pinterest look.
Best options:
- Clear plastic party cups
- Small glass jars
- Stemless glasses
- Mini trifle bowls
Why clear works:
- Layers are visible
- Colors pop
- Desserts instantly look more impressive
Pro tip:
- Use straight-sided cups for cleaner layers
- Smaller cups (6–8 oz) look fuller and more elegant
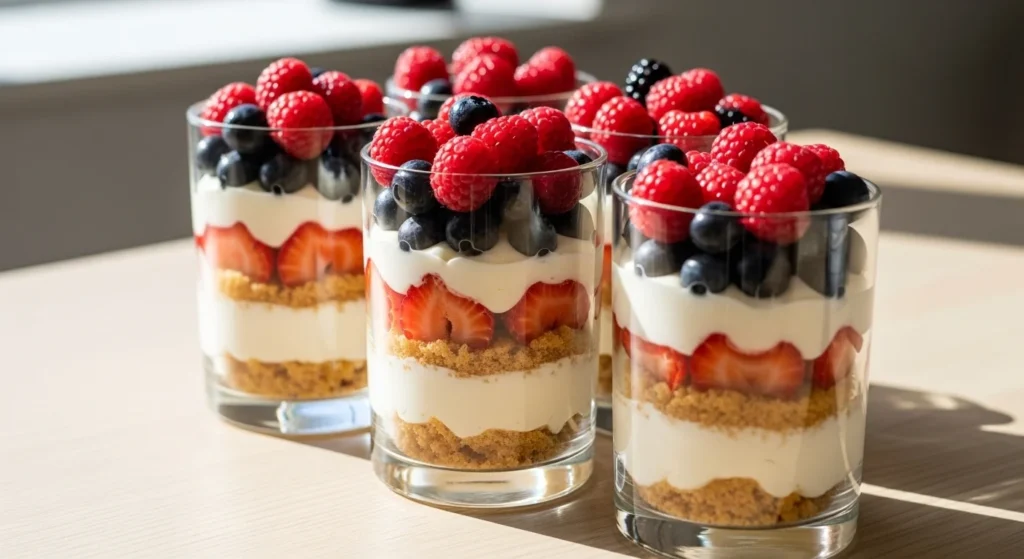
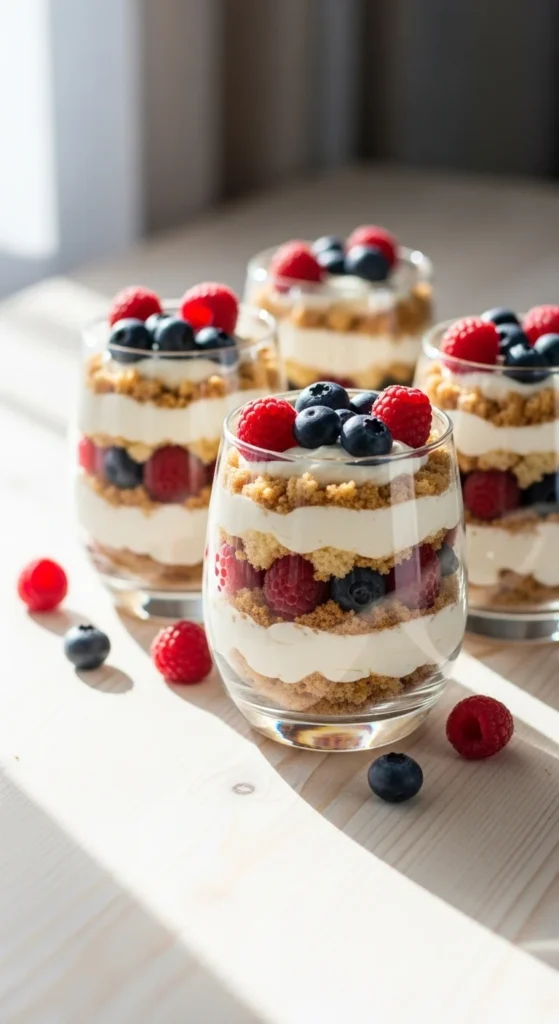
Understand the Layering Order
Pinterest-worthy dessert cups follow a simple structure. Random layering is the fastest way to messy results.
A foolproof layering order:
- Base layer – cake, cookies, brownies, or crumbs
- Creamy layer – whipped cream, pudding, mousse, or frosting
- Flavor layer – fruit, sauce, or filling
- Repeat until full
Why this works:
- Sturdy layers support softer ones
- Cream sticks crumbs to the cup
- Flavors stay balanced
Avoid:
- Starting with sauce (it smears the glass)
- Thick layers all at once
Thin, even layers always win.
Use Texture Contrast for Visual Impact
Pinterest desserts don’t just look good—they feel good to eat.
Aim for contrast:
- Soft + crunchy
- Creamy + crumbly
- Smooth + juicy
Great texture pairings:
- Cake crumbs + whipped cream
- Cookie crumbs + cheesecake filling
- Granola + yogurt mousse
- Brownies + chocolate pudding
If everything is soft, the layers blur together visually.
Quick fix:
- Add a thin crunchy layer between creamy ones
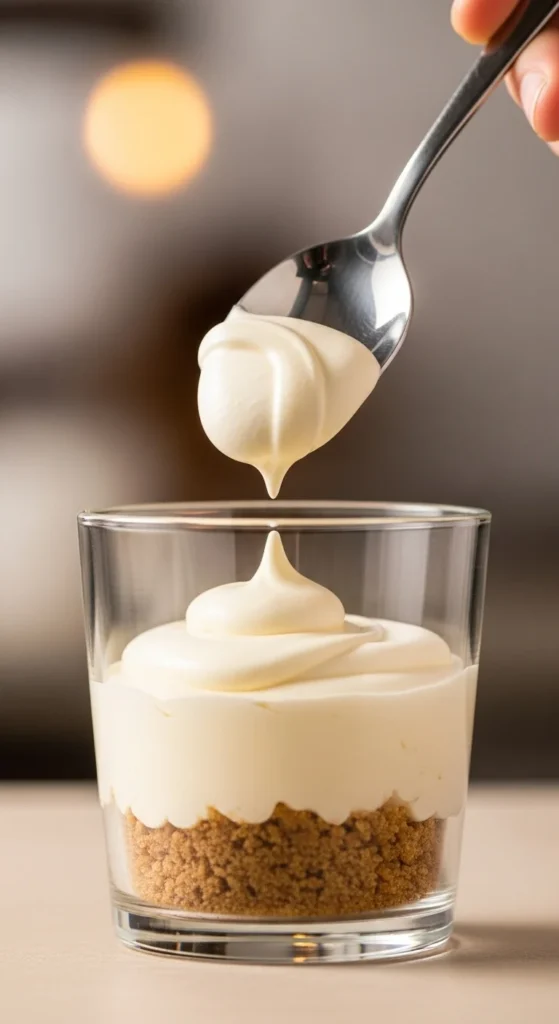
Keep Layers Thin and Even
Thick layers are tempting—but thin layers create that stacked, professional look.
Layering tips:
- Use 1–2 tablespoons per layer
- Gently tap the cup to level
- Wipe the inside rim if needed
Tools that help:
- Small spoon
- Piping bag (or zip-top bag with corner cut)
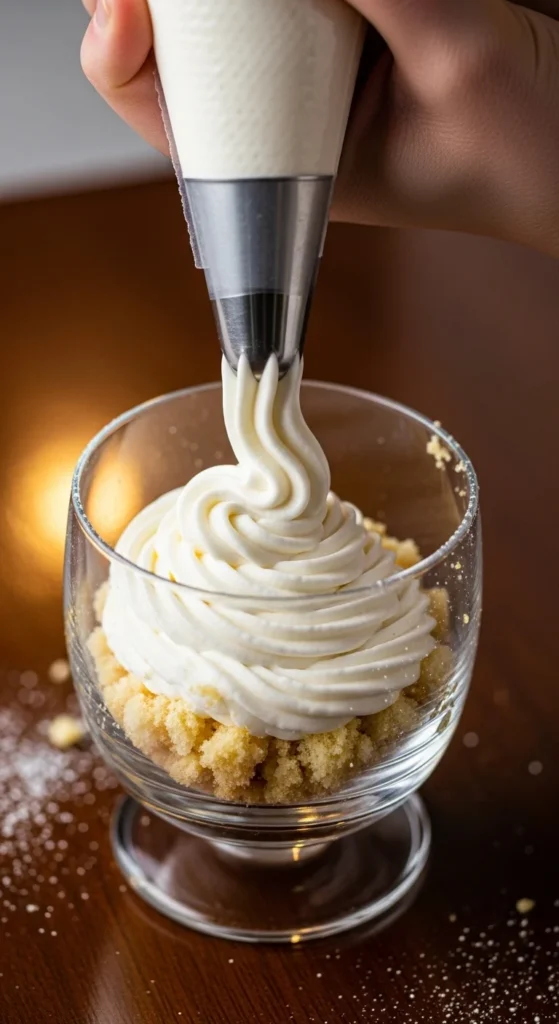
Piping creamy layers instead of spooning makes a huge difference.
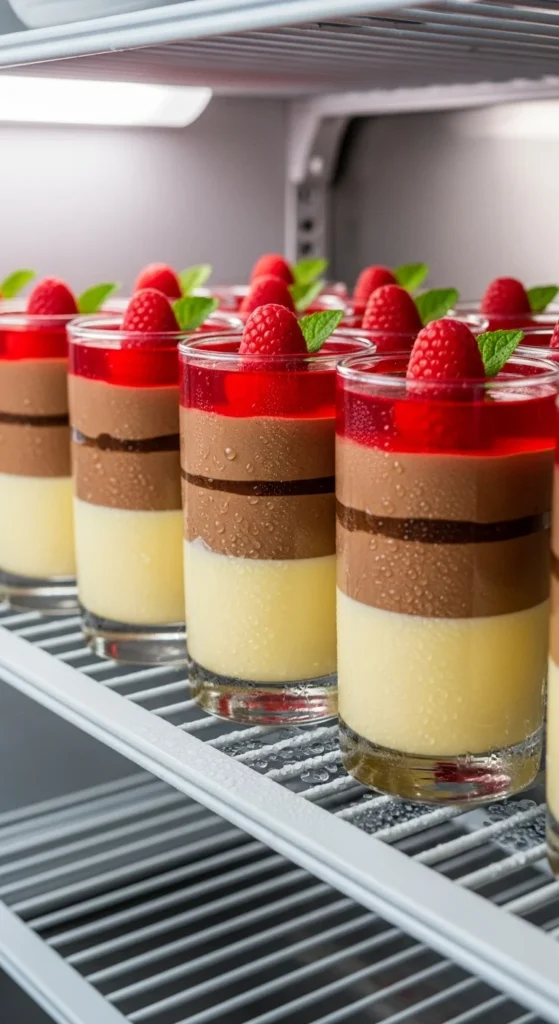
Choose Colors That Photograph Well
Pinterest desserts are all about visual balance.
Best color combinations:
- Chocolate + cream + berry
- Vanilla + caramel + brown crumbs
- Lemon + cream + golden cake
- Strawberry + white cream + biscuit
Design rule:
- Alternate light and dark layers
- Avoid stacking similar colors together
If two layers look too similar:
- Add a thin crumb or sauce layer between them
Clean the Cup as You Go
This is one of the most overlooked steps—and one of the most important.
Before adding a new layer:
- Check the glass
- Wipe smudges with a paper towel
- Keep edges crisp
Why it matters:
- Clean sides make layers pop
- Photos look sharper
- Desserts look intentional
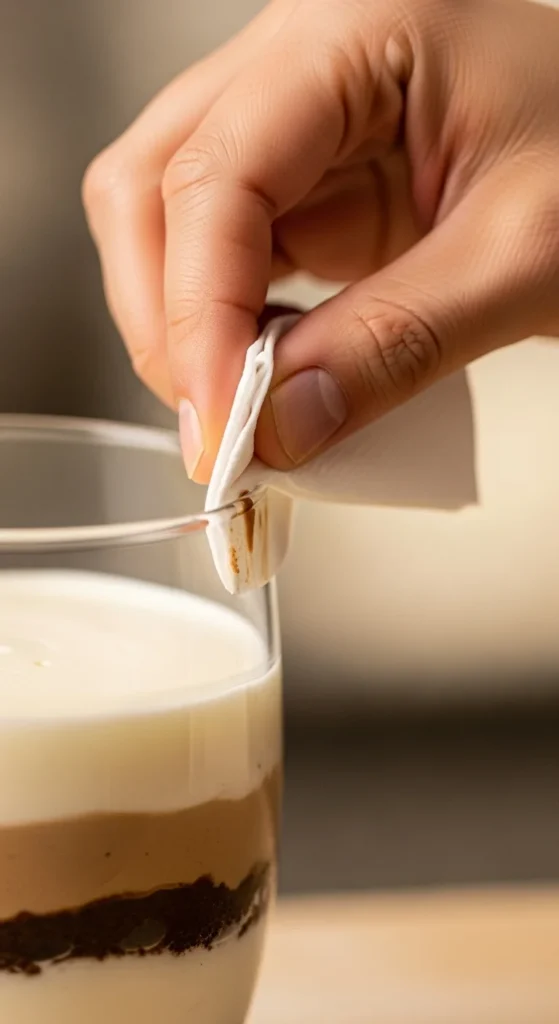
Pinterest-perfect desserts are 50% assembly, 50% cleanup.
Finish With a Simple, Centered Topping
The top layer sets the tone for the whole dessert.
Best finishing ideas:
- Small swirl of cream
- A single berry
- Chocolate shavings
- Crushed cookies
- Light dusting of cocoa
Topping rules:
- Keep it minimal
- Center it
- Match the flavors inside
Overloading the top can ruin an otherwise clean look.
Chill Before Serving (or Shooting Photos)
Chilling helps layers set and sharpens the visual lines.
Chill time:
- At least 30 minutes
- Up to overnight if covered
Benefits:
- Cleaner layers
- Better texture
- Easier transport
If serving at a party, chilled dessert cups hold their shape longer.
Final Takeaway: Pinterest Layers Are About Intention
Layered dessert cups don’t need fancy recipes—they need structure, contrast, and patience.
Remember:
- Use clear cups
- Layer thin and evenly
- Pipe creamy layers
- Keep the glass clean
- Finish simply
Once you master this method, you can turn almost any dessert into a Pinterest-worthy cup.
✨ Save this guide for later and start layering like a pro.


