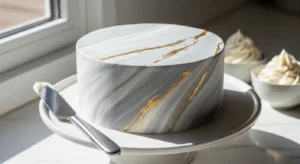
There’s something magical about a cake covered in smooth fondant and topped with tiny handmade flowers, bows, or cute characters. It instantly looks bakery-level — even if you made it at home. The good news? Fondant decorations are much easier than they look. With a few simple tools and a little practice, you can turn any cake into a showstopper.
Whether you’re decorating a birthday cake, wedding cake, or cupcakes, this guide walks you through everything step-by-step.
Let’s get started!
What Is Fondant (and Why It’s So Popular)?
Fondant is a soft, pliable sugar dough used to cover and decorate cakes. Think of it like edible modeling clay.
People love it because:
- It creates a smooth, polished finish
- It’s easy to shape into decorations
- Colors beautifully with gel food coloring
- Holds details better than buttercream
You can buy ready-made fondant or make marshmallow fondant at home. Store-bought is faster and perfect for beginners.
Tools & Ingredients You’ll Need
Before you start shaping anything, gather your basics. Having tools ready makes decorating much easier.
Ingredients
- Fondant (store-bought or homemade)
- Cornstarch or powdered sugar (for dusting)
- Gel food coloring
- Edible glue or water
Tools
- Rolling pin
- Sharp knife or pizza cutter
- Fondant cutters or cookie cutters
- Small paintbrush
- Silicone mat or clean counter
- Toothpicks or modeling tools (optional)

Tip: Keep fondant wrapped when not using it. It dries fast!
Step 1: Prepare and Color Your Fondant
Start by softening the fondant.
How to do it:
- Knead it like dough for 1–2 minutes until smooth and stretchy.
- If sticky, dust lightly with cornstarch.
- If dry, add a tiny bit of shortening or knead longer.
To color:
- Add a small drop of gel color
- Fold and knead until evenly blended
- Repeat for deeper shades
Gel colors work best because liquid coloring makes fondant sticky.
Think ahead about your theme — flowers, animals, or letters — and prepare colors accordingly.
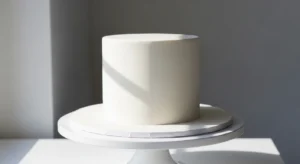
Step 2: Roll Fondant the Right Way
Rolling fondant evenly is key to clean shapes.
- Dust surface lightly
- Roll to about 1/8 inch thickness
- Rotate often to prevent sticking
Too thin = tearing
Too thick = bulky decorations
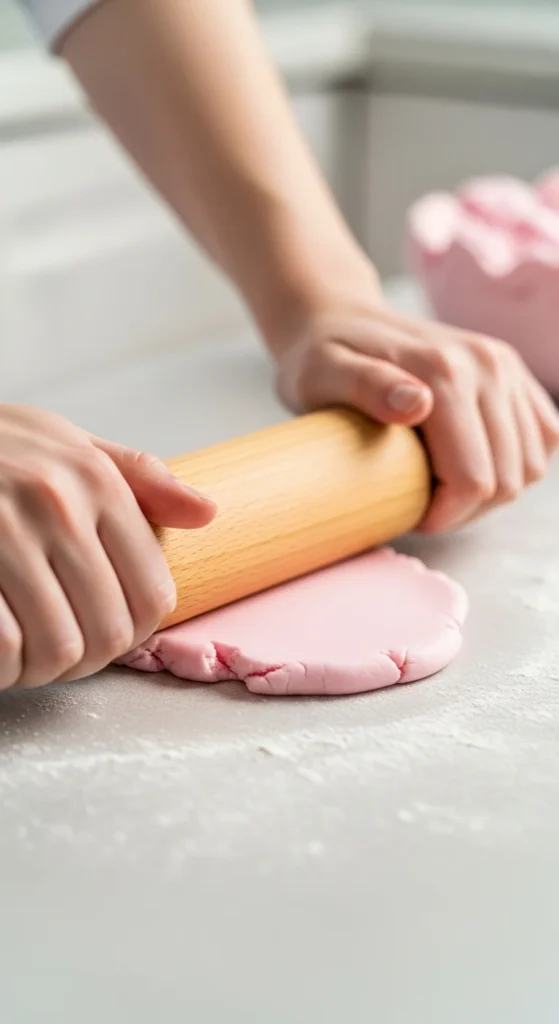
Now you’re ready to cut and shape!
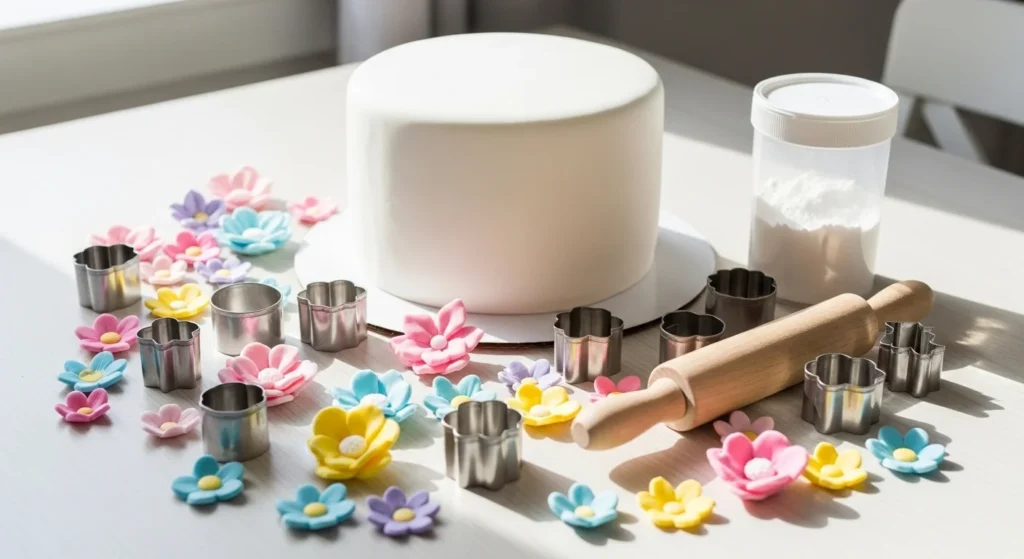
Step 3: Create Easy Fondant Decorations
Here are beginner-friendly decorations that look impressive but are simple to make.
🌸 Fondant Flowers
- Roll fondant thin
- Press flower cutter
- Shape petals gently with fingers
- Let dry on curved foil or spoon for natural shape
🎀 Bows
- Cut strips
- Fold ends inward
- Pinch center
- Attach with edible glue
⭐ Stars & Hearts
Just press cutters and lift — perfect for kids’ cakes.
🎈 Balls & Pearls
Roll small pieces between palms for borders or toppers.
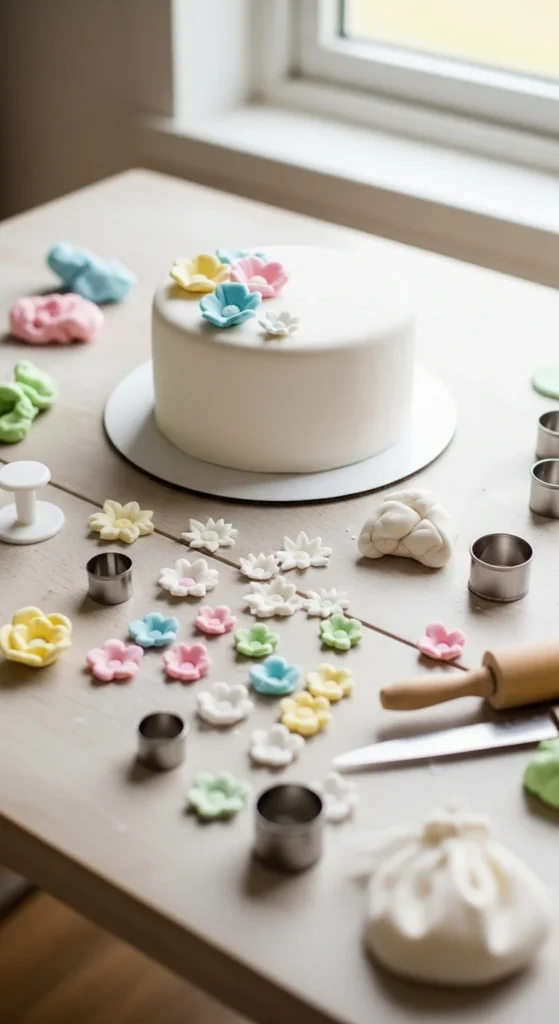
Let decorations air-dry for 30–60 minutes so they firm up before placing on cake.
Step 4: Add Details and Texture
This is where the fun really begins.
Use:
- Toothpicks for lines
- Molds for patterns
- Paintbrush for edible dust or shimmer
- Small cutters to layer shapes
You can:
- Add veins to leaves
- Press lace textures
- Stack flowers
- Paint gold highlights
Small details make a huge difference visually.
Step 5: Attach Decorations to the Cake
Once decorations are slightly firm:
Use:
- Edible glue
- Water (tiny amount)
- Buttercream (acts like glue too)
Gently press onto cake and hold for a few seconds.
For heavier pieces, insert toothpicks or skewers for support.
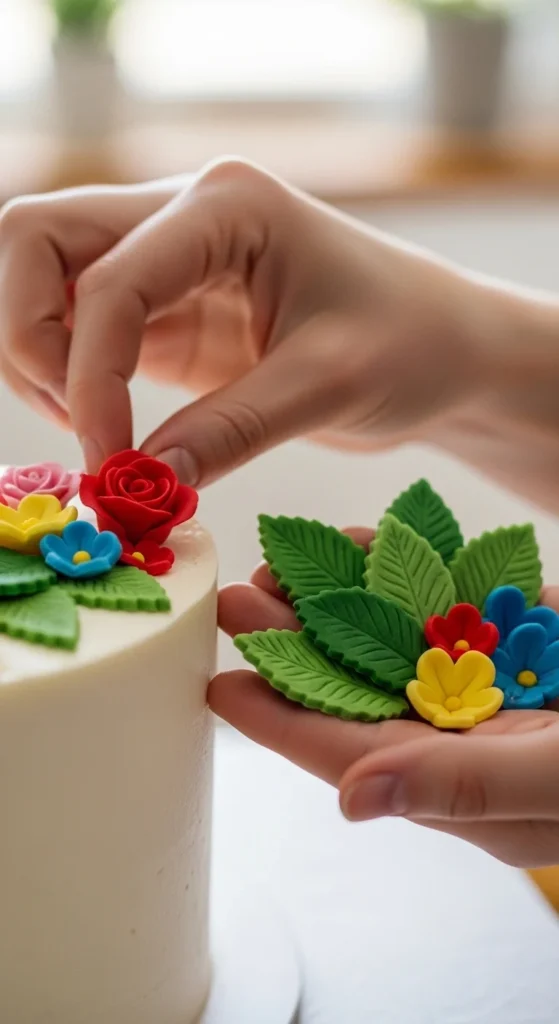
Work slowly and step back often to check placement. Balance is everything.
Helpful Tips for Success
Keep these tricks in mind:
- Cover unused fondant with plastic wrap
- Work in small batches
- Use cornstarch sparingly
- Let shapes dry before moving
- Store finished decorations in airtight container
If something cracks or tears, just knead and try again. Fondant is forgiving.
Fun Decoration Ideas to Try
Need inspiration? Try:
- Baby shower animals
- Wedding roses
- Cartoon faces
- Number toppers
- Polka dot patterns
- Mini bows around tiers
Start simple, then build confidence with layered designs.
Final Thoughts
Making fondant decorations at home is easier than it looks — and surprisingly relaxing too. With a few tools and some practice, you can create cakes that look straight out of a bakery window.
Try one or two shapes first, then experiment with more detailed pieces as you go.
Save this guide for later and have fun decorating your next cake! 🎂