There’s something instantly impressive about a lattice pie crust. The woven strips, the golden shine, the bubbling fruit peeking through — it looks bakery-level, yet it’s completely doable at home.
The secret isn’t complicated. It’s about even strips, strategic folding, and keeping your dough cold so everything holds its shape.
Let’s walk through how to create a beautiful lattice pie crust step by step — no stress, no slipping strips.
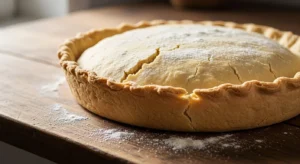
Start With Well-Chilled Dough
Before you even think about weaving, your dough needs to be firm.
Cold dough:
- Cuts cleanly
- Holds strip shape
- Prevents sagging
- Makes weaving easier
After rolling your top crust, place it on a parchment-lined baking sheet and refrigerate for 15–30 minutes before cutting strips.
If your kitchen is warm, chill longer.
Roll and Cut Even Strips
Consistency is what makes a lattice look professional.
Ideal Strip Width:
- ½ inch for delicate weaves
- 1 inch for classic lattice
- Up to 1½ inches for modern bold styles
Use a ruler and pizza cutter or sharp knife for precision.
Most 9-inch pies use about 12 strips total.
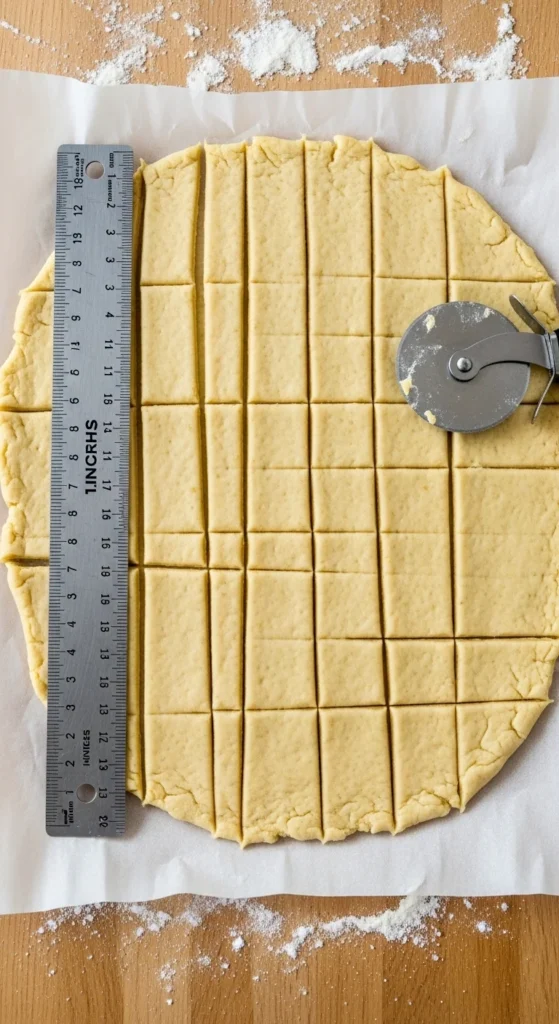
Uniform width = balanced pattern.
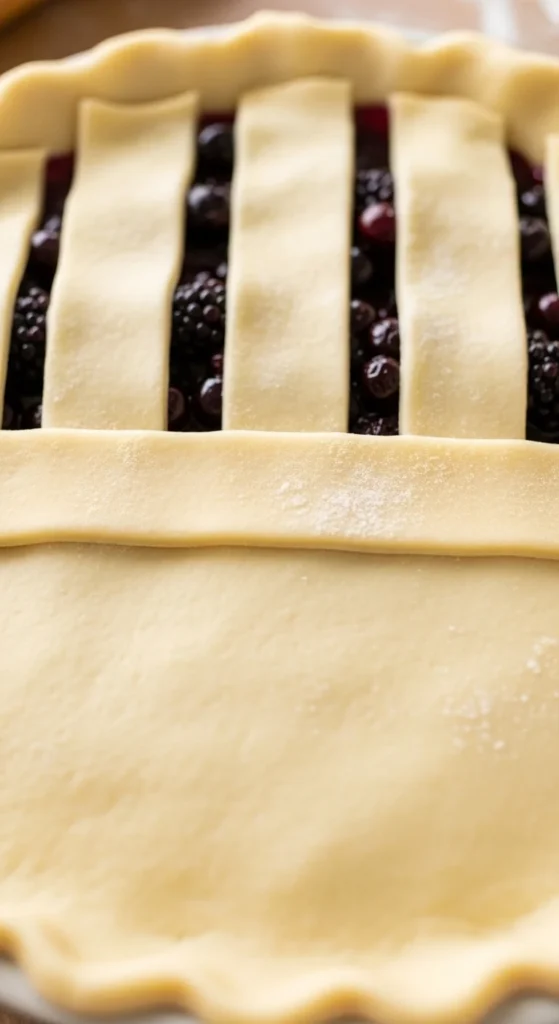
Step 1: Lay the Vertical Base Strips
Place your pie filling in the bottom crust first.
Now begin weaving.
- Lay 5–6 strips vertically across the pie.
- Place the longest strip in the center.
- Slightly shorter strips on either side.
- Shortest near the edges.
Leave equal spacing between strips.
Working center-out keeps everything symmetrical.
Step 2: Fold Every Other Strip Back
Here’s the weaving magic.
Take every other vertical strip and gently fold them halfway back toward the center.
Now place one horizontal strip perpendicular across the unfolded strips.
Then unfold the vertical strips back into place over the horizontal strip.
This creates your first woven layer.
Step 3: Alternate the Fold Pattern
Now fold back the opposite vertical strips — the ones you didn’t move before.
Lay another horizontal strip across.
Unfold again.
Repeat this alternating pattern until the lattice is complete.
Remember:
- Fold every other strip
- Place perpendicular strip
- Unfold
- Alternate
This pattern builds that classic weave design.
Work from the center outward for clean symmetry.
Keep Strips Cold While Working
If strips become soft or sticky:
- Pause
- Refrigerate the pie for 10 minutes
Cold strips maintain straight lines and prevent sagging.
Professional bakers often chill assembled lattice pies for 20–30 minutes before baking to ensure shape retention.
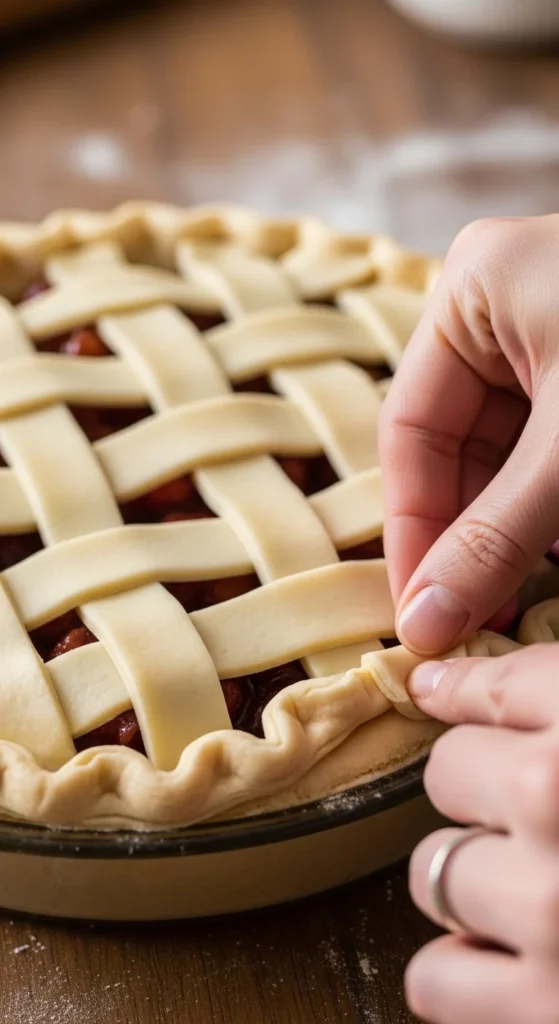
Trim, Fold, and Crimp the Edges
Once weaving is complete:
- Trim strips so about 1–2 inches extend beyond the edge.
- Brush a little water around the rim of the bottom crust.
- Fold the strip ends under the bottom crust edge.
- Press gently to seal.
Now crimp.
You can:
- Flute with your fingers
- Press with a fork for rustic style
- Create decorative rope edges
Crimping secures the weave and prevents filling leaks.
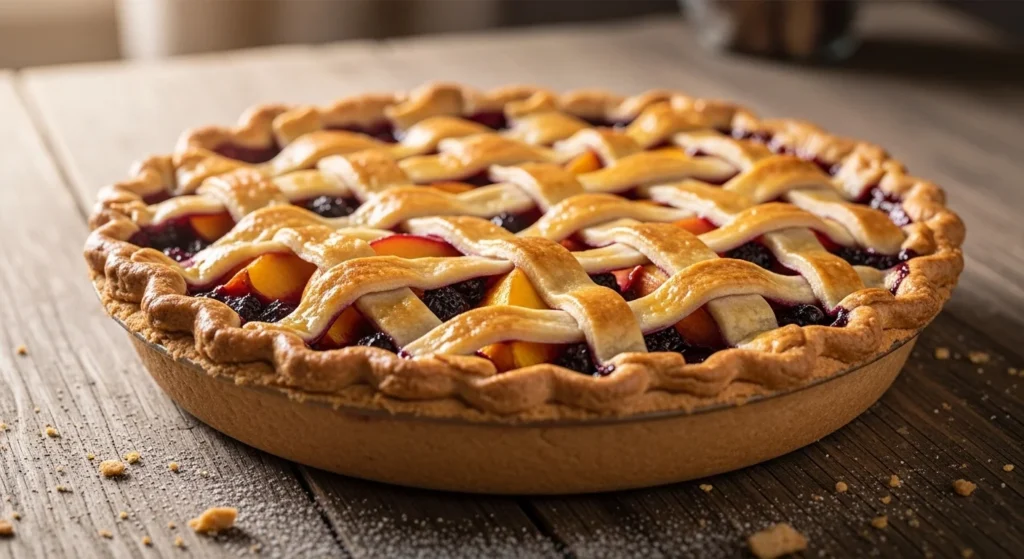
Add Shine and Sparkle
Before baking, brush the entire lattice with egg wash:
- 1 egg yolk
- 1 tablespoon milk or cream
This gives a glossy golden finish.
For extra texture and sparkle:
- Sprinkle coarse sugar over the top
Egg wash + sugar = bakery-style finish.
Bake and Watch for Browning
Lattice pies typically bake:
- 425°F for 15 minutes
- Reduce to 350°F for 40–50 minutes
If edges brown too quickly, use a foil pie shield halfway through.
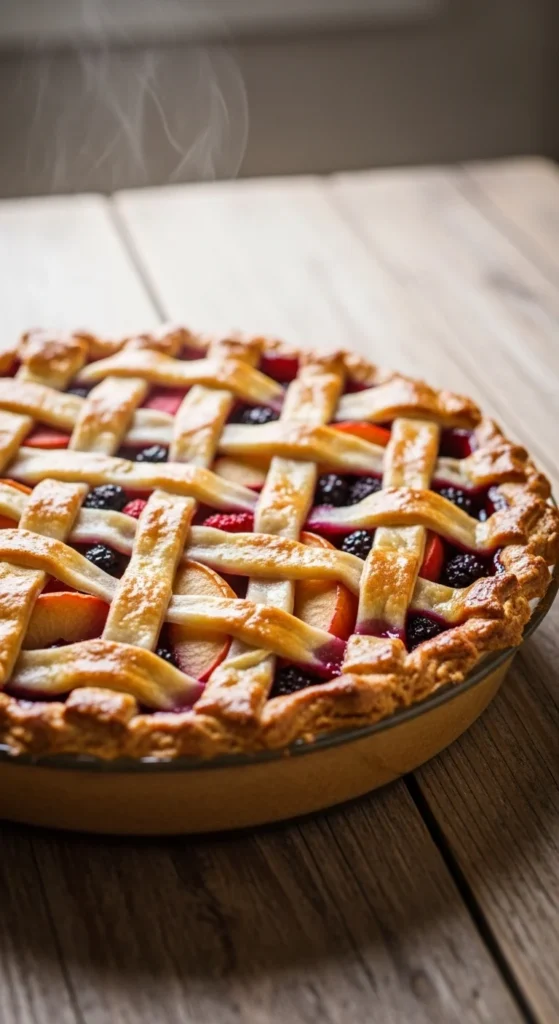
Because lattice tops have gaps, they vent steam naturally — making them ideal for fruit pies like apple, cherry, blueberry, or peach.
The open weave allows juices to bubble without overflowing.
Common Lattice Mistakes (And Fixes)
Strips Sliding
- Chill strips before cutting
- Chill assembled pie before baking
Uneven Gaps
- Measure strips with ruler
- Start from center and space evenly
Lattice Unraveling
- Brush water under edges
- Fold strips under bottom crust
- Crimp tightly
Shrinking During Bake
- Chill assembled lattice 20–30 minutes before baking
Cold dough always behaves better.
Creative Lattice Variations
Once you master the classic weave, try:
- Thick modern strips
- Double-layer lattices
- Braided accents along edges
- Colored dough strips
- Half-lattice designs
- Slab pie rectangle lattices
You can even weave curved strips for a softer, artistic look.
Final Takeaway
Creating a beautiful lattice pie crust isn’t about perfection — it’s about process.
Remember these essentials:
- ✔ Cut uniform ½–1 inch strips
- ✔ Fold every other strip when weaving
- ✔ Work from the center outward
- ✔ Chill before and after assembly
- ✔ Seal and crimp securely
Once you try it, you’ll realize the weave is easier than it looks — and the results are always stunning.
Save this guide for later, and the next time you bake a fruit pie, top it with a golden lattice that turns heads before the first slice. 🥧✨