
If there’s one sauce that can instantly make breakfast feel fancy, it’s Hollandaise. Silky, buttery, and just tangy enough — it’s the golden ribbon that ties together brunch classics like Eggs Benedict and steamed asparagus. The best part? You don’t need to be a French chef to pull it off. With the right technique and a little patience, you can whip up this restaurant-worthy sauce right in your kitchen.
Why Hollandaise Sauce Scares People — and Why It Shouldn’t
Hollandaise has a reputation for being fussy — and yes, it can break if you rush it. But the truth is, it’s all about temperature control and steady whisking. Once you understand how it works, it becomes second nature.
Think of Hollandaise as a simple emulsion — a marriage between egg yolks, melted butter, and a touch of acid (like lemon juice). When whisked gently over low heat, the yolks thicken and blend beautifully with butter, creating that smooth, glossy texture we all love.
So, let’s make it foolproof.
Step 1: Gather Your Ingredients
The magic of Hollandaise comes from just a few simple things you probably already have.
You’ll Need:
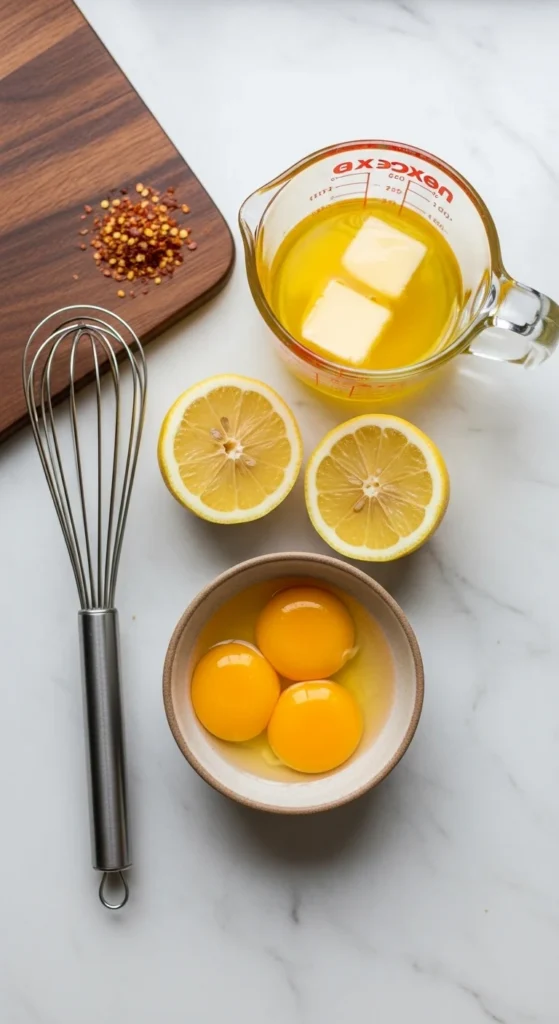
- 3 large egg yolks
- 1 tablespoon lemon juice (freshly squeezed)
- ½ cup (1 stick) unsalted butter, melted and warm
- A pinch of salt
- A dash of cayenne pepper (optional, for a little kick)
Tip:
Use high-quality butter and fresh eggs — the better the ingredients, the richer your sauce will taste.
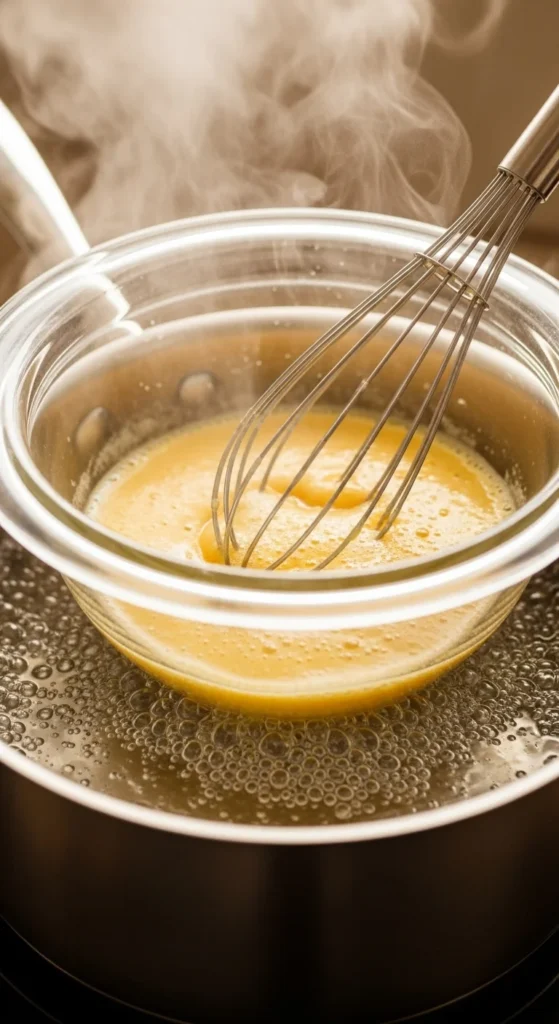
Step 2: Set Up a Gentle Double Boiler
Hollandaise loves gentle heat — too much, and your yolks scramble; too little, and it won’t thicken.
How to Do It Right:
- Fill a small saucepan with about an inch of water and bring it to a simmer.
- Place a heatproof bowl (metal or glass) on top — it should sit snugly without touching the water.
- Reduce the heat to low.
This setup lets you whisk your sauce over soft, indirect heat, keeping the yolks smooth and silky.
Step 3: Whisk the Yolks and Lemon Juice
Now, the real action begins.
- Add egg yolks and lemon juice to your bowl.
- Whisk constantly until the mixture becomes pale and slightly thick — about 2–3 minutes.
- You’ll know it’s ready when it leaves ribbons on itself as you lift the whisk.
This step helps incorporate air, which gives your sauce that light, fluffy feel.
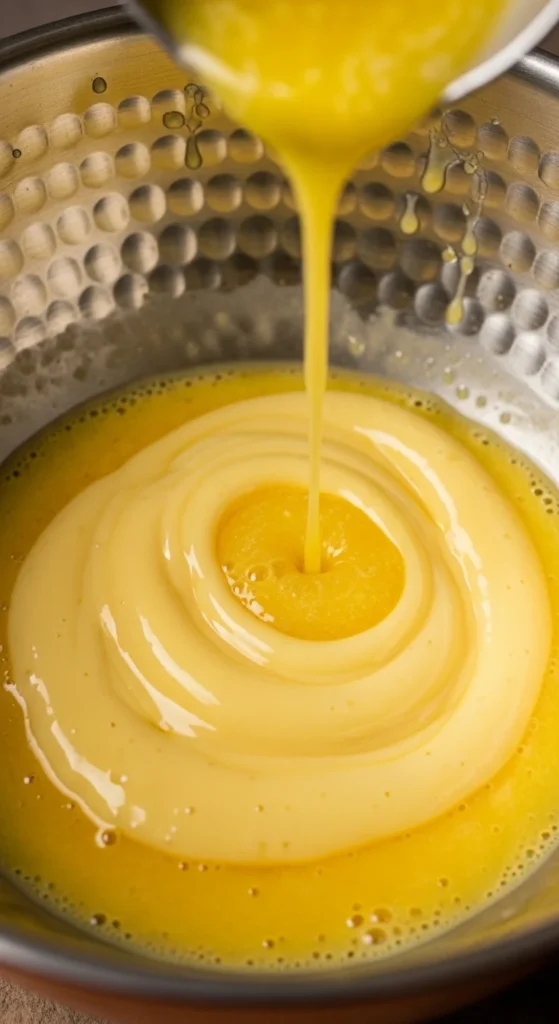
Step 4: Slowly Add the Butter
This is the “don’t rush it” moment.
While whisking constantly, drizzle in the melted butter very slowly — just a few drops at first. Once the mixture starts to thicken and emulsify, you can pour it a little faster.
The Key:
If you add the butter too quickly, the sauce can break (meaning the fat separates). But if you go slow and steady, it’ll come together like magic.
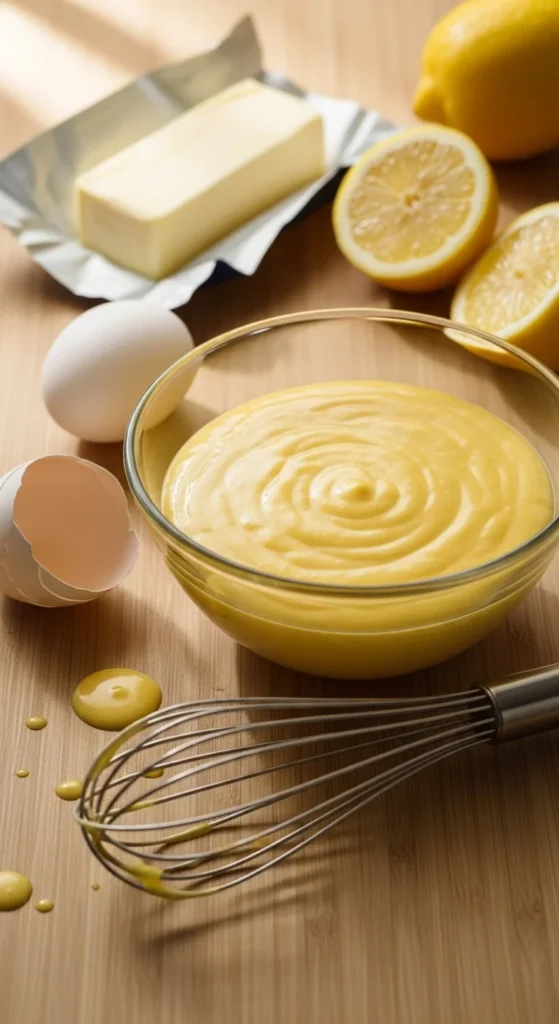
Once all the butter is in, whisk in a pinch of salt and cayenne pepper if you like. The sauce should be smooth, creamy, and thick enough to coat the back of a spoon.
Step 5: Taste and Adjust
Give your Hollandaise a quick taste. Too tangy? Add a bit more butter. Too rich? A few extra drops of lemon juice will brighten it up.
You can also add a dash of hot sauce for more flavor depth — some chefs swear by it!
If your sauce seems too thick, whisk in a teaspoon of warm water at a time until it loosens up to your liking.
Step 6: Serve It Warm and Fresh
Hollandaise is best enjoyed immediately after making it. It doesn’t hold up well to reheating — the delicate emulsion can separate.
Perfect Pairings:
- Drizzled over poached eggs for classic Eggs Benedict
- Served with steamed asparagus or broccoli
- Poured over grilled salmon or roasted potatoes

Troubleshooting: If It Breaks, Don’t Panic
Even pros have broken a Hollandaise or two — but it’s easy to fix.
Quick Fix:
If your sauce separates or looks curdled:
- Whisk 1 tablespoon of warm water or a fresh egg yolk in a clean bowl.
- Slowly whisk in the broken sauce a little at a time.
- It’ll come back together beautifully.
Final Thoughts
Hollandaise might look intimidating, but once you try it, you’ll realize it’s simpler than it seems — it just asks for a little attention and patience. The reward? A rich, buttery sauce that transforms any breakfast or dinner into something special.


