There’s something irresistible about a pie with a crust that adds crunch and a nutty depth to every bite. A nut pie crust elevates any filling—from creamy chocolate to tart fruit—giving your pie a texture and flavor boost that a plain crust can’t match. Best of all, making it at home is easier than you think, and the results are bakery-worthy.
Ingredients You’ll Need
For a nutty, flavorful crust, quality ingredients are key. Here’s what you need:
- 1 ½ cups all-purpose flour
- 1 cup finely chopped nuts (pecans, walnuts, or almonds work best)
- ½ tsp salt
- ½ cup unsalted butter, cold and cubed
- ¼ cup sugar (optional, for a slightly sweet crust)
- 3–4 tbsp ice water
Tip: Toasting the nuts lightly before chopping enhances their flavor and adds a warm, roasted note to your crust.

Step 1: Combine Dry Ingredients
In a large mixing bowl, whisk together the flour, sugar (if using), salt, and chopped nuts. Mixing the nuts with the dry ingredients ensures an even distribution of crunch throughout your crust.
Pro Tip: Make sure the nuts are roughly the same size so that every bite has a consistent texture.
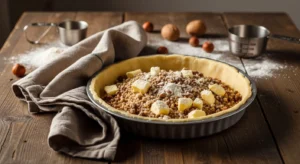
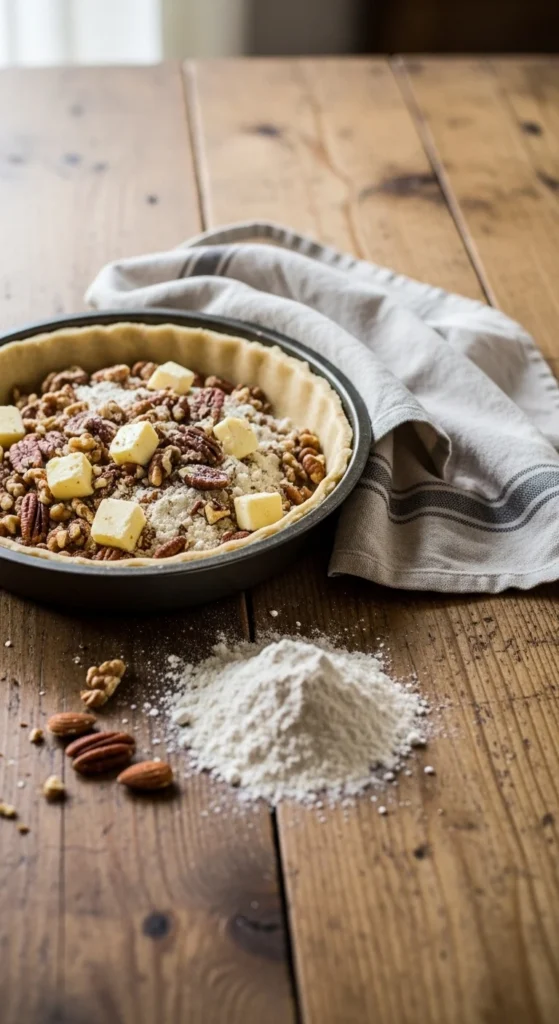
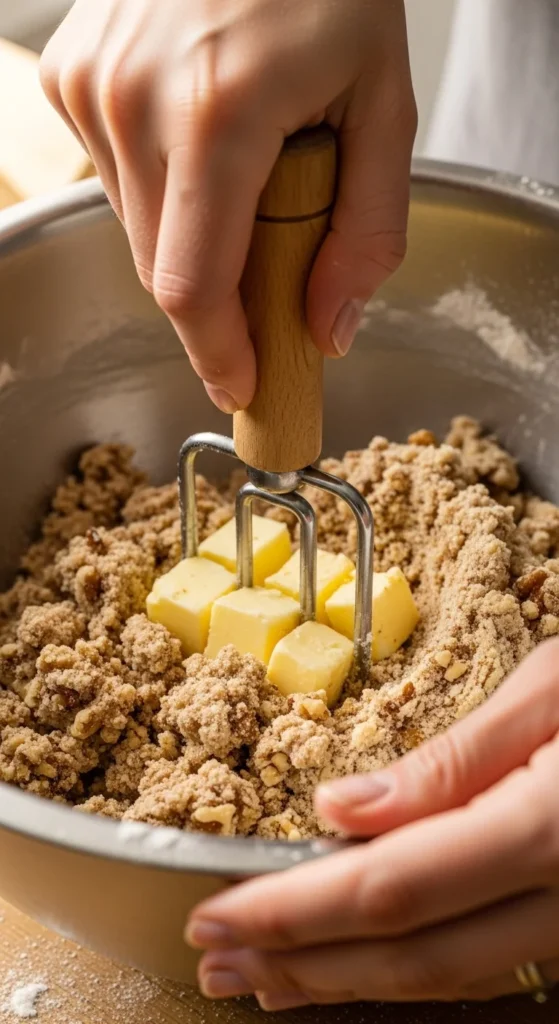
Step 2: Cut in the Butter
Add the cold, cubed butter to the flour and nut mixture. Use a pastry cutter, two forks, or your fingertips to work the butter into the mixture until it resembles coarse crumbs. Tiny bits of butter should still be visible—they’re what create the flaky texture after baking.
Step 3: Add Ice Water
Drizzle in ice water, one tablespoon at a time, stirring gently until the dough begins to hold together. Stop adding water as soon as the dough clumps—it should be moist but not sticky.
Tip: Chilling the dough for 15–20 minutes before pressing into the pie pan helps prevent shrinking during baking.
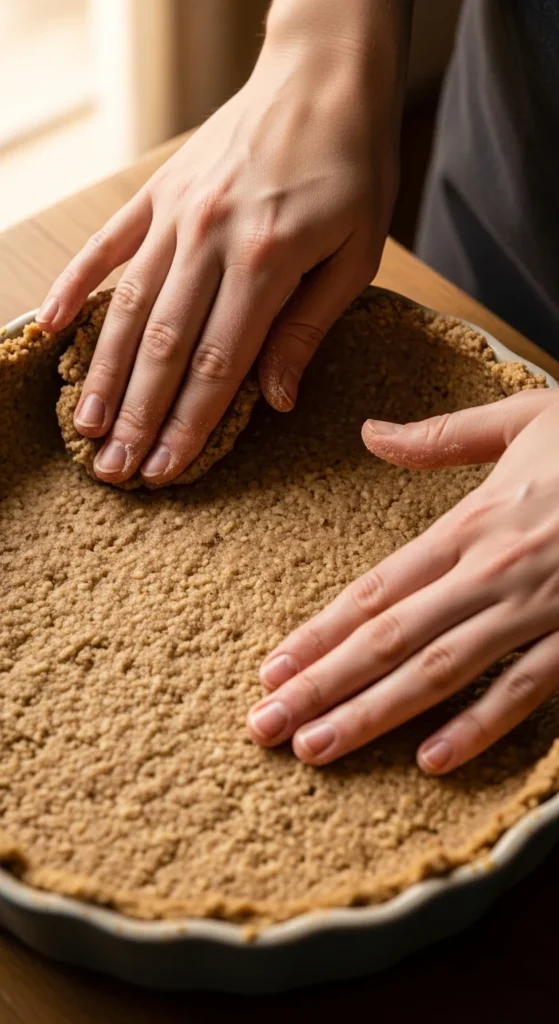
Step 4: Press into the Pie Pan
Transfer the dough to a greased or parchment-lined pie pan. Use your fingers to press it evenly across the bottom and up the sides. Patch any cracks gently with leftover dough.
Optional: For a decorative touch, crimp the edges with your fingers or a fork.
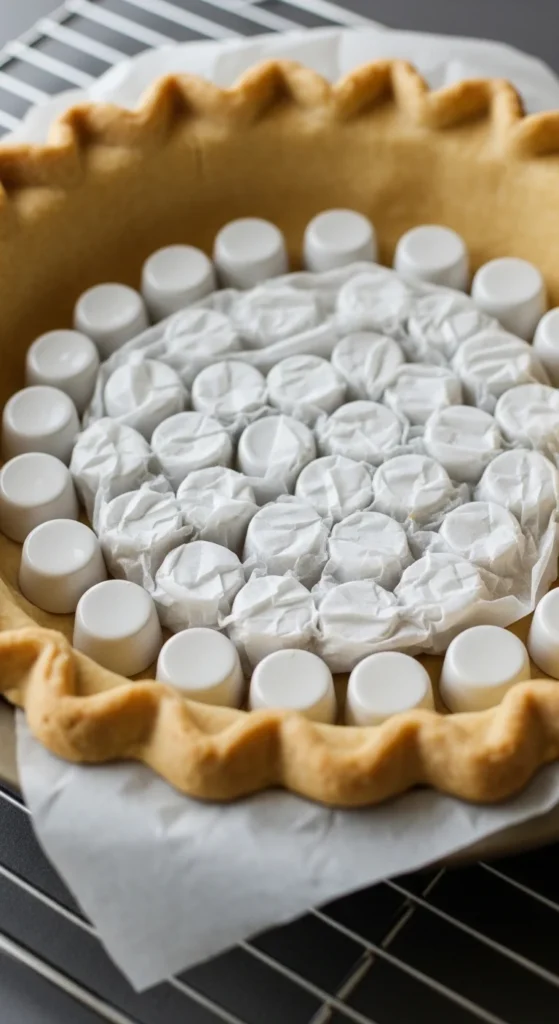
Step 5: Blind Bake (If Needed)
For pies with custard or no-bake fillings, pre-bake the crust to ensure it stays crisp.
- Preheat oven to 350°F (175°C)
- Line the crust with parchment paper and fill with pie weights or dried beans
- Bake for 15 minutes, remove weights, and bake an additional 5–7 minutes until lightly golden
Pro Tip: This step locks in the crunch and prevents soggy bottoms, especially with juicy fillings.
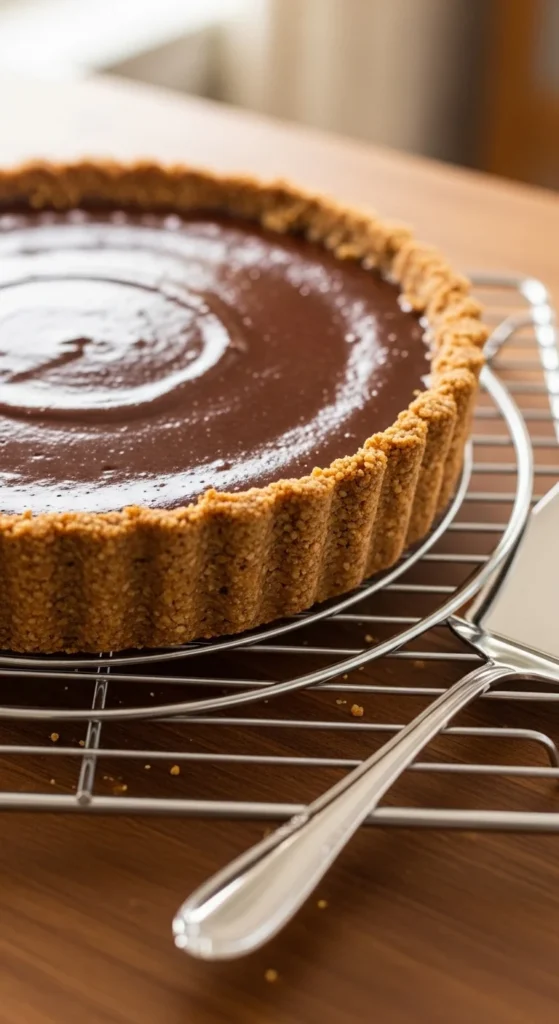
Step 6: Fill and Bake
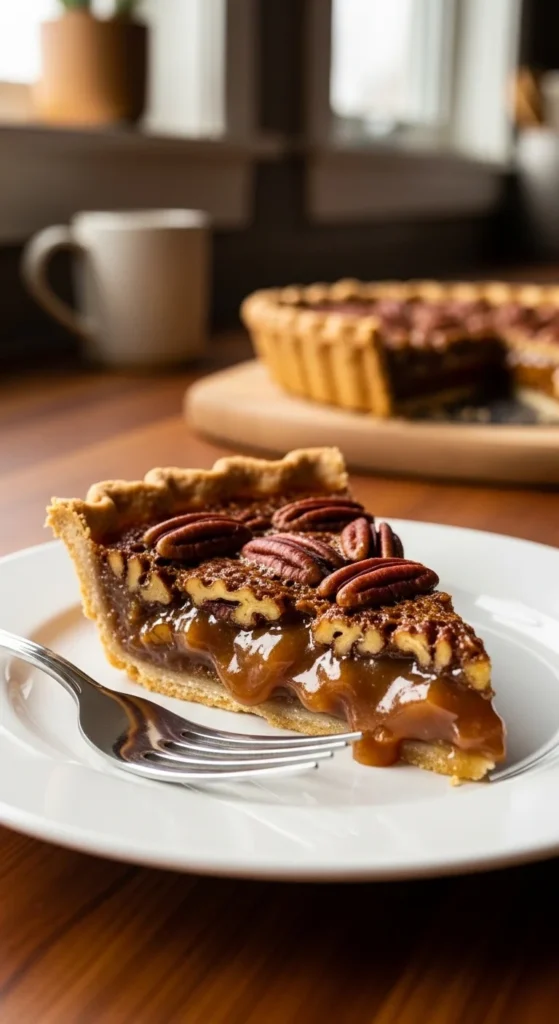
Once blind-baked (or if using a fully baked filling), pour in your favorite pie filling. Nut crust pairs beautifully with:
- Chocolate cream pies
- Pumpkin pies
- Caramel or butterscotch pies
- Fruit pies like apple or cherry
Bake according to your filling recipe, keeping an eye on the edges. Cover with foil if they brown too quickly.
Tips for the Perfect Nut Pie Crust
- Chop nuts finely but not too finely: Small chunks give texture; powdery nuts can make the crust crumbly.
- Toast for extra flavor: A quick 5-minute toast on the stove or in the oven adds warmth and aroma.
- Cold butter is key: Keeps the crust flaky and tender.
- Storage: Unbaked dough can be refrigerated for up to 3 days or frozen for up to a month.
Final Thoughts
A nut pie crust isn’t just a base—it’s a flavor upgrade that adds crunch, richness, and depth to any pie. From chocolate to fruit fillings, this crust transforms your dessert from ordinary to extraordinary.
Save this recipe for later and impress your friends and family with pies that are as beautiful as they are delicious!